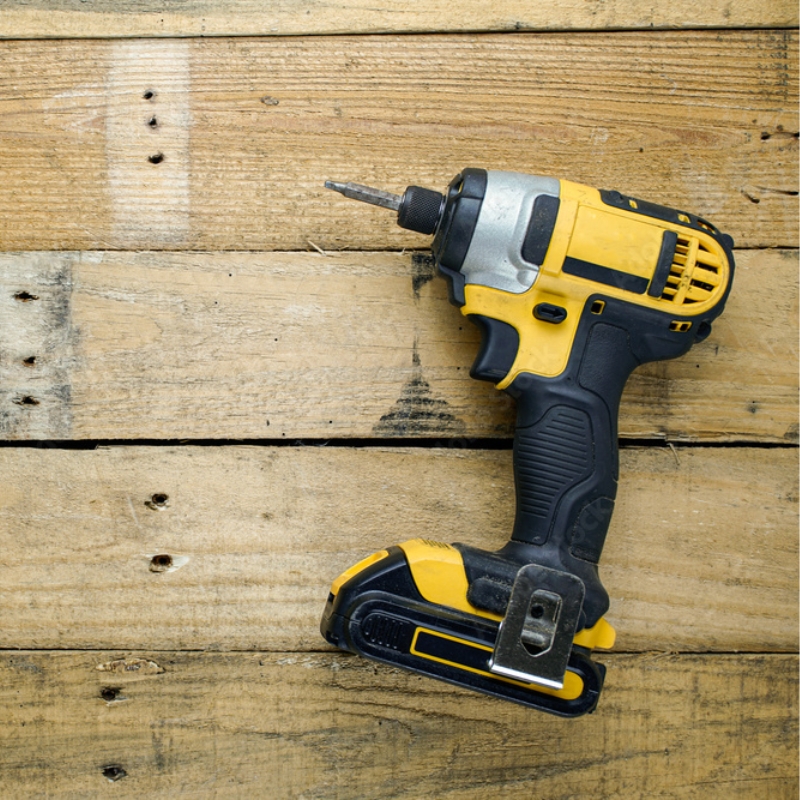
A driver drill is a power tool that drills holes and drives screws using a rotating motor, adjustable clutch, and variable-speed trigger.
If you are hanging shelves in your American home, building a backyard deck, or fixing a loose cabinet door, a driver drill can handle many common jobs. It combines two useful tasks in one tool. You can drill holes in wood, metal, and other suitable materials, then switch to a driver bit to fasten screws.
A driver drill is often called a drill driver or simply a cordless drill. Most models have a chuck that grips round or hexagonal bits, a clutch that helps control screw torque, and a trigger that lets you adjust speed. Many cordless versions use rechargeable batteries, making them handy for work around a house, garage, workshop, or construction site.
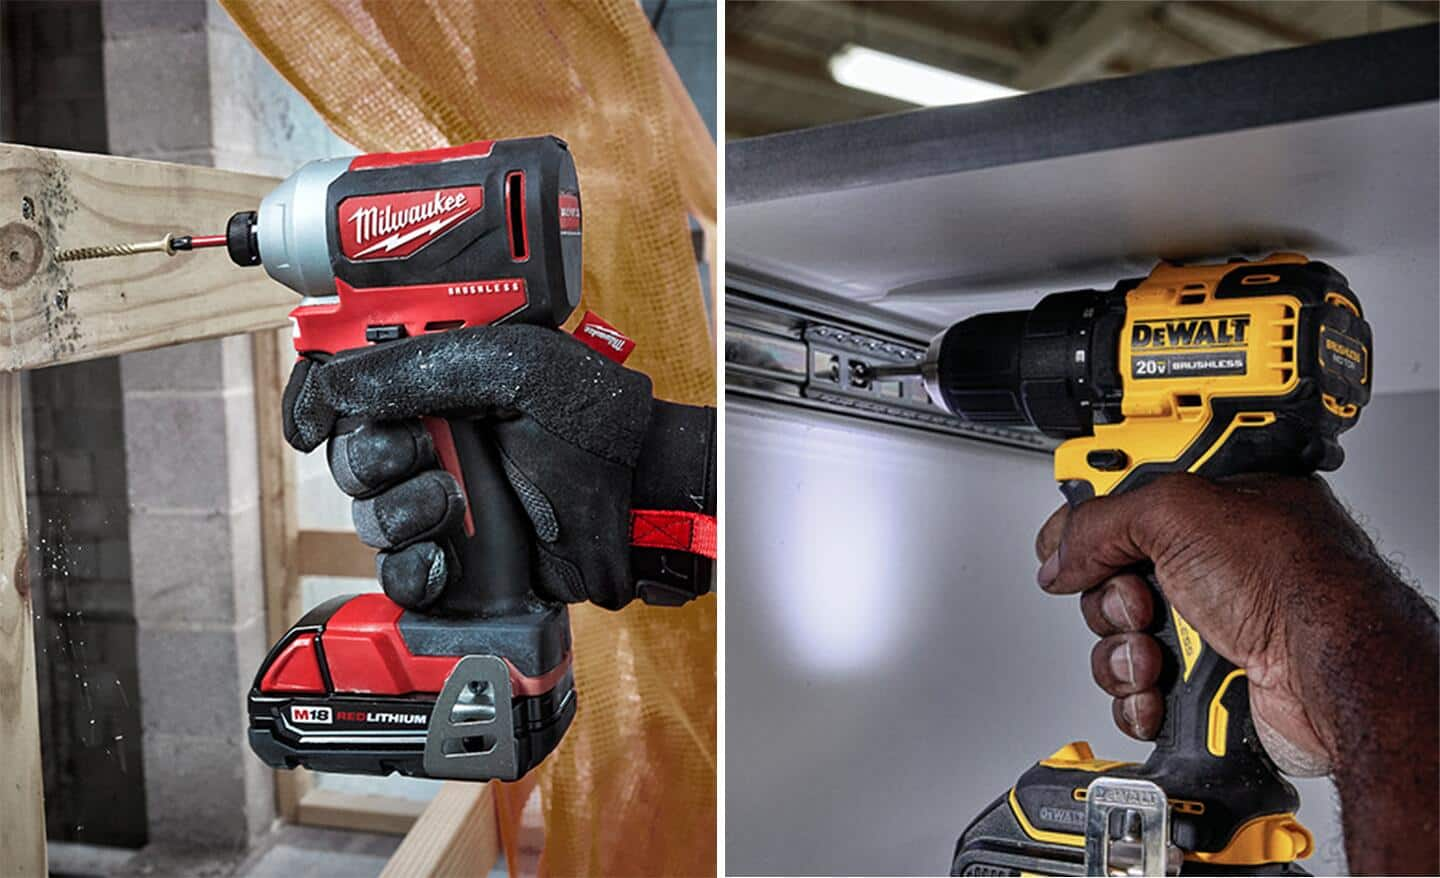
The main point is simple: a driver drill is a versatile tool for controlled drilling and fastening. It is not the same as an impact driver, which uses repeated rotational impacts to deliver extra turning force, or a hammer drill, which adds a forward hammering action for masonry. Knowing these differences helps you choose the right tool and avoid damaging your work.
Source: Bing
What Is a Driver Drill?
A driver drill is a handheld power tool built to turn accessories at different speeds and levels of torque. It performs two main jobs: drilling holes and driving fasteners such as screws. Most modern models are cordless, although corded drills and drill drivers are also available.
The term driver drill usually refers to a drill driver without a dedicated hammering function. Some manufacturers use slightly different names, so check the tool’s listed features rather than relying on the label alone. A standard drill driver generally has a three-jaw chuck, a forward and reverse switch, a speed selector, and an adjustable clutch.
For a typical homeowner, this tool can handle tasks such as assembling furniture, mounting curtain rods, installing cabinet hardware, and making pilot holes before inserting screws. It is useful because one tool can perform several jobs by changing the accessory and adjusting the settings.
A driver drill does not automatically make every task easy. Thick steel, large hole saws, long structural screws, and concrete can demand different tools, accessories, or operating methods. Material, bit size, tool power, and the manufacturer’s instructions all affect what the drill can do.
Source: Bing
Drilling
The motor rotates a drill bit to create a hole in a material that the bit and tool are designed to handle.
Driving
The motor turns a driver bit to install or remove compatible screws and other fasteners.
Torque control
The adjustable clutch helps limit turning force during many fastening tasks, reducing the chance of stripping a screw or damaging a workpiece.
Is a Driver Drill the Same as a Drill Driver?
In most tool catalogs and everyday conversations, driver drill and drill driver describe the same general type of tool. Both names usually refer to a drill with a chuck that can hold drilling accessories and driver bits. The exact wording can vary by brand.
A drill driver should not be confused with an impact driver. An impact driver typically has a quick-release hex collet and uses repeated rotational impacts to help turn fasteners. A standard driver drill relies on steady motor rotation and usually offers a clutch for more controlled fastening.
Check the specifications
Look for a keyless chuck, clutch settings, speed ranges, and any hammer mode before buying a tool described as a driver drill.
How Does a Driver Drill Work?
A driver drill converts electrical power into rotary motion. In a cordless model, a rechargeable battery supplies power to an electric motor. The motor and gearbox turn the chuck, which holds the selected bit. A corded model draws power from an electrical outlet instead.
When you squeeze the trigger, the motor begins to turn. Pressing the trigger farther usually increases speed, although the available speed range also depends on the selected gearbox setting and the drill’s design. This variable control helps you start a hole slowly and increase speed as the bit cuts.
When drilling, the bit removes material as it rotates. When driving a screw, the driver bit transfers turning force to the screw head. The clutch can disengage the drive when resistance reaches a selected level, depending on the model. This helps prevent excessive force from damaging the fastener or material.
A two-speed gearbox often gives the tool a low-speed, higher-torque range and a high-speed range suited to many smaller drilling tasks. These are general design principles rather than universal speed or torque values. Always check the manual for the limits and recommended settings of your particular model.
Source: Bing
Motor
Provides the turning power needed to rotate the bit or fastener.
Gearbox
Offers different speed and torque ranges for tasks that require more control or faster rotation.
Chuck
Clamps onto a compatible accessory so the motor can rotate it.
Clutch
Helps limit applied torque during many fastening jobs.
Trigger and direction switch
Control the rotation speed and select forward or reverse operation.
What Does Torque Mean on a Driver Drill?
Torque is the turning force that helps a drill rotate a bit or drive a screw. More torque can help with demanding work, but using the highest available force is not always best. Small screws, soft wood, plastic, and delicate fittings can be damaged by excessive torque.
For screw driving, begin with a low clutch setting and test it on scrap material when possible. Increase the setting only if the screw stops before reaching the desired depth. For drilling, many drill drivers have a separate drill setting that bypasses the ordinary screw-clutch limits. Follow the tool’s manual when selecting that mode.
Practical rule
Use controlled force for small fasteners and increase torque only when the material and fastener require it.
What Is a Driver Drill Used For?
A driver drill is useful for a wide range of home improvement, repair, furniture assembly, and workshop tasks. Its main advantage is flexibility. You can change the bit to suit the material or fastener without needing a separate tool for every basic job.
For many homeowners in the United States, a driver drill is a practical starting point for a home tool kit. It can help with routine repairs in a kitchen, bedroom, garage, shed, or workshop. It is also useful for light construction and some professional work when the drill’s capacity matches the task.
The tool is not limited to wood. With the correct bit and suitable settings, many driver drills can drill into certain metals and plastics. Some can also handle light masonry drilling with a suitable masonry bit, but a hammer drill is generally more suitable for repeated work in brick, concrete, or block.
Source: Bing
Furniture assembly
Drive screws into compatible furniture parts and drill pilot holes where the instructions call for them.
Home repairs
Install cabinet pulls, repair loose hardware, and fasten suitable brackets or fittings.
Shelves and storage
Drill holes for appropriate anchors and fasteners after checking the wall material and locating hidden utilities.
Woodworking
Make pilot holes, drill clearance holes, and install screws in boards, plywood, and other suitable wood products.
Metalworking
Drill selected metals using a compatible metal-cutting bit, proper workpiece support, and suitable speed.
Maintenance
Remove compatible screws, replace hardware, and carry out other repair jobs that require controlled rotation.
Using a Driver Drill for Wood
Wood is one of the most common materials for a driver drill. You can use it to make pilot holes, drill holes for suitable hardware, and drive wood screws. The correct bit depends on whether you need a small pilot hole, a larger opening, or a clean hole for a fitting.
Pilot holes are particularly helpful near the ends of boards and when using larger screws. A pilot hole can reduce splitting and make a screw easier to drive. Choose the hole size according to the screw and wood, because an oversized pilot hole may weaken the screw’s grip.
Support the workpiece
Clamp loose boards to a stable surface and keep the bit clear of the bench or anything beneath the material.
Using a Driver Drill for Metal
A driver drill can make holes in many types of thin or moderate metal when paired with an appropriate metal drill bit. High-speed steel bits are common for general metal drilling, while other bit materials or coatings may be suited to specific metals and working conditions.
Metal drilling often benefits from a slower speed than small-hole drilling in wood. Secure the metal so it cannot spin or shift, use suitable eye protection, and follow the bit manufacturer’s guidance on cutting fluid where applicable. Do not hold small metal pieces in your hand while drilling.
Avoid overheating
Use an appropriate speed and feed pressure. Stop if the bit overheats, loses its cutting edge, or begins to bind.
Can a Driver Drill Drill Into Concrete?
A standard driver drill is generally not the first choice for drilling into concrete. Some models can make limited holes in softer masonry with a suitable masonry bit, but the lack of a hammering mechanism can make concrete drilling slow and demanding.
For regular holes in concrete, brick, or block, choose a hammer drill with a compatible masonry bit. For heavy-duty concrete drilling, a rotary hammer may be more suitable. Before drilling into a wall, identify the wall material and check for electrical wires, plumbing, and other hidden services.
Choose the right tool
Do not force a standard drill through hard masonry if the bit is not cutting effectively or the tool is overheating.
Driver Drill vs. Impact Driver vs. Hammer Drill
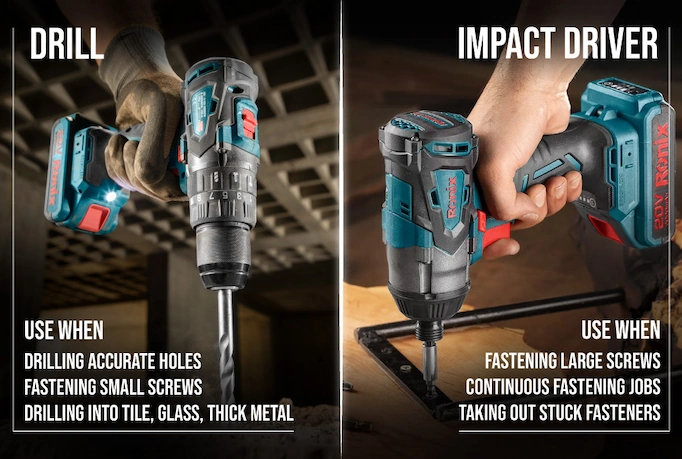
A driver drill, impact driver, and hammer drill may look similar, but they use different mechanisms. The right choice depends on whether you need controlled drilling, high-force fastening, or help breaking into masonry.
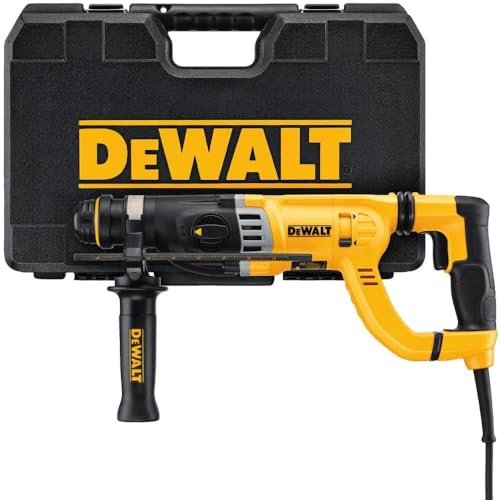
A driver drill provides steady rotary motion and usually has a clutch. An impact driver adds rotational impacts to help turn stubborn or long fasteners. A hammer drill adds rapid forward impacts along the bit’s axis while it rotates, helping a masonry bit break material as it cuts.
Some combination tools offer more than one mode. A hammer drill driver, for example, may provide ordinary drilling, screw driving, and hammer drilling. Check the manufacturer’s specifications because the available modes and performance differ between models.
Source: Bing
Driver drill
Best suited to general drilling, furniture assembly, pilot holes, and controlled screw driving.
Impact driver
Often useful for driving many long screws and other demanding fasteners, especially in construction and decking.
Hammer drill
Designed to help drill into masonry using rotation combined with forward hammering action.
Rotary hammer
A heavier-duty option for many concrete drilling tasks, particularly when the job requires more substantial hammering action.
Which Tool Should a Beginner Buy First?
For general household repairs, a standard driver drill is often the most versatile first purchase. It can drill holes, drive screws, and handle many small projects with one tool. Its clutch and chuck also make it suitable for a wide range of ordinary accessories.
If you regularly build decks, install long structural screws, or drive many large fasteners, an impact driver may be a useful addition. If your projects involve regular concrete or brick drilling, consider a hammer drill or a suitable rotary hammer instead.
You do not need every type of drill at once. Choose based on the materials you work with, the fasteners you use, and how often you perform each task. A correctly matched tool and accessory can be more useful than a more powerful tool that does not suit the job.
For mixed household jobs
Start with a driver drill that has a chuck, adjustable clutch, and variable-speed trigger.
For repeated heavy fastening
Consider an impact driver with compatible impact-rated bits.
For masonry
Choose a hammer drill or rotary hammer appropriate for the material and hole size.
Can You Use an Impact Driver as a Drill?
An impact driver can drill some holes if you use a compatible accessory. However, most impact drivers use a short hex collet rather than the adjustable three-jaw chuck found on a typical driver drill. The accessory must fit the collet and be rated for the tool’s intended use.
A driver drill is generally easier to control for ordinary drilling, especially when you need a specific hole size, careful starting, or a smooth finish. An impact driver’s repeated impacts can also be unsuitable for some delicate materials and small fasteners.
Use compatible accessories
Check the accessory’s rating and the tool manufacturer’s instructions instead of assuming every drill bit will fit an impact driver.
Understanding Driver Drill Parts and Controls
Learning the main controls makes a driver drill easier to use and helps prevent common mistakes. Most models share the same basic parts, although their placement and design can vary. Read the manual before using an unfamiliar drill, especially if it has electronic modes or advanced clutch settings.
Source: Bing
Chuck
The front section that grips the bit. Many modern drills use a keyless chuck that you tighten by hand.
Clutch ring
The numbered ring near the chuck that adjusts the clutch for screw driving on models with this feature.
Speed selector
A switch that selects a gearbox range on many two-speed drills.
Trigger
A variable-speed control that responds to how far you press it.
Forward and reverse switch
Changes the direction of rotation for driving or removing screws.
Battery or power cord
Supplies electrical power to the motor.
Handle and grip
Help you hold and control the tool. Some larger models also have an auxiliary handle.
What Do the Numbers on a Drill Mean?
The numbers around a drill’s clutch ring usually represent selectable torque limits for screw driving. On many models, a higher number allows more turning force before the clutch slips. The exact behavior and range depend on the drill’s design.
These numbers are not universal torque measurements. A setting of 10 on one drill does not necessarily match a setting of 10 on another. Start low, test on scrap material, and raise the setting until the screw reaches the intended depth without damaging the material.
Many drill drivers also have a drill symbol. This mode is generally intended for drilling and may bypass the ordinary adjustable clutch. Some models have a separate hammer symbol for masonry drilling. Use the icons and mode instructions supplied with your tool.
Small screws
Begin with a low clutch setting to reduce the chance of stripping the screw head or damaging the workpiece.
Large screws
Increase the setting gradually if needed, while maintaining control of the tool and fastener.
Drilling holes
Select the drill mode when the manual directs you to use it for drilling.
What Do the Speed Settings Mean?
A two-speed drill usually offers a lower-speed range and a higher-speed range. The lower range is commonly used for controlled screw driving and tasks that need more torque. The higher range is often used for smaller drill bits and jobs that benefit from faster rotation.
The trigger controls speed within the selected range on most variable-speed models. Start slowly when making a hole or engaging a screw, then increase speed as appropriate. Never shift a mechanical gearbox while the motor is running unless the manual specifically permits it.
Low gear
Useful for controlled fastening and many demanding drilling tasks that call for lower speed.
High gear
Useful for many smaller holes and tasks that benefit from higher rotation speed.
How to Use a Driver Drill Step by Step
Using a driver drill safely starts with selecting the right bit and securing the material. Before you begin, check the tool, battery, chuck, accessory, and work area. Wear appropriate eye protection and any additional protective equipment required by the material or task.
Source: Bing
Step 1: Inspect the tool
Check for a damaged housing, loose parts, a cracked battery, a worn cord on corded models, or a bit that is bent or damaged. Do not use defective equipment.
Step 2: Choose the right accessory
Use a drill bit designed for the material when drilling and a driver bit that matches the screw head when fastening.
Step 3: Secure the workpiece
Use clamps or a vise when appropriate. Keep the material stable and make sure the bit will not hit the bench or another object behind it.
Step 4: Insert and tighten the bit
Disconnect the battery or power source when changing accessories if required by the manual. Center the bit in the chuck and tighten it securely.
Step 5: Set the controls
Choose the correct gear, clutch setting, and rotation direction. Use the drill mode for drilling when instructed.
Step 6: Position the drill
Hold the grip firmly, align the bit with the intended point, and keep the tool as straight as the task allows.
Step 7: Start slowly
Press the trigger gently to establish control. Increase speed gradually if the bit is cutting properly and the material permits it.
Step 8: Stop and inspect
Release the trigger before removing the tool. Wait for the bit to stop, then inspect the hole or fastener and adjust your approach if needed.
How to Drill a Clean Hole
Mark the drilling point and choose a bit suited to the material and hole diameter. For many holes in wood or metal, a small pilot hole can help guide a larger bit. Pilot holes are not necessary for every job, so follow the bit and fastener guidance for your application.
Hold the drill in line with the hole and begin at a controlled speed. Apply steady pressure without forcing the bit. If the bit binds, release the trigger and wait for it to stop before freeing the accessory and checking the cause.
For a clean exit in wood, a backing board can help reduce tear-out. When drilling through metal, secure the workpiece and manage heat according to the bit manufacturer’s instructions. Remove chips with a suitable tool after the drill has stopped; never clear them with your fingers while the bit is moving.
Sign of success
The hole is close to the intended location and size, the bit cuts without repeated binding, and the material shows no avoidable damage.
How to Drive Screws Without Stripping Them
Choose a driver bit that matches the screw head and fits firmly. A poor fit can cause the bit to slip and damage the recess. Set the clutch low for the first attempt, align the tool with the screw, and apply enough forward pressure to keep the bit engaged.
Start the screw slowly. Once it catches, maintain steady alignment and let the drill turn it in. Stop when the screw reaches the desired depth. If the clutch slips too early, raise the setting a little and try again on a suitable test piece.
If the screw keeps slipping, stop and check the bit fit, screw condition, alignment, and material. Increasing torque without checking these issues can make the problem worse.
Sign of success
The screw enters straight, reaches the intended depth, and remains undamaged without crushing the surrounding material.
How to Choose the Right Driver Drill
The best driver drill for you depends on the work you expect to do, not simply the highest voltage or largest torque number on the package. A homeowner who mainly assembles furniture has different needs from a contractor who drills many large holes or drives screws all day.
Compare the chuck size, speed range, clutch, weight, grip, battery system, and available accessories. If you already own cordless tools from one battery platform, a compatible drill may reduce the need to buy another charger and battery set. Confirm compatibility by checking the manufacturer’s product information.
Source: Bing
Chuck capacity
A 3/8-inch chuck is common on compact drills, while a 1/2-inch chuck is common on many general-purpose and heavier-duty models. The chuck’s rated capacity does not guarantee that the drill can handle every bit of that size in every material.
Battery voltage and capacity
Voltage is one part of the tool’s design, while amp-hour capacity relates to stored battery energy. Neither number alone proves how much work a drill can complete.
Weight and balance
A compact, lighter drill can be easier to control for overhead work and long periods of use.
Clutch and speed controls
Adjustable clutch settings and variable speed are useful for fastening different sizes of screws and working with varied materials.
Brushless motor
Some models use brushless motors. Their efficiency, heat management, maintenance needs, and performance depend on the full tool design and operating conditions.
Included accessories
Check whether the kit includes a battery, charger, case, and useful bits. A lower listed tool price may not reflect the full cost of a usable setup.
Cordless vs. Corded Driver Drills
Cordless driver drills are convenient when moving between rooms, working outdoors, or drilling where a power outlet is not close by. Their working time depends on battery capacity, tool load, battery condition, and the task. A spare compatible battery can help reduce interruptions on longer projects.
Corded drills can provide continuous power while connected to a suitable outlet. However, the cord can limit movement and introduce a trip or snag hazard. Use a properly rated cord and supply, keep the cord away from the bit, and follow the tool’s electrical safety instructions.
For many household projects, a cordless drill is a practical choice. For fixed workshop tasks where continuous power matters, a corded model may also make sense. Compare the actual specifications and intended use rather than assuming one power type is always better.
Choose cordless
When mobility, convenient storage, and working away from outlets are important.
Choose corded
When a suitable power source is available and uninterrupted operation fits the task.
Do You Need a 3/8-Inch or 1/2-Inch Driver Drill?
A 3/8-inch chuck can suit many light household repairs, furniture assembly jobs, and smaller drilling tasks. A 1/2-inch chuck accepts accessories with a larger shank capacity and is common on general-purpose drills intended for a broader range of jobs.
Chuck size is only one part of the decision. A drill with a larger chuck is not automatically more powerful, and the permitted accessory diameter can vary by material and task. Check the manual for recommended bit sizes and operating limits.
For light household work
A compact 3/8-inch model may be sufficient if its power and accessory limits match your needs.
For varied home and workshop tasks
A 1/2-inch model may offer more flexibility for compatible larger-shank accessories.
Common Driver Drill Problems and How to Fix Them
When a driver drill does not work as expected, start with simple checks before assuming the motor has failed. Remove the battery or disconnect the power source before inspecting the chuck or changing a bit. Never open the tool housing unless you are qualified and the manufacturer permits the repair.
Source: Bing
The drill will not start
Check the battery charge, battery seating, direction switch position, and any lockout function. For a corded model, inspect the plug and supply safely. Stop using the tool if you notice damage, smoke, or a burning smell.
The bit slips in the chuck
Stop the tool, isolate the power, and check that the bit is compatible, centered, and properly tightened. Inspect the chuck and bit for wear or damage.
The screw will not go in
Check the driver bit fit, clutch setting, screw type, pilot hole, and material. A screw may be too long or large for the application, or the material may require a different fastener.
The drill feels weak
Check battery charge, selected gear, bit sharpness, and whether the task exceeds the tool’s capacity. A dull bit or unsuitable accessory can make the drill struggle.
The drill overheats
Stop and let the tool cool according to the manual. Excessive pressure, a binding bit, prolonged heavy use, or a poor accessory match may contribute to overheating.
The drill makes an unusual noise
Release the trigger and inspect the tool after it stops. If the noise persists or you detect grinding, burning, damaged parts, or abnormal vibration, discontinue use and seek qualified service.
Why Does the Clutch Keep Slipping?
A clutch that slips while driving a screw may be working as designed. The setting may be too low for the fastener, the screw may have reached its intended depth, or the material may resist further movement. Raise the setting gradually if the screw needs to travel farther.
If the clutch slips at nearly every setting, inspect the bit fit, screw, battery charge, and tool mode. Some drills have electronic controls or special modes that affect their behavior. Consult the manual if the problem continues, and do not force the tool to overcome a suspected mechanical fault.
First check
Confirm that the drill is in the correct mode and that the clutch setting suits the screw and material.
Why Does the Drill Bit Keep Binding?
A bit can bind when it encounters too much resistance, becomes misaligned, catches on material, or is used outside its intended range. Large bits and deep holes can place greater demands on the drill. Forcing the tool can twist your wrist, damage the bit, or cause the workpiece to move.
Release the trigger and wait for all motion to stop. Disconnect the power before freeing the bit if required by the manual. Secure the workpiece, inspect the bit, clear the hole safely, and resume only when you understand the cause. If binding repeats, use a more suitable bit or tool.
Never force a stuck bit
Stop, isolate the power, and correct the cause before trying again.
Driver Drill Safety Tips for Home and Workshop Use
A driver drill is a common power tool, but the rotating chuck and bit can still cause injury. Loose clothing, jewelry, long hair, unsecured material, and hidden utilities all create risks. Prepare the work area before pressing the trigger and keep your hands away from the rotating accessory.
Wear safety glasses or other eye protection suitable for the task. Drilling can throw chips, dust, and fragments toward your face. Hearing protection may be appropriate for noisy tasks, while respiratory protection and dust controls may be needed for certain materials and environments.
Before drilling into walls, ceilings, floors, or cabinets, check for concealed electrical wires, plumbing, gas lines, and other services. Use suitable detection methods and follow applicable building and electrical safety guidance. If you cannot establish a safe drilling path, stop and consult a qualified professional.
Source: Bing
Secure the work
Clamp material where appropriate instead of holding a small or unstable workpiece by hand.
Maintain control
Use a firm grip, stable stance, and a suitable auxiliary handle if the tool provides one and the task requires it.
Isolate power before adjustments
Remove the battery or disconnect the power supply as directed before changing accessories or clearing a jam.
Avoid loose clothing
Keep sleeves, hair, jewelry, and gloves away from the rotating chuck and bit.
Watch for kickback
A bit that catches can cause the tool to twist suddenly. Use suitable settings, secure the material, and avoid excessive pressure.
Use the right dust controls
Follow material-specific precautions, especially when drilling masonry, concrete, treated wood, or materials that may produce hazardous dust.
Follow the manual
Use only compatible accessories and operating modes, and observe the tool’s limits and maintenance instructions.
Can You Wear Gloves When Using a Driver Drill?
Loose gloves can catch on rotating parts, so they should not be worn where they could become entangled with the chuck or bit. Follow the tool’s manual and workplace safety rules on hand protection. The correct approach can depend on the material, the task, and the risk of contact with sharp edges.
Keep hands clear of the rotating accessory and never use a glove to steady a workpiece near the bit. Clamp the material and stop the tool before adjusting it.
Prioritize entanglement prevention
Keep clothing and protective equipment from contacting rotating parts and follow task-specific safety guidance.
Driver Drill Accessories and Maintenance
The right accessories help a driver drill perform well across different tasks. Keep a small selection of common drill bits, driver bits, and any compatible specialty accessories required for your projects. Match each accessory to the material, the drill’s chuck capacity, and the manufacturer’s operating limits.
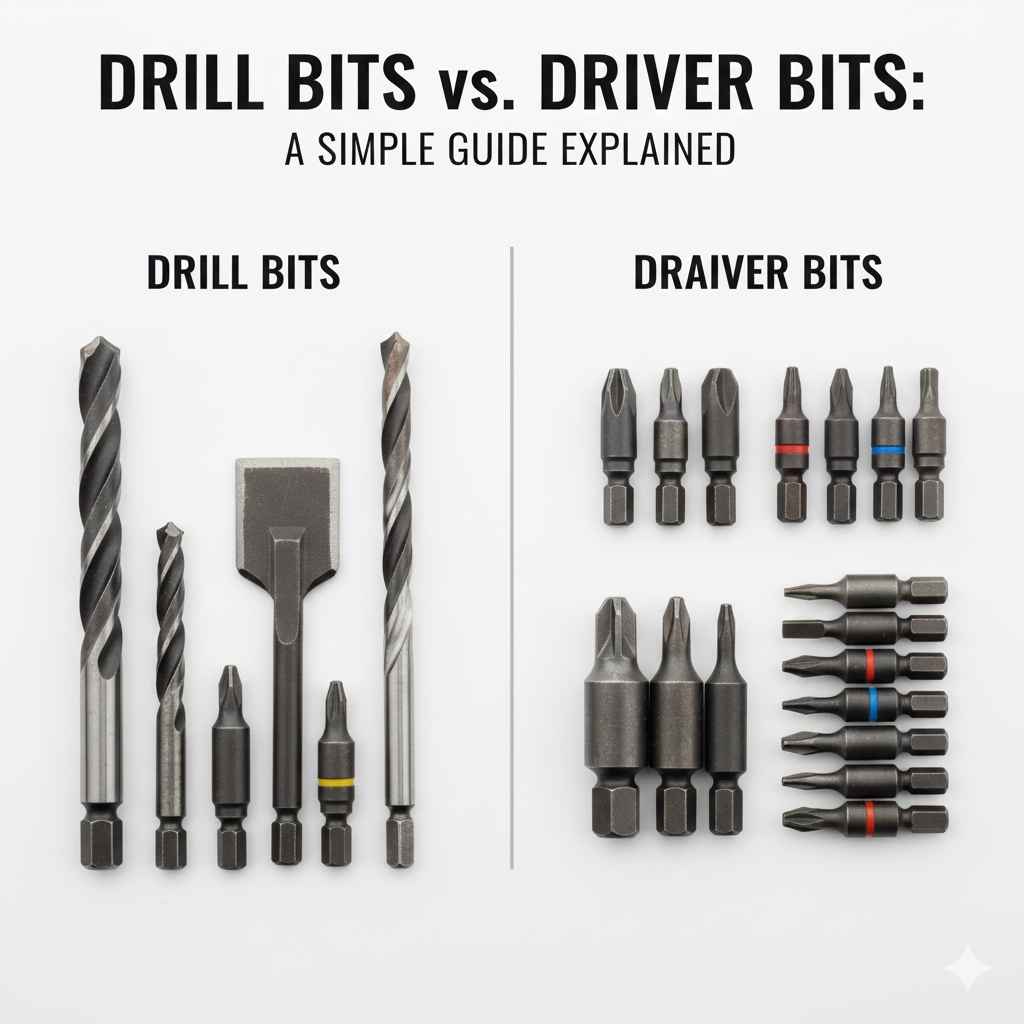
Drill bits remove material, while driver bits engage screw heads and transfer torque. They are not interchangeable in every situation. A drill bit is designed to cut a hole, while a driver bit is shaped to fit a fastener. Some accessories can be used in more than one tool type, but compatibility and impact ratings still matter.
Source: Bing
Twist drill bits
Common for general holes in wood, metal, and other materials when the bit is designed for that use.
Brad-point bits
Designed for wood drilling and often useful when accurate starting and clean holes matter.
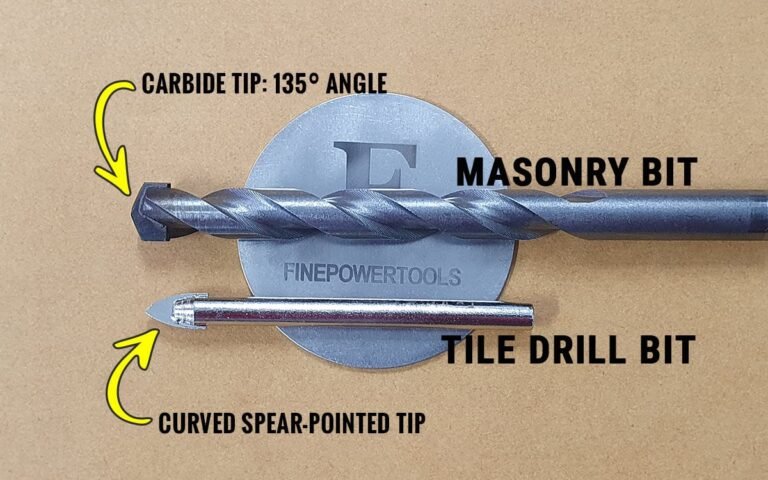
Masonry bits
Designed for suitable masonry applications, though a standard driver drill may not be adequate for hard concrete.
Driver bits
Fit screw-head styles such as Phillips, slotted, square, Torx, and other compatible designs.
Hole saws
Create larger circular openings when the drill has enough capacity and the accessory is compatible with the material and tool.
Countersink bits
Create a tapered recess around a hole so a compatible screw head can sit flush or below the surface.
How to Maintain a Driver Drill
Basic care helps keep a driver drill ready for use. After each project, remove dust and debris from the exterior using a method approved by the manufacturer. Keep ventilation openings clear, inspect the chuck, and check accessories for wear or damage.
Store the tool in a dry place and protect it from heavy impacts and moisture. Follow the battery maker’s instructions for charging, storage, and temperature limits. Do not use a battery that is cracked, leaking, unusually hot, or otherwise damaged.
If the drill develops a persistent fault, use an authorized service provider or a qualified repair professional when appropriate. Do not bypass safety features or attempt internal electrical repairs without the required training.
Inspect bits
Replace damaged, bent, or badly worn accessories rather than forcing them to cut.
Keep the chuck clean
Remove debris using the method recommended by the manufacturer and make sure accessories clamp securely.
Care for the battery
Use the compatible charger and observe the manufacturer’s charging and storage guidance.
Store safely
Keep the drill and accessories dry, protected, and out of reach of children.
When Should You Replace a Driver Drill?
A driver drill may need repair or replacement when it can no longer hold bits securely, loses power despite a sound battery, develops persistent abnormal noise, or shows damage that affects safe operation. A worn battery may also reduce working time without meaning that the drill itself has failed.
Compare the cost and availability of service, replacement batteries, and compatible parts before deciding. If the tool has structural damage, repeated electrical faults, or a failed safety feature, stop using it until it has been properly assessed.
Repair may make sense
When a replaceable battery or serviceable part is the main problem and compatible replacements are available.
Replacement may make sense
When the tool is unsafe, repair is impractical, or its capacity no longer suits the work you need to do.
Frequently Asked Questions
Q
What Is the Main Purpose of a Driver Drill?
The main purpose of a driver drill is to drill holes and drive screws with controlled rotary motion. It is useful for furniture assembly, woodworking, home repairs, cabinet installation, and many general maintenance tasks. Its chuck, variable-speed trigger, and adjustable clutch make it a versatile option for many household projects.
Q
Is a Driver Drill Better Than an Impact Driver?
Neither tool is better for every job. A driver drill is generally more versatile for ordinary drilling and controlled screw driving. An impact driver is often more suitable for repeated heavy fastening because its rotational impacts help turn demanding fasteners. Choose according to your main tasks and the accessories each tool accepts.
Q
Can a Driver Drill Remove Screws?
Yes. Most driver drills have a forward and reverse switch. Select reverse after the motor stops, fit a driver bit that matches the screw head, and apply controlled pressure. If the screw is rusted, damaged, or stuck, stop if the bit repeatedly slips and choose an appropriate removal method rather than forcing the tool.
Q
Can I Use Regular Drill Bits in a Driver Drill?
Many standard drill bits work in a driver drill if their shanks fit the chuck and the bits are designed for the material and task. Check the chuck capacity and the accessory manufacturer’s instructions. Some specialty bits require specific adapters or operating limits, so do not assume every bit is compatible.
Q
What Is the Difference Between a Driver Drill and a Hammer Drill?
A driver drill mainly provides rotary motion for drilling and screw driving. A hammer drill adds rapid forward impacts while the bit rotates, helping it drill into suitable masonry. Some hammer drill drivers also have a normal drill mode and a screw-driving clutch, but their features vary by model.
Q
Is a Driver Drill Suitable for Beginners?
Yes. A driver drill can be a good first power tool because it handles many common home repair and DIY tasks. Beginners should read the manual, use the correct bits, start with low speed and torque, secure the workpiece, wear appropriate eye protection, and practice on scrap material before working on a finished project.
Q
What Size Driver Drill Do I Need for Home Use?
For many general household jobs, a compact drill with a suitable chuck, adjustable clutch, variable speed, and a compatible battery system is enough. A 3/8-inch chuck can suit lighter tasks, while a 1/2-inch chuck may offer more flexibility for larger compatible accessories. Choose based on the materials, hole sizes, and fasteners you expect to use.
Q
Can a Driver Drill Drill Through Brick or Concrete?
A standard driver drill may handle some limited drilling in softer masonry with an appropriate bit, but it is generally not ideal for regular concrete drilling. A hammer drill or rotary hammer is usually a better choice. Confirm the tool’s capabilities and check for hidden utilities before drilling into a wall.
✦ Wrapping Up
Conclusion
A driver drill is a versatile power tool that combines drilling and screw driving in one compact package. Its rotating chuck accepts compatible drill bits and driver bits, while the trigger and clutch help you control speed and turning force. These features make it useful for furniture assembly, woodworking, repairs, and many everyday home improvement tasks.
The key is to match the drill to the work. Use the correct accessory, select an appropriate speed and clutch setting, secure the material, and stop if the bit binds or the tool shows signs of damage. Choose an impact driver for many demanding fastening jobs and a hammer drill or rotary hammer when your masonry work requires a hammering mechanism.
💡 Key Takeaway
Before your next project, identify the material, choose a compatible bit, set the drill to the right mode, and test the speed and clutch on scrap material. For general household drilling and fastening, a driver drill with variable speed, an adjustable clutch, and a suitable chuck is a practical starting point.