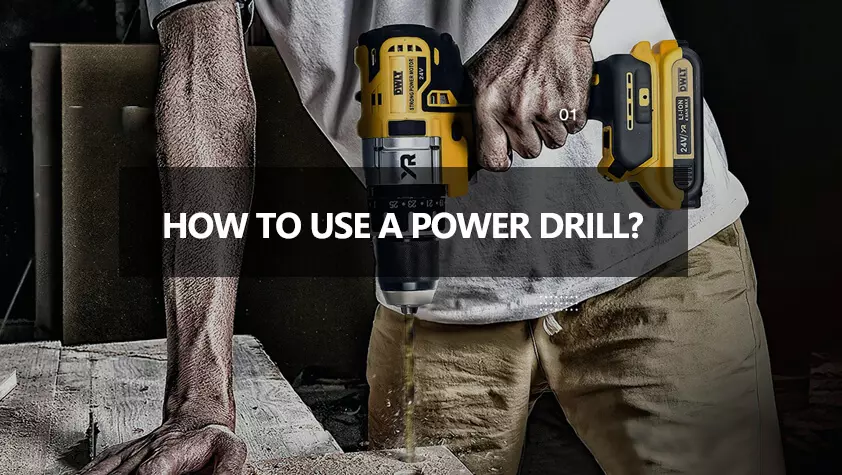
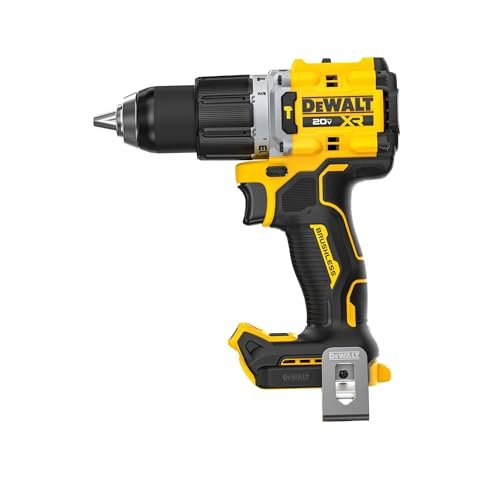
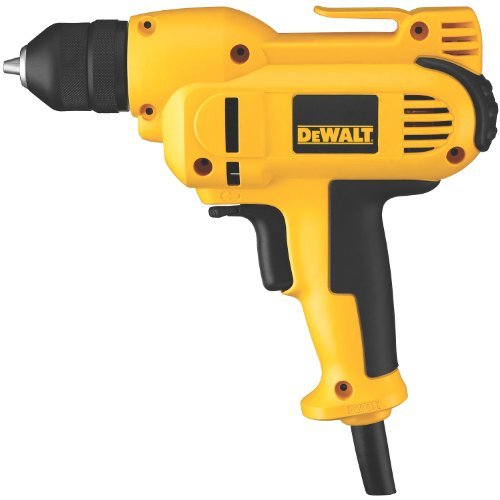
To use a power drill, secure your workpiece, fit the correct bit, set the speed and torque, hold the drill straight, and press the trigger gently.
From hanging shelves in a suburban home to fixing a loose cabinet handle in an apartment, a power drill is one of the most useful tools for American DIY projects. It can make holes, drive screws, and help with many small repairs. Yet a drill can also damage a wall, strip a screw, or cause an injury when used the wrong way. The good news is that you do not need years of workshop skills to learn the basics.
This guide explains how to use a power drill step by step. You will learn how to choose a drill bit, set the clutch, control speed, make a clean hole, and drive a screw without damaging the material. It also covers common mistakes, battery care, and safety checks. The instructions apply to many common cordless and corded drills, but your exact model’s manual takes priority when controls or limits differ.
Source: www.pinterest.com
What Is a Power Drill?
A power drill is a handheld tool that spins a bit to make holes or drive fasteners. Most home models use an electric motor powered by a rechargeable battery or a wall outlet. A cordless drill is convenient for work around the house because it does not need a power cord, while a corded drill can run as long as it has a suitable power supply.
Many standard drills are also called drill drivers because they can both drill holes and drive screws. Some models have a hammer function for certain masonry tasks. A hammer drill adds rapid impacts as the bit rotates, but a standard drill driver does not. Check your manual before using any special mode.
Source: toolsfilter.com
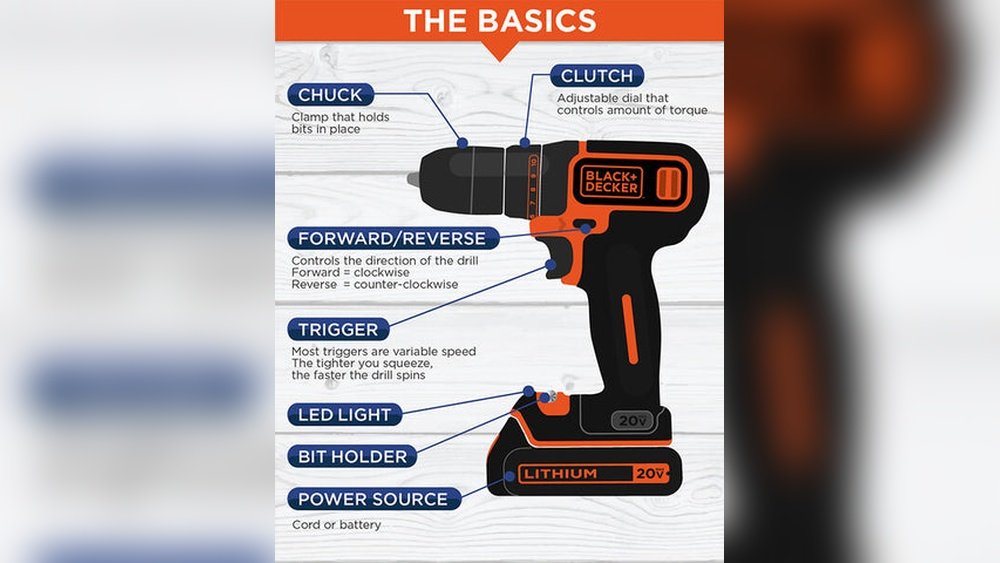
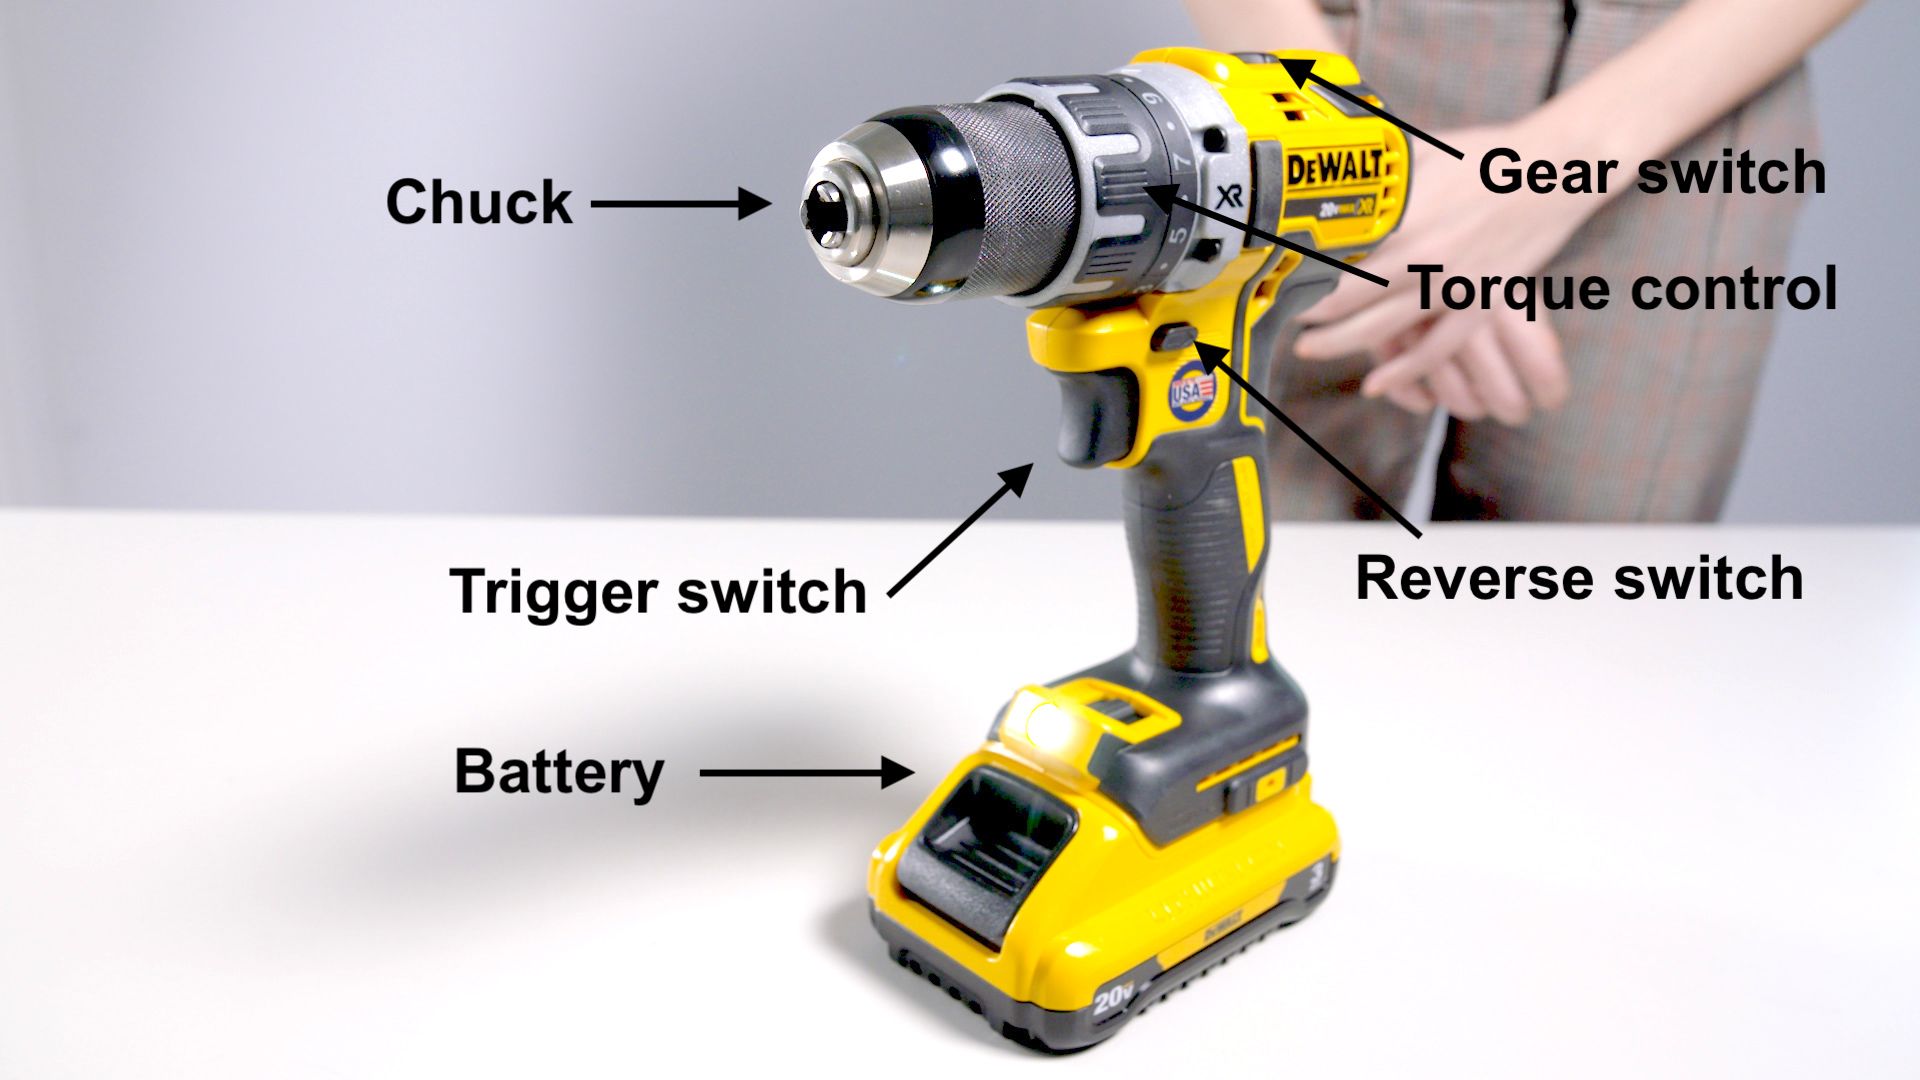
Chuck
The chuck holds the drill bit or driver bit. Many household drills have a keyless chuck that you tighten by hand.
Trigger
The trigger starts the motor. On many models, pressing it farther increases the speed.
Forward and reverse switch
This control changes the direction of rotation. Forward usually drives screws in, while reverse helps remove them.
Clutch ring
The numbered clutch limits how much turning force the drill applies in screw-driving mode.
Gear selector
A two-speed selector, when fitted, lets you choose a slower speed with more turning force or a higher speed for many drilling tasks.
Battery or power cord
This supplies power. Follow the manufacturer’s instructions for charging, storage, and electrical safety.
Power Drill vs. Impact Driver
A drill driver is a useful first choice for general home repairs because it handles both holes and screws. An impact driver delivers rotational impacts that help turn long or stubborn fasteners. It is not a direct replacement for a drill when making clean holes, and its bit holder may require hex-shank accessories rather than ordinary round-shank drill bits.
Use a drill driver
For pilot holes, furniture assembly, cabinet hardware, and many basic home repairs.
Use an impact driver
For suitable screw-driving jobs that need extra turning force, with compatible bits and proper control.
Gather the Right Tools and Safety Gear
Before learning how to use a power drill, gather the tools for your task and prepare a stable work area. The right setup helps you avoid damaged materials, slipping bits, and unnecessary strain. Read the drill manual if you are unfamiliar with its controls, chuck, or operating limits.
Wear safety glasses that protect your eyes from flying chips and dust. Tie back long hair, secure loose clothing, and remove jewelry that could catch in a moving part. Keep children and pets away from the work area, and use suitable hearing protection and dust controls when the task calls for them.
Source: www.lowes.com
Power drill and charged battery
Check the housing, battery, cord, and trigger for visible damage before use. Do not use a damaged tool.
Correct drill or driver bit
Match the bit to the material, hole size, or fastener. A wood bit is not the right choice for every surface.
Measuring tools
Use a tape measure, pencil, and suitable square or level to mark the intended location.
Clamps
Hold loose boards or other workpieces firmly. Do not rely on one hand to restrain an item while drilling with the other.
Wall and utility checks
Use suitable detection tools and reliable building information to check for hidden wiring, pipes, and other hazards before drilling into a wall.
Check the Work Area Before Drilling
Choose a well-lit space with firm footing and enough room to control the drill. Keep the bit clear of the bench, your body, and nearby objects. If you are working on a board, support it so it cannot drop or split when the bit comes through the other side.
For wall work, do not assume a stud finder can identify every hidden hazard. Devices have limits, and wiring or plumbing may follow unexpected routes. If you cannot establish that the drilling area is safe, stop and seek qualified help rather than guessing.
Unplug corded drills
Disconnect the power before changing a bit or making adjustments, following the manual.
Remove cordless batteries when appropriate
Take out the battery before changing bits or servicing the tool if the manufacturer directs you to do so.
Choose the Right Drill Bit
The correct bit makes drilling easier and helps produce a cleaner hole. Match its design to the material, the hole diameter, and the job. Also check that the bit fits the drill’s chuck and stays within the tool’s stated capacity.
A sharp, suitable bit usually cuts more cleanly than a worn or mismatched one. If you notice unusual heat, smoke, a burning smell, or repeated slipping, stop the drill and inspect the setup after the tool has stopped and been safely disconnected.
Source: bisongenerator.com
Twist bits
Common general-purpose bits are available for wood and metal. Use a bit specifically rated for the material you are drilling.
Brad-point bits
These bits have a pointed center that helps locate holes in wood and can reduce wandering at the start.
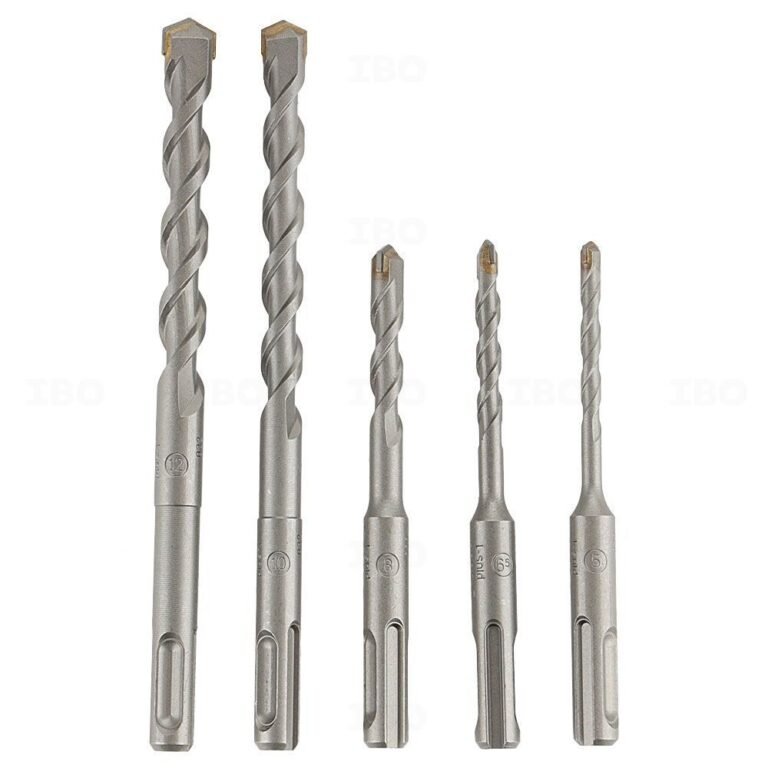
Masonry bits
These are designed for materials such as brick and concrete. Some masonry jobs also require a hammer drill and a bit rated for hammer action.
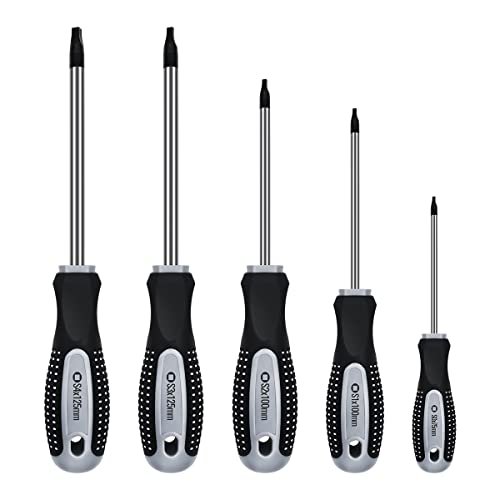
Driver bits
These fit screw heads such as Phillips, slotted, Torx, or square-drive types. Match the size and shape to the fastener.
Spade and hole-saw bits
These make larger holes in suitable materials. Confirm the drill can safely handle the bit size and load.
How to Select a Bit for Wood, Metal, or Masonry
For wood, choose a wood-rated bit suited to the required hole size. For metal, use a bit rated for the particular metal and follow its cutting-speed and lubrication guidance. Thin metal may need a secure support and careful pressure to keep the bit from catching.
For brick or concrete, use a masonry bit and check whether your drill has the required hammer function. Avoid using hammer action on materials or accessories that are not rated for it. If you are drilling tile, glass, or other brittle surfaces, use a purpose-made bit and the method specified for that material.
Match the diameter
Choose a bit diameter that suits the hole, fastener, anchor, or manufacturer’s instructions.
Check the shank
Make sure the bit’s shank is compatible with the chuck and can be gripped securely.
Inspect the cutting end
Do not use a cracked, bent, badly worn, or visibly damaged bit.
How to Insert and Secure a Drill Bit
A bit must sit securely in the chuck before you turn on the drill. A loose bit can wobble, slip, or come free during use. Disconnect the power source first so the trigger cannot start the motor while your hands are near the chuck.
Source: YouTube, Lowe’s Home Improvement
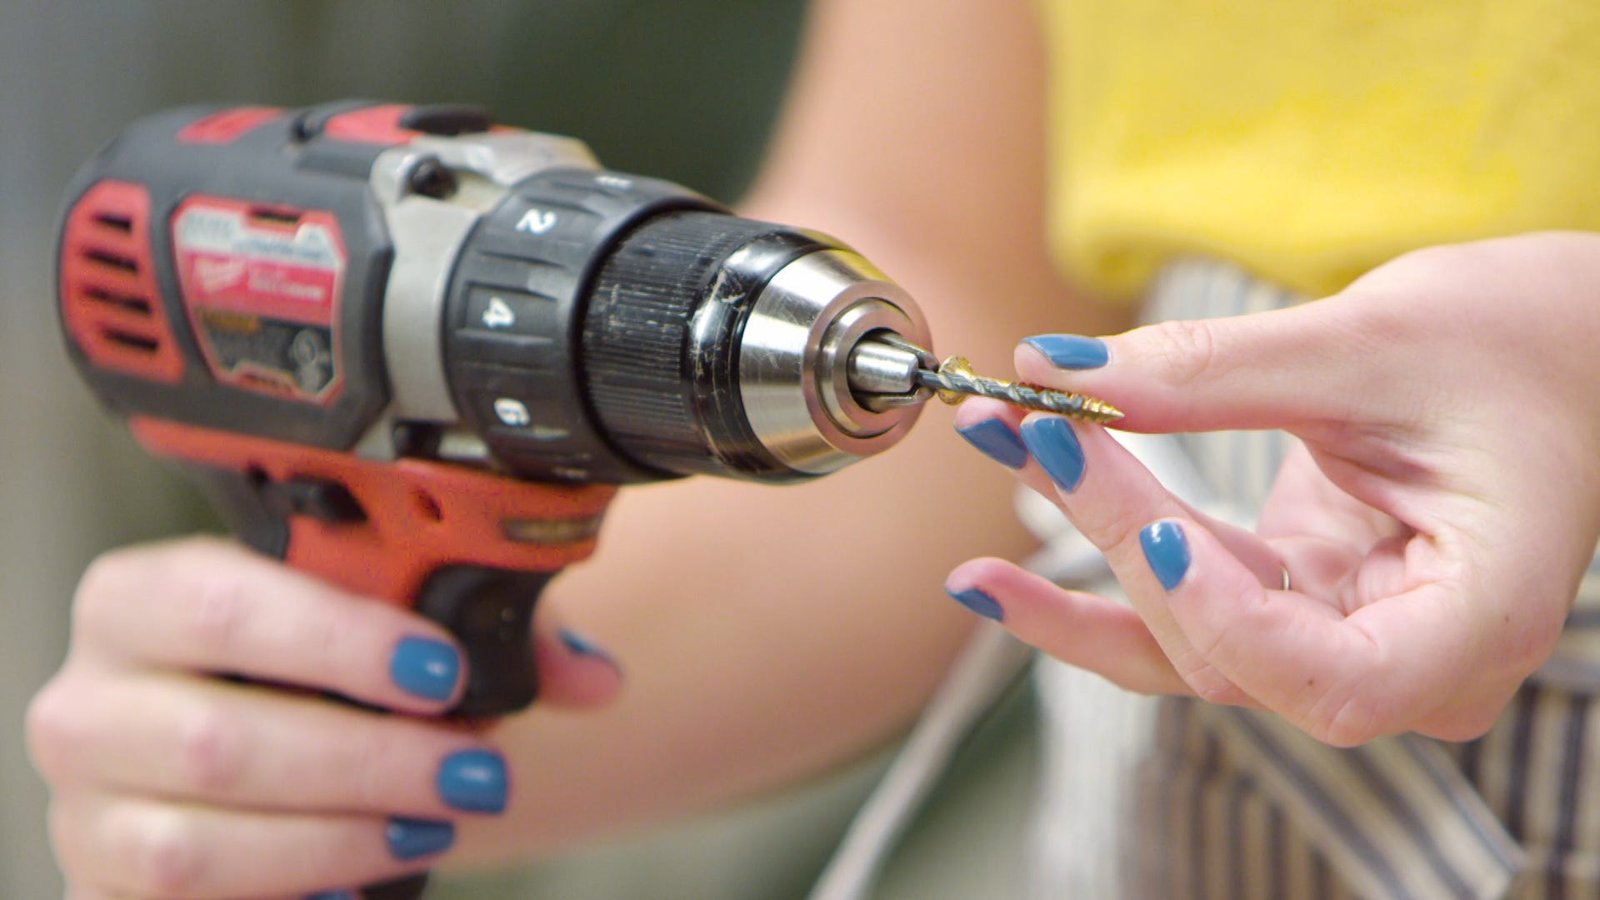
Step 1: Open the Chuck
For a typical keyless chuck, hold the chuck body and turn its sleeve in the direction that opens the jaws. Some models use different mechanisms, so follow the manual if the chuck does not operate as expected. If your drill uses a keyed chuck, use its supplied key to loosen the jaws.
Keep the tool disconnected
Remove the battery or unplug the drill before handling the chuck.
Step 2: Insert the Bit
Place the bit’s shank between the chuck jaws. Keep it centered and insert enough of the shank for the jaws to grip it securely, while avoiding contact between the jaws and the bit’s flutes where that would prevent a proper grip. Do not force a bit that does not fit.
Keep the bit aligned
A centered bit helps reduce wobble and supports accurate drilling.
Step 3: Tighten the Chuck
Tighten the keyless chuck by hand according to the manufacturer’s instructions. For a keyed chuck, tighten it with the proper key and remove the key before powering the drill. Never leave a chuck key in place when the motor starts.
Check the grip
Confirm the bit is held firmly and looks straight. Do not use a bit that continues to slip or wobble.
Understand Drill Speed, Torque, and Clutch Settings
Speed controls how quickly the bit rotates, while torque describes the turning force available at the chuck. The right balance depends on the material, bit, fastener, and drill model. Starting slowly gives you more control while you line up a hole or screw.
Many drill drivers have a numbered clutch ring. In screw-driving mode, the clutch can stop applying force after the set limit is reached, helping reduce stripped screw heads and damaged surfaces. The numbers are settings, not universal torque measurements, so a setting that works on one drill may behave differently on another.
Source: House Beautiful
Low speed
Useful for controlled screw driving, starting a hole, and tasks where catching or slipping is a concern.
High speed
Often useful for smaller bits in suitable materials when the drill and bit instructions allow it.
Low clutch setting
A sensible starting point for small screws or delicate materials, provided the setting is suitable for the task.
Drill mode
On many drill drivers, this bypasses the screw clutch for ordinary drilling. Check the manual because controls vary.
How to Choose a Starting Setting
For a small screw in soft wood, begin with a low speed and a modest clutch setting. Test on scrap material if possible. If the clutch slips before the screw is seated, increase the setting a little and try again.
For drilling, select the gear and operating mode recommended for the bit and material. Larger bits often need lower speeds than small bits. Never assume that maximum speed is best for every job.
Watch the tool
The bit should rotate smoothly without excessive vibration, smoke, or unusual noise.
Let the clutch guide you
Repeated clutch clicks can mean the screw needs a slightly higher setting, the bit is not seated properly, or resistance is too high. Stop and check before applying more force.
How to Use a Power Drill Step by Step
The safest way to learn is to practice on a scrap piece of wood before working on a finished surface. This lets you feel how the trigger responds and see how the bit cuts without risking a cabinet, wall, or shelf. Keep the drill under control and stop whenever the tool behaves unexpectedly.
Source: YouTube, NextJeneration
Step 1: Mark the Drilling Point
Measure the location and mark it with a pencil. For a precise hole in wood, a small starter mark can help the bit stay on target. For wall drilling, complete your utility checks before putting the bit against the surface.
Measure twice
Check the spacing and position before drilling, especially when fitting cabinet hardware or mounting brackets.
Step 2: Secure the Material
Clamp the workpiece to a stable bench or support it in a way that prevents movement. Keep hands away from the bit’s path. When drilling a board, make sure the bit will not strike the bench or another object as it exits.
Prevent movement
A secure workpiece is easier to drill accurately and less likely to catch the bit.
Step 3: Set the Drill
Fit the correct bit and tighten the chuck. Set forward rotation for a normal hole or screw installation, choose a suitable gear, and select the correct operating mode. For ordinary drilling, use the drill mode if your model has one.
Check the direction
A drill set to reverse may fail to cut as expected. Confirm the direction before touching the bit to the material.
Step 4: Hold the Drill Correctly
Grip the main handle firmly and use the auxiliary handle if your drill has one and the task calls for it. Stand with balanced footing and keep your wrist in a natural position. Line up the bit with the marked point and keep your body out of its path.
Keep the drill straight
For a straight hole, align the bit with the intended drilling angle before starting the motor.
Step 5: Start Slowly
Press the trigger gently so the bit begins to turn at a controlled speed. Let the bit engage the surface before increasing speed as appropriate. Avoid sudden pressure that can make the bit wander or cause the drill to twist.
Use steady pressure
Let the bit do the cutting. Excessive force can overheat the bit, stall the motor, or damage the workpiece.
Step 6: Drill to the Required Depth
Continue with controlled pressure and keep the drill aligned. If you need a hole of a specific depth, use a suitable depth stop or a clearly marked depth guide when permitted by the tool’s instructions. Pause when needed to clear chips, following the safe procedure for your tool and material.
Watch for resistance
If the bit binds, the drill stalls, or the workpiece shifts, release the trigger and wait for the tool to stop before investigating.
Step 7: Release the Trigger and Inspect
Release the trigger and wait until the bit stops rotating before withdrawing it or setting the drill down. Inspect the hole for the required size, depth, and position. Disconnect the power before removing the bit or making adjustments.
Check the result
A suitable hole should be in the intended position and free of damage that would affect the task.
How to Drive Screws With a Power Drill
A drill driver can install screws much faster than a manual screwdriver, but it can also overtighten them. The key is to use a well-fitting driver bit, a controlled speed, and the right amount of force. For delicate work, test the setup on scrap material first.
Source: dunnlumber.com
Step 1: Choose the Correct Driver Bit
Match the driver bit to the screw head and size. A bit that is too small or has the wrong shape may slip out and damage the screw. Seat the bit fully in the screw head before starting.
Keep the bit aligned
Hold the drill in line with the screw so the bit does not slip sideways.
Step 2: Set the Clutch and Speed
Select forward rotation, a low speed, and a modest clutch setting. For many wood screws, drilling a pilot hole can make installation easier and reduce the risk of splitting, especially near a board edge. Follow the fastener maker’s instructions when available.
Use a pilot hole when needed
Choose a pilot-hole size suited to the screw, wood type, and installation requirements.
Step 3: Drive the Screw Slowly
Hold the screw in its starting position with your fingers well clear of the rotating bit. Start the screw slowly, then keep the drill aligned as it enters the material. Once the screw is nearly seated, ease off the trigger to avoid driving it too deep.
Stop when seated
The screw head should reach the intended position without crushing the material or stripping the head.
Step 4: Adjust if the Screw Stops
If the clutch clicks repeatedly before the screw is seated, release the trigger and inspect the bit, screw, and material. A slightly higher clutch setting may help, but a pilot hole or a more suitable screw may be the better fix. Do not keep forcing a stalled drill.
Reverse to remove
After the drill stops, switch to reverse and carefully back out a screw if removal is needed.
How to Drill Into Different Materials
Different materials respond to drilling in different ways. The bit, speed, support, and drilling method must suit the surface. If the material is brittle, coated, hidden behind a wall, or structurally important, confirm the correct method before starting.
Source: artofit.org
Drilling Into Wood
Use a wood-rated bit and secure the board firmly. Start at a controlled speed and keep the drill aligned. For a clean exit, support the back of the board with scrap wood when practical, and make sure the bit will not strike the support beneath it.
Reduce splitting
Use a suitable pilot hole when needed, particularly near edges or with larger screws.
Avoid burn marks
Use a sharp bit and an appropriate speed. Stop if the wood begins to smoke or smell burnt.
Drilling Into Metal
Use a bit rated for the metal and secure the workpiece with clamps. Start at a speed appropriate for the bit diameter and metal type. Metal drilling can generate sharp chips and heat, so wear eye protection and keep hands away from the cutting area.
Use a cutting lubricant only when it is suitable for the metal, bit, and task. Never hold small metal pieces in your hand while drilling. If the bit catches, release the trigger and wait for the tool to stop before correcting the setup.
Control heat
Follow the bit manufacturer’s guidance for speed, pressure, and lubrication.
Handle chips safely
Let the tool stop before removing metal chips, and use a suitable brush rather than bare fingers.
Drilling Into Brick or Concrete
Use a masonry-rated bit and verify that the drill is suitable for the material. Hard masonry often calls for a hammer drill or rotary hammer rather than a basic drill driver. Select the appropriate mode and bit according to the tool manual.
Before drilling, check for hidden utilities and confirm the hole location is safe. Wear eye protection and suitable dust protection, and control silica-containing dust using a method appropriate for the task. If you cannot control the dust or establish a safe drilling location, get qualified help.
Use suitable anchors
Choose a fastener system designed for the masonry type and the load it must support.
Know when to stop
If the bit meets unexpected resistance or you suspect a hidden utility, stop rather than drilling deeper.
Drilling Into Drywall
Drywall is relatively soft, but mounting items safely requires more than making a hole. Check for hidden wiring and plumbing, then decide whether the load needs a suitable drywall anchor or attachment to a wall stud. Heavy shelves, televisions, and other substantial loads require a mounting method rated for the actual wall and load.
Use a bit suited to the required hole and anchor. Avoid making a hole larger than the anchor instructions allow. If the wall’s construction or hidden services are uncertain, pause and obtain reliable guidance.
Match the anchor to the load
Follow the anchor manufacturer’s stated hole size, installation steps, and load limits.
Common Power Drill Problems and How to Fix Them
When a drill does not behave as expected, release the trigger first. Wait for the bit to stop, disconnect the power, and inspect the setup before trying again. Do not try to free a stuck bit while the motor is running.
Source: dunnlumber.com
The bit slips in the chuck
Disconnect the drill and check that the bit is compatible, centered, and properly secured. Inspect the chuck and bit for damage. Stop using the tool if the chuck cannot hold the bit securely.
The screw head becomes stripped
Use a correctly sized driver bit, keep it aligned, and reduce speed and pressure. A pilot hole may help where suitable.
The drill will not make a hole
Check the rotation direction, bit type, bit condition, material, and operating mode. Do not assume that pushing harder will solve the problem.
The drill stalls or twists
Release the trigger and let the tool stop. Check for a jammed bit, an unsuitable speed, excessive pressure, or an unsecured workpiece. Use an auxiliary handle when required by the manual.
The battery runs down quickly
Check the battery charge, age, temperature, and task load. Use only compatible batteries and chargers approved for the tool.
The bit gets hot or smokes
Stop immediately and let the tool and bit cool safely. Check for a dull or unsuitable bit, excessive pressure, incorrect speed, or material buildup before continuing.
When Not to Continue
Stop using the drill if you notice a damaged cord, cracked housing, a swollen or damaged battery, smoke, sparks beyond normal operation, a burning electrical smell, or a trigger that fails to work properly. Disconnect the tool when safe and follow the manufacturer’s service guidance. Do not open or repair electrical or battery components unless you are qualified to do so.
Do not bypass safety features
Use the correct accessories and approved replacement parts, and seek service for faults you cannot safely resolve.
Power Drill Safety Rules Every Beginner Should Know
Safe drilling depends on the tool, the material, and the work area. A drill that is easy to control in a piece of scrap wood may behave very differently when a large bit catches in a thick board. Build a habit of checking the setup before every new task.
Source: www.lowes.com
Wear eye protection
Use suitable safety glasses to protect against flying chips and debris. Add other protective equipment when the material and task require it.
Secure the workpiece
Use clamps or a suitable fixture so the material cannot shift or spin.
Keep hands clear
Keep fingers away from the bit and chuck. Never try to stop a rotating bit by hand.
Check hidden hazards
Before drilling into walls, floors, or ceilings, check for electrical wires, pipes, and other concealed services.
Avoid loose clothing
Secure long hair and remove jewelry that could catch in rotating parts.
Disconnect before adjustments
Remove the battery or unplug the tool before changing bits, clearing a jam, or performing maintenance, as directed by the manual.
Keep the drill dry
Use the tool only in conditions permitted by the manufacturer. Do not expose a standard drill or its battery to water or wet conditions beyond its rated protection.
Control dust
Use appropriate dust collection and respiratory protection when needed, especially when drilling concrete, masonry, or other materials that create hazardous dust.
Special Care When Drilling Into Walls
Wall drilling deserves extra caution because the surface does not reveal everything behind it. Electrical cables, plumbing, gas lines, and other services may be hidden in locations that are not obvious. A detector can help, but it cannot guarantee that every hazard will be found.
Do not drill where you cannot reasonably establish that the location is safe. Avoid areas near likely service routes unless you have reliable information about the building. If a hole could affect a load-bearing member, fire-rated assembly, or other critical building feature, consult a qualified professional before proceeding.
Use a depth limit when suitable
A properly set depth stop can limit penetration, but it does not make an unsafe drilling location safe.
Quick Reference: Which Drill Setting Should You Use?
Use this table as a starting point, not a universal setting chart. The correct choice depends on the drill model, material, bit, and fastener. Follow the instructions for your specific tool and accessory whenever they differ from general advice.
Source: bisongenerator.com
Common Tasks and Starting Choices
Start with a controlled setting, test it on scrap material when possible, and adjust only after the tool has stopped. For large bits or high-resistance tasks, check the drill’s capacity and use the auxiliary handle if required.
Small screw in soft wood
Use a driver bit that fits, low speed, and a modest clutch setting. Increase the clutch only if needed.
Pilot hole in wood
Use a wood-rated bit of the required diameter and the drill mode, with controlled speed and steady pressure.
Small hole in suitable metal
Use a metal-rated bit, secure the workpiece, and follow the bit maker’s speed and lubrication guidance.
Hole in concrete or brick
Use a masonry-rated bit and a drill with the appropriate capability and mode. Control dust and verify the location first.
Large-diameter hole
Check the tool’s capacity and the bit’s speed requirements. A lower gear may be needed, and an auxiliary handle may be essential.
Removing a screw
Select reverse, seat the driver bit fully, and begin slowly while keeping the drill aligned.
How to Maintain a Power Drill
Basic maintenance helps keep a power drill ready for its next job. After each use, switch it off, disconnect its power source, and let the bit cool before handling it. Remove dust from the tool’s exterior with a method approved by the manufacturer.
Source: artofit.org
Clean the chuck
Remove visible dust and debris according to the manual. Do not apply oil or other products unless the manufacturer permits them.
Inspect bits
Look for dull edges, cracks, bends, or other damage. Replace bits that no longer cut safely or accurately.
Care for the battery
Use the specified charger and follow the maker’s charging, temperature, and storage guidance.
Store the drill properly
Keep the tool in a dry, secure location away from children, excessive heat, and conditions prohibited by the manual.
Check moving parts
Watch for unusual chuck movement, a sticking trigger, or changes in sound. Arrange service if a fault persists.
When Should You Replace a Drill Bit?
Replace a bit when its cutting edge is badly worn, its body is bent or cracked, or it cannot cut the intended material properly despite a correct setup. A damaged bit may wander, overheat, or place extra strain on the drill. Use a replacement that matches the task and the tool’s specifications.
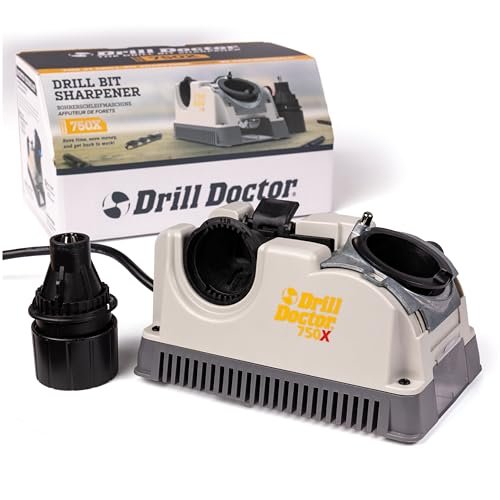
Do not sharpen every bit yourself
Some bits can be resharpened with the correct method, while others are best replaced. Follow the bit maker’s guidance.
Common Beginner Mistakes to Avoid
Most early drilling problems come from using the wrong bit, rushing the setup, or forcing the tool. A few simple habits can prevent many of these issues. Take a moment to check the bit, the material, the drill settings, and the work area before every hole.
Source: YouTube, Lowe’s Home Improvement
Pushing too hard
Excess pressure can cause overheating, stalling, or a sudden catch. Use steady pressure and let the correct bit do the work.
Starting at full speed
A sudden start can make the bit wander or the driver bit slip. Begin slowly when the task allows it.
Using the wrong bit
A wood bit, metal bit, masonry bit, and driver bit have different purposes. Choose the correct one for the task.
Ignoring the clutch
A high clutch setting may drive a screw too far or damage its head. Start modestly and adjust as needed.
Drilling without a secure workpiece
Loose material can shift, spin, or catch the bit. Clamp it securely before starting.
Assuming every wall is safe to drill
Hidden utilities and building features can create serious hazards. Verify the location before making a hole.
Changing a bit while the drill is live
Disconnect the power source before changing bits or adjusting the chuck, following the manual.
A Simple Practice Exercise for Beginners
Take a clean scrap board and mark three points. Use a suitable wood bit to make a small hole at each mark, starting slowly and keeping the drill aligned. Inspect the holes and note how speed and pressure affect control.
Next, fit a suitable driver bit and install a compatible screw into another piece of scrap wood. Begin with a modest clutch setting and stop when the screw reaches the intended depth. Practice until you can keep the bit aligned without forcing the tool.
Judge success by control
Look for a steady drill, a secure workpiece, a clean hole, and a screw seated at the intended depth without visible damage.
Frequently Asked Questions
Q
How do you use a power drill for the first time?
Read the manual, wear safety glasses, and practice on a secured piece of scrap wood. Fit a suitable bit with the drill disconnected, tighten the chuck, select the correct direction and mode, and start at low speed. Use gentle pressure and release the trigger before inspecting the result.
Q
Should I use a high or low speed on a power drill?
Use a speed that suits the bit, material, and drill. Low speed often gives better control when starting a hole or driving screws, while higher speeds may suit smaller bits in appropriate materials. Follow the tool and bit instructions rather than assuming one speed works for every task.
Q
What do the numbers on a drill mean?
On many drill drivers, the numbered ring controls the screw-driving clutch. Lower settings generally allow less turning force before the clutch slips, while higher settings allow more. These numbers are not universal torque measurements. Use drill mode for ordinary drilling when your model provides it.
Q
Can I use a power drill as a screwdriver?
Yes. A drill driver can drive and remove many screws when fitted with the correct driver bit. Set the direction, begin at a low speed, and use a suitable clutch setting to help avoid overtightening. For very delicate work or unusual fasteners, a manual screwdriver may offer better control.
Q
Can I drill into a wall with a regular power drill?
It depends on the wall material and the drill. A standard drill may handle some suitable tasks, but hard brick and concrete often need a hammer drill or rotary hammer with a compatible masonry bit. Before drilling any wall, check for hidden wires, pipes, and other hazards, and use the correct anchor for the load.
Q
Why does my drill bit keep slipping?
A bit may slip because the chuck is loose, the shank is incompatible, the bit is damaged, or the chuck is worn. Disconnect the drill, inspect the bit, and secure it according to the manual. If the chuck still cannot grip the bit firmly, stop using the tool until it is repaired.
Q
Do I need to drill a pilot hole before driving a screw?
Not always. Some screws are designed to enter certain materials without a pilot hole, but a pilot hole can reduce splitting and make installation easier in many wood projects. The right size depends on the screw, wood, and task, so follow the fastener maker’s guidance when available.
Q
How do I keep a drill hole straight?
Mark the hole carefully, secure the workpiece, and align the drill with the intended angle before starting. Use a guide or drill stand when greater accuracy is needed and the equipment is suitable. Apply steady pressure and avoid twisting the drill sideways as the bit cuts.
Q
When should I stop using a power drill?
Stop if the drill stalls repeatedly, the bit catches, the chuck loosens, or the tool develops smoke, a burning smell, visible damage, or an abnormal trigger response. Release the trigger and disconnect the power when safe. Do not continue until the cause is understood and any fault has been corrected.
✦ Wrapping Up
Conclusion
Learning how to use a power drill starts with a few habits: choose the right bit, secure the material, check the settings, and keep the tool aligned. Start slowly, use steady pressure, and stop if the bit catches or the drill behaves in an unusual way. These steps help you make cleaner holes and drive screws with better control.
Before moving to a finished wall, cabinet, or furniture piece, practice on scrap material. Check the manufacturer’s instructions for your drill, bit, fastener, and anchor. Take extra care with masonry, hidden utilities, large bits, and heavy wall-mounted items because those tasks can need special tools or qualified help.
💡 Key Takeaway
For your next project, mark one hole on a secured piece of scrap wood, fit a suitable bit with the drill disconnected, set a controlled speed, and practice drilling straight before working on the final surface.