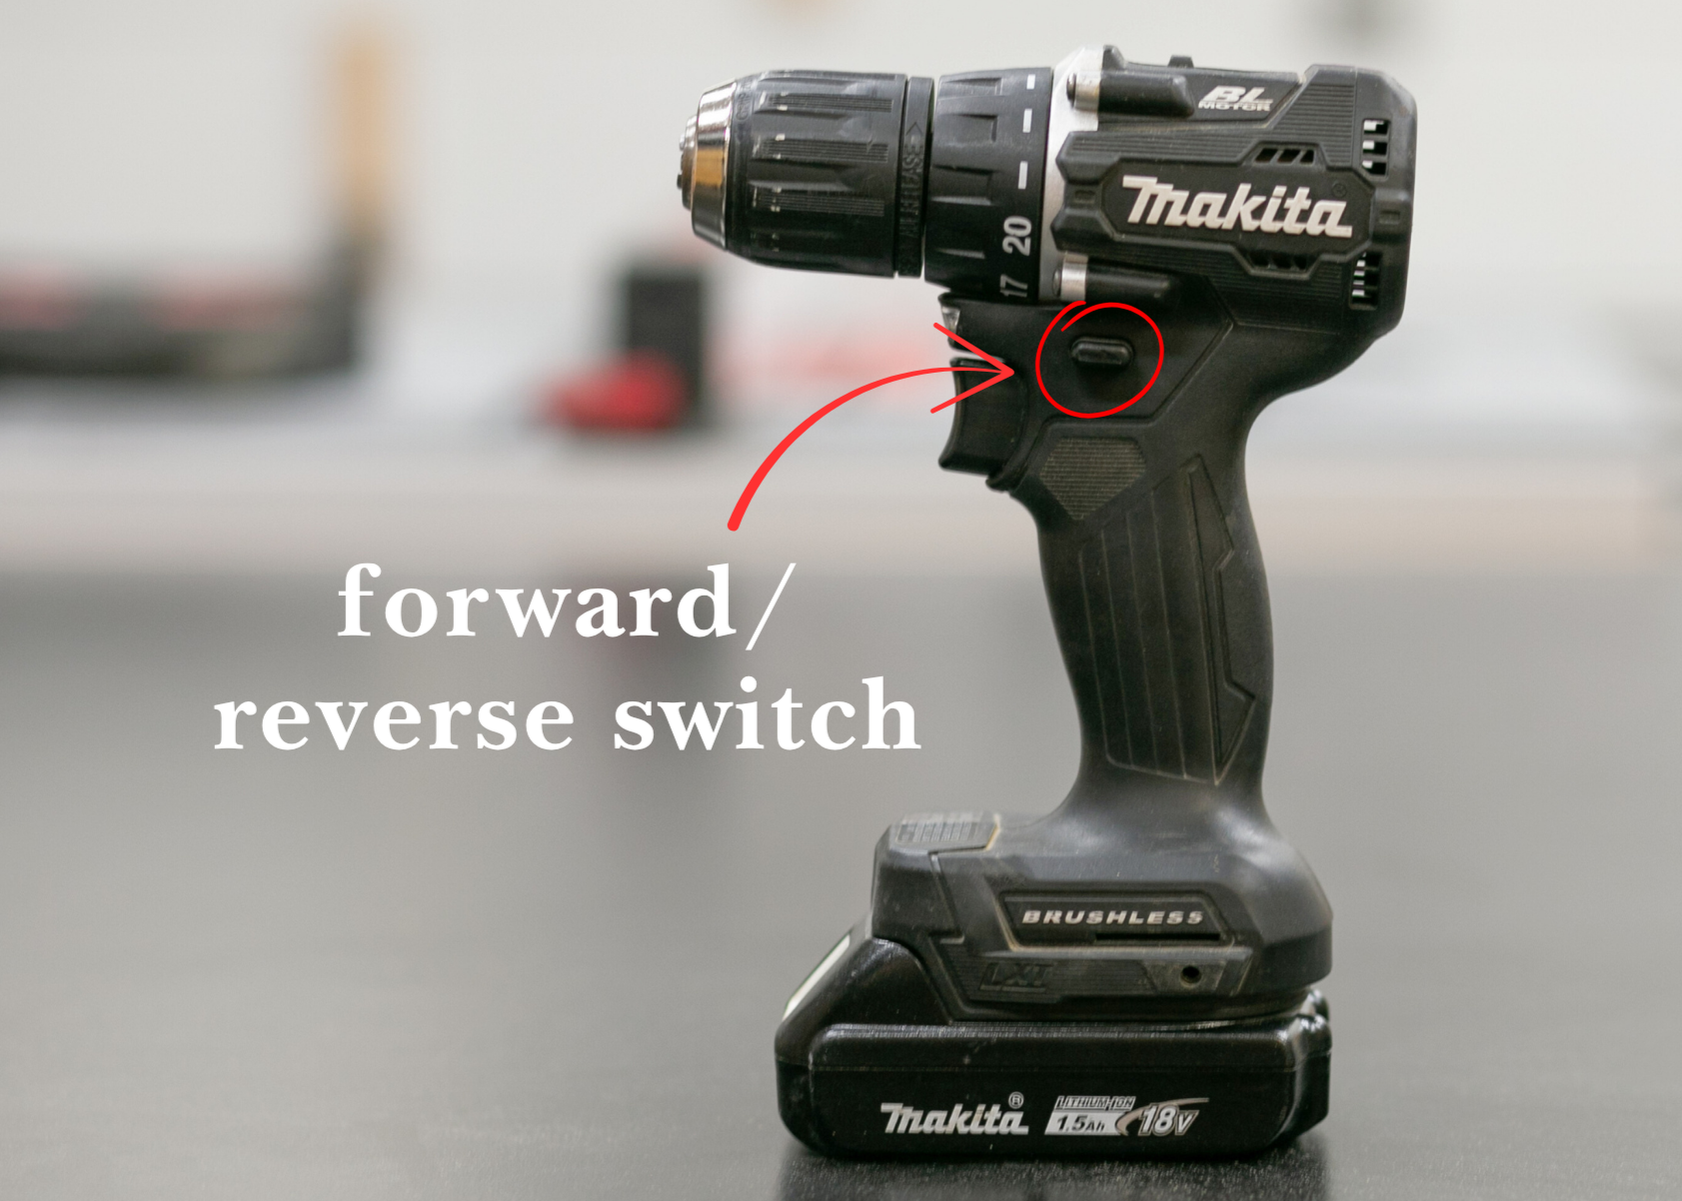
To reverse a drill, release the trigger, find the forward and reverse switch above the trigger, and push it to the opposite side. Squeeze the trigger gently to check that the chuck turns backward before removing a screw.
If you are fixing a loose cabinet handle, building a garage shelf, or repairing a deck in the United States, a power drill can save time. But a screw that will not come out can bring the job to a stop. In many cases, the answer is a small switch on the drill handle. This switch changes the direction in which the motor turns.
Most modern cordless drills have a forward and reverse control near the trigger. The exact switch position can vary by brand and model, but the basic steps are much the same. You do not need to take the drill apart or change the drill bit to reverse its direction.
Before you start, let go of the trigger and keep the bit away from your work. Check your drill’s manual if you cannot find the switch or if the tool behaves in an unusual way. This guide explains how to reverse a drill, remove screws, check the direction, and deal with common problems safely.
Source: storage.googleapis.com
What Does Reverse Mean on a Drill?
Reverse means the drill motor turns the chuck in the opposite direction from its normal forward setting. The chuck is the part at the front of the tool that holds a drill bit or screwdriver bit. When you pull the trigger, the motor spins the chuck and turns the bit.
On many drills, forward rotation is clockwise when you look straight at the back of the drill and toward the bit. Reverse rotation is counterclockwise from that same view. The view matters because looking from the other end can make the direction seem reversed.
For common screws with right-hand threads, forward rotation usually drives the screw in, while reverse rotation backs it out. The switch changes motor direction; it does not change the drill’s speed setting, clutch setting, or torque limit.
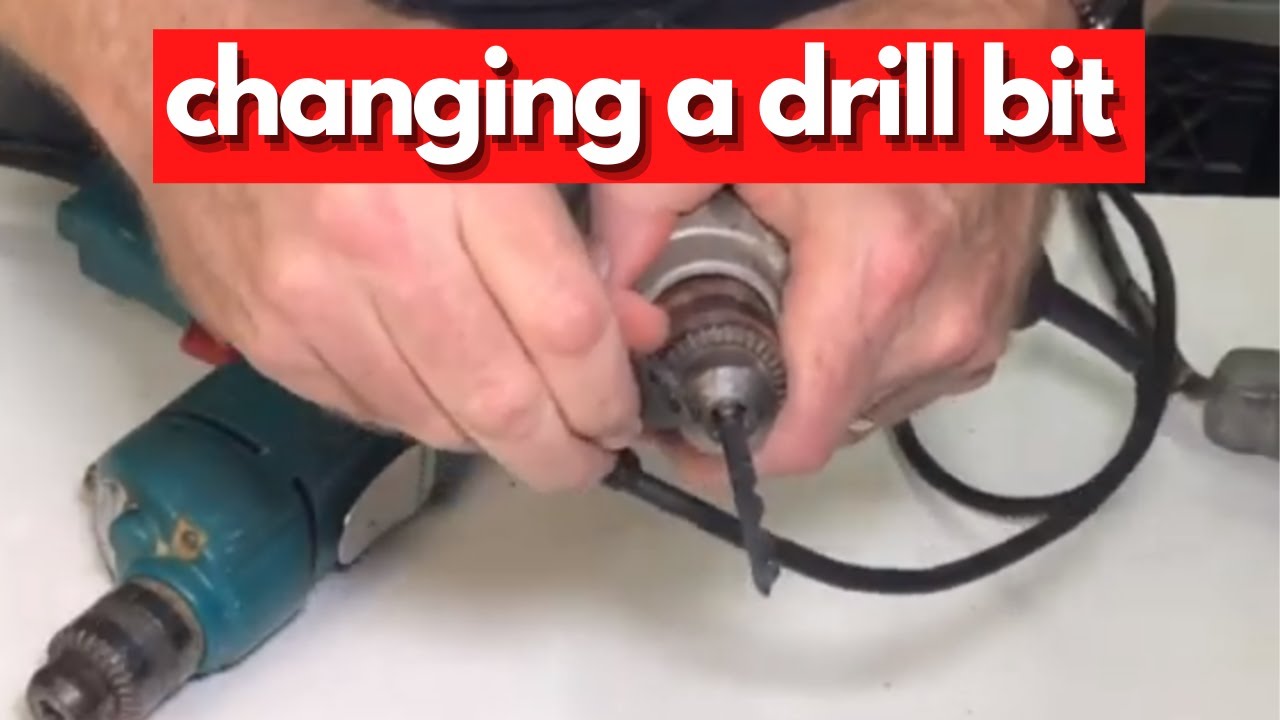
Source: www.youtube.com, The Bloke Cave
Forward
Usually turns a standard screw clockwise to drive it into wood, plastic, or another suitable material.
Reverse
Usually turns a standard screw counterclockwise to loosen or remove it.
Variable speed
Controls how fast the chuck turns when you press the trigger. It is separate from the direction selector.
Why Do Drills Have a Reverse Function?
The reverse function makes a drill more useful for home repairs and workshop tasks. You can remove screws, back out some bolts, release certain fasteners, and help free a bit that has become stuck in a suitable workpiece.
It can also help when a screw starts at the wrong angle or when you need to take apart furniture. However, reverse cannot repair a stripped screw head, a broken gear, or a damaged thread. Those problems may need a different tool or repair method.
For repairs
Remove cabinet hinges, shelf brackets, handles, and other screw-fastened parts.
For assembly
Back out a screw that is crooked or placed in the wrong hole.
For stuck bits
A brief reverse rotation may help release a bit, but stop if the tool binds or the bit cannot move freely.
How to Reverse a Drill Step by Step
You can reverse most standard cordless drills in a few seconds. The main rule is to stop the motor before moving the selector. This helps prevent accidental operation and reduces stress on the tool’s direction mechanism.
The switch often sits just above the trigger, where your thumb or index finger can reach it. Some drills use a sliding button that moves from left to right. Others use arrows or markings to show the direction.
Source: www.pinterest.com
Step 1: Release the trigger
Let go of the trigger and wait until the chuck stops completely. Never change direction while the motor is still spinning unless the manufacturer specifically permits that operation.
Step 2: Find the direction switch
Look above the trigger or on the handle for a small button or slider. Check the manual if you cannot identify it.
Step 3: Move the switch
Push the selector to the reverse position. On many models, pressing the switch from one side selects forward, while pressing it from the other side selects reverse. Do not assume the left side always means reverse.
Step 4: Check the selector position
Look for an arrow, symbol, or position marking. If the tool uses a center position, make sure the selector is fully in the intended direction before operating it.
Step 5: Test the drill
Keep the bit clear of your hands, clothing, and the workpiece. Press the trigger lightly for a brief test and watch the chuck’s direction.
Step 6: Remove the screw
Seat the screwdriver bit firmly in the screw head. Apply steady pressure along the screw’s axis, then squeeze the trigger gently to loosen it.
How Can You Tell If the Drill Is in Reverse?
The easiest check is to watch the chuck from a safe position while briefly pressing the trigger. If the chuck turns in the direction opposite to its normal forward rotation, the drill is in reverse. Keep fingers, hair, loose sleeves, and other objects away from the rotating parts.
You can also check the direction selector’s symbols. Many tools use arrows or labels, but the exact layout differs. The owner’s manual is the best guide when markings are unclear.
The screw backs out
A standard screw begins moving outward when the bit is correctly seated and the direction is right.
The screw goes deeper
Stop immediately. Release the trigger and check the direction selector before trying again.
The chuck does not turn
Check the battery, selector position, trigger response, and whether the tool is jammed.
What If the Direction Switch Will Not Move?
Some drills prevent the selector from changing position while the trigger is pressed or the motor is running. Release the trigger and wait for the chuck to stop before trying again. Use light finger pressure rather than forcing the button.
If the switch remains stuck, remove the battery or unplug the drill. Check the owner’s manual for the correct selector operation. Do not pry the switch with a screwdriver or open the housing unless you are qualified to service the tool.
Stop the motor
A spinning motor may prevent the switch from engaging properly.
Check for the center position
Some drills have a middle lock position that disables the trigger.
Seek service if needed
A cracked, loose, or jammed switch may need repair or replacement.
How to Reverse Different Types of Drills
The same basic idea applies to many electric drills, but the control layout can vary. Before changing the direction, identify the tool type and check its manual. A cordless drill, corded drill, hammer drill, and impact driver may use different controls or have different limits.
If a tool has no direction selector, do not assume it can reverse. Some specialized drills are designed for one direction or have controls that work differently.
Source: shuntool.com
How to Reverse a Cordless Drill
Most cordless drills place the direction selector above the trigger. Release the trigger, move the selector to reverse, and test the chuck at low speed. If the selector is centered, the trigger may be locked until you move the switch fully to one side.
If the battery is nearly empty, the motor may slow down or stop under load. Charge the battery according to the manufacturer’s instructions if the drill cannot turn the bit with normal pressure.
Before use
Check that the battery is seated correctly and the drill is set to a suitable speed.
During removal
Use firm, straight pressure on the screw head and avoid sudden trigger bursts.
How to Reverse a Corded Drill
Many corded drills have a forward and reverse selector near the trigger or handle. Release the trigger and wait for the chuck to stop before moving the switch. Keep the cord away from the bit, the workpiece, and any sharp edges.
If the drill has no obvious direction control, consult the manual. Disconnect the power plug before changing bits, inspecting a jam, or carrying out maintenance.
Keep the cord clear
Position the cord behind the tool so it cannot wrap around the chuck or catch on the work.
Disconnect before service
Unplug the drill before opening the chuck, clearing a jam, or inspecting the tool.
How to Reverse a Hammer Drill
Many hammer drills include a reverse function as well as a hammer mode. Release the trigger, select reverse, and confirm the direction before removing a fastener. For screw removal, use the rotation mode recommended by the manual rather than assuming hammer action is needed.
Hammer action is designed to help drill into suitable masonry. It is usually not needed for ordinary screw removal and may cause unnecessary vibration or damage if used on the wrong task.
Choose the correct mode
Use a normal rotation setting for routine screw removal unless the tool instructions say otherwise.
Check model instructions
Some hammer drills have mode and direction controls that must be set separately.
What About an Impact Driver?
Many impact drivers also have forward and reverse controls, often near the trigger. The switch may look different from the one on a drill, and some models include extra speed or drive modes. Check the manual before selecting a mode.
Impact drivers use rapid rotational impacts to drive fasteners. For a stuck screw, begin with a compatible bit, a secure fit, and controlled operation. If the screw head starts to strip, stop before the damage becomes worse.
Use the right bit
The bit must match the screw head and fit securely in the driver.
Avoid excess force
High torque can break a screw or damage the material around it.
How to Remove a Stuck Screw With a Drill in Reverse
A drill in reverse can remove many stuck screws, but the result depends on the screw head, the bit, the material, and the amount of rust or damage. Start with the simplest method. More force is not always the answer, especially when a screw is embedded in old wood or a metal fitting.
For home repairs, the goal is to turn the screw without stripping its head or damaging the surrounding surface. A few careful checks can prevent a small repair from turning into a larger one.
Source: shuntool.com
Step 1: Choose the Correct Screwdriver Bit
Use a bit that matches the screw head. A Phillips bit, a slotted bit, a square-drive bit, and a Torx bit are not interchangeable. A bit that rocks in the screw head can slip and round off the recess.
Inspect the screw head before applying power. If the recess is badly damaged, a standard screwdriver bit may not grip well enough. Consider a suitable manual extractor or another method designed for damaged fasteners.
Match the shape
Use the exact drive type required by the screw head.
Match the size
Choose a bit that fills the recess without excessive movement.
Replace worn bits
A rounded or chipped bit is more likely to slip.
Step 2: Set a Suitable Speed and Clutch
For a screw that resists turning, start slowly so you can feel how the bit engages. A low-speed setting can give you better control. If your drill has a clutch, choose a suitable setting and increase it only if needed, following the tool’s instructions.
Clutch behavior varies by drill. Some models limit torque in a way that affects screw removal, while others may not offer the same control in every mode. If the clutch slips repeatedly, stop and check the settings instead of holding the trigger longer.
Start slowly
Use a light trigger pull to see whether the screw begins to turn.
Keep the tool straight
Hold the bit in line with the screw to reduce slipping.
Step 3: Apply Steady Pressure
Place the bit firmly in the screw head before pressing the trigger. Push along the screw’s axis, keeping the drill aligned with the fastener. Use enough pressure to maintain contact, but do not lean so hard that you lose control.
If the screw begins to move, keep the trigger steady and let the tool work. If the bit slips, the screw head twists, or the motor stalls, release the trigger and reassess the problem.
Keep your stance stable
Stand where you can control the tool if the bit slips or the screw suddenly releases.
Stop when the bit slips
Repeated slipping can damage the screw head and make removal harder.
Step 4: Deal With a Screw That Still Will Not Move
If a screw will not turn, do not keep forcing the drill. Check whether the selector is truly in reverse and whether the bit fits the head. Rust, paint, corrosion, damaged threads, or a screw driven too deeply may be the real cause.
For a suitable metal fastener, a product made to loosen rusted fasteners may help if its label permits use on that material. Follow its instructions and keep liquids away from the drill’s motor, battery contacts, and other electrical parts. Allow the product to work for the stated time before trying again.
If the screw head is stripped, use a suitable screw extractor or ask a repair professional. If the fastener is near wiring, plumbing, a gas line, or a load-bearing part, confirm what is behind the surface before drilling or cutting.
Rust or corrosion
Use a suitable penetrating product when permitted, and avoid uncontrolled force.
Stripped screw head
Use a method designed for damaged fasteners rather than repeatedly slipping the bit.
Broken or jammed tool
Disconnect power and inspect only as allowed by the manufacturer’s instructions.
Forward vs. Reverse: Which Direction Should You Use?
Choose forward for most standard drilling tasks and for driving ordinary right-hand threaded screws. Choose reverse to remove those screws or loosen compatible fasteners. The correct direction depends on the job and the fastener, so check before applying power.
The table below gives a quick guide for common household tasks. It assumes a normal drill with a working direction selector and standard fasteners. Special threads, unusual tools, and manufacturer-specific procedures may require a different approach.
Source: shuntool.com
Drilling a pilot hole
Use forward rotation with a suitable drill bit and speed for the material.
Driving a standard screw
Use forward rotation and a compatible screwdriver bit.
Removing a standard screw
Use reverse rotation with the bit seated firmly in the screw head.
Loosening a standard right-hand threaded bolt
Reverse rotation usually loosens it, provided the drill and socket attachment are suitable for the task.
Working with a left-hand threaded fastener
The normal direction may be different. Confirm the thread type before choosing a direction.
Can You Drill a Hole in Reverse?
A conventional drill bit is designed to cut most effectively in its intended direction. Running it backward usually does not produce a normal, clean hole and can cause rubbing, poor cutting, or tool damage. Reverse is mainly useful for removing screws and for certain tasks specifically supported by the tool or accessory manufacturer.
Some specialized bits and drilling systems have different operating rules. Follow the bit manufacturer’s instructions rather than assuming that a standard drill bit can cut in both directions.
For wood
Use forward rotation with a suitable wood bit and control the drill to avoid splintering.
For metal
Use a suitable metal-cutting bit, the recommended speed, and proper workpiece support.
For masonry
Use a suitable masonry bit and the correct drill mode for the material and tool.
Can Reverse Help Remove a Broken Drill Bit?
Reverse rotation may help with certain stuck bits, but it cannot safely remove every broken bit. If the bit has snapped inside the workpiece, the remaining piece may be wedged, damaged, or too hard for an ordinary drill to grip.
Disconnect power before inspecting the tool or workpiece. Use a removal method designed for the specific bit and material, and seek professional help if the broken bit is embedded in metal, masonry, or a part that must remain structurally sound.
If the bit is still in the chuck
Disconnect power and release it according to the chuck instructions.
If the bit is broken inside the material
Do not assume reverse will free it. Assess the material and use a suitable extraction method.
Common Drill Reversal Problems and How to Fix Them
If your drill will not reverse, start with simple checks that do not require taking the tool apart. Confirm the direction selector position, battery charge or power connection, and whether the chuck is free to turn. Stop using the tool if you smell burning, hear unusual grinding, or see smoke or sparks beyond what the manufacturer’s instructions describe as normal.
A drill that runs in only one direction may have a worn selector, damaged wiring, a motor problem, or an electronic control fault. These faults are not all user-serviceable, so avoid opening the housing unless you have the required skills and the manufacturer permits that repair.
Source: storage.googleapis.com
The Drill Runs Only in Forward
First, release the trigger and move the selector fully into reverse. If the tool has a center lock position, make sure the switch is not stuck there. Try a brief test without a bit or with the bit safely clear of all surfaces.
If the drill still runs only in one direction, stop and disconnect power. A faulty direction switch or internal control may be responsible. Arrange service or replacement instead of trying to bypass the selector.
Check the selector
Make sure it is fully engaged in the intended direction.
Check the manual
Confirm the model’s operating steps and any electronic mode restrictions.
Arrange repair
If the control fails to change direction, use qualified service.
The Drill Makes Noise but the Chuck Does Not Turn
A motor that runs while the chuck stays still may indicate a loose chuck, a jammed mechanism, or an internal fault. Release the trigger at once. Do not hold the trigger down in an attempt to force the mechanism to move.
Disconnect the battery or unplug the drill before checking for a loose bit or visible obstruction. If the chuck or gearbox appears damaged, follow the manufacturer’s repair guidance.
Stop the motor
Continued operation can worsen a jam or mechanical fault.
Check the attachment
Inspect the bit and chuck only with the tool disconnected from power.
The Drill Stops When You Select Reverse
Some drills stop when the direction selector is in the middle position. Move it fully to the desired side with the trigger released. If the tool remains unresponsive, check the battery, charger, cord, and other basic power items according to the manual.
If the tool has power but does not run in either direction, an overload, battery protection feature, or internal fault may be involved. Let the tool cool if the manual recommends it, and do not continue if the housing is unusually hot or damaged.
Check the lock position
Move the selector completely into forward or reverse.
Check the power source
Use the specified battery or power supply and follow the manufacturer’s troubleshooting steps.
Stop if overheating occurs
Let the tool cool only as directed and arrange service if the problem returns.
Drill Safety Rules to Follow Before Reversing
A drill can twist your wrist, throw a bit, or damage a workpiece if it catches unexpectedly. Good habits matter even when all you want to do is remove one small screw. Take a moment to secure the work and make sure you can control the tool.
Wear eye protection when drilling or removing fasteners, and follow the tool’s instructions for any additional protective equipment. Tie back long hair, remove loose jewelry, and keep sleeves and gloves away from rotating parts. Gloves may be suitable for some material-handling tasks, but they can catch in a spinning chuck, so never bring them near rotating parts.
Source: www.youtube.com, Gk Technical
Disconnect Power Before Maintenance
Remove the battery from a cordless drill or unplug a corded drill before changing bits, clearing a jam, cleaning the chuck, or inspecting damage. Releasing the trigger alone is not enough protection against accidental startup during maintenance.
If the tool uses a special chuck or bit holder, follow the manufacturer’s steps to remove the attachment. Keep the tool disconnected until the inspection or change is complete.
Prevent accidental startup
Disconnect the power source before working on the chuck or bit.
Keep the workpiece secure
Use a clamp or suitable support when the material could spin or shift.
Use the Right Bit and Avoid Excess Force
A bit that does not match the screw head can slip and damage both the screw and the workpiece. A dull or bent bit can also cause poor results. Inspect bits before use and replace damaged ones.
Do not force a drill that stalls, overheats, or produces unusual sounds. Let the tool stop, disconnect power, and identify the cause. If you are working near hidden wiring, pipes, or gas lines, check the area before drilling or removing a deeply embedded fastener.
Wear eye protection
Protect your eyes from loose debris, dust, and broken fastener pieces.
Use controlled pressure
Keep the bit aligned and let the tool do the work.
Respect the tool’s limits
Use only attachments and operating modes approved for the drill.
A Quick Checklist Before You Start
Before you reverse a drill, use this short checklist to make sure the tool is ready. These checks are useful for a small furniture repair, a home workshop task, or a larger DIY project. They also help you spot problems before applying force to a stuck fastener.
If any check fails, stop and correct the issue before continuing. A drill that works correctly should respond to the direction switch, turn smoothly, and let you control the bit without unusual noise or vibration.
Source: makergray.com
Power is under control
The trigger is released, and the chuck has stopped before you move the selector.
The direction is confirmed
The switch is fully in reverse, based on the model’s markings or manual.
The bit fits
The screwdriver bit matches the screw head and is securely held in the chuck or bit holder.
The work area is safe
The workpiece is stable, your eyes are protected, and the bit is clear of wires and other hazards.
The test is successful
A brief, low-speed test confirms the chuck turns in the intended direction.
How Do You Know the Job Is Done Correctly?
The screw should turn out without repeated slipping, and the drill should stop normally when you release the trigger. The tool should not make new grinding sounds, smell burnt, or become unusually hot during a simple task.
If the screw remains stuck or the drill behaves differently from normal, do not keep trying the same action. Recheck the bit, direction, fastener condition, and tool settings. A damaged screw or faulty drill may need a different method.
Successful removal
The screw backs out, the bit stays seated, and the surrounding material remains intact.
Successful tool operation
The drill starts and stops normally and responds to the direction selector.
Frequently Asked Questions
Q
Where Is the Reverse Button on a Drill?
On many cordless and corded drills, the reverse button is a small sliding switch just above the trigger. It may move from one side of the handle to the other. Check the arrows, markings, or owner’s manual because the exact position varies by model.
Q
Do I Need to Hold the Reverse Button While Using the Drill?
Usually, no. On most drills, the selector stays in the chosen position after you move it. You then use the trigger to run the drill. Some tools have different control designs, so follow the instructions for your specific model.
Q
Can I Change a Drill From Forward to Reverse While It Is Running?
The safest general method is to release the trigger and wait until the chuck stops before changing direction. Some models may allow electronic braking or other special operation, but do not assume that applies to your drill. Check the manual before using any different method.
Q
Why Does My Drill Not Work in Reverse?
The selector may be in the center lock position, may not be fully engaged, or may have a fault. A weak battery, jammed chuck, or internal electrical problem can also stop the tool. Check the basic settings and power source first. If the drill still will not reverse, disconnect it and arrange qualified service.
Q
Does Reverse Loosen Every Screw?
Reverse loosens most standard right-hand threaded screws because it turns them counterclockwise. It may not loosen left-hand threaded fasteners, damaged screws, rusted screws, or fasteners with broken threads. Confirm the thread type and condition before applying force.
Q
Can I Use Reverse to Drill Into Wood or Metal?
A standard drill bit is designed to cut in its intended direction, which is usually forward. Reverse rotation generally does not cut a normal hole as intended and may cause rubbing or damage. Use reverse mainly for removing fasteners unless the manufacturer specifically approves a different use.
Q
What Should I Do if the Screw Head Is Stripped?
Stop using the ordinary screwdriver bit if it keeps slipping. Try a correctly sized, undamaged bit only if the recess still offers a firm grip. If it does not, use a suitable screw extractor or ask a repair professional. Repeatedly running the drill can make the damage worse.
✦ Wrapping Up
Conclusion
Learning how to reverse a drill is simple once you know where the direction switch sits. Release the trigger, wait for the chuck to stop, move the selector to reverse, and test the direction before removing a screw. Most standard cordless and corded drills use this basic process, although switch layouts and special functions can differ.
For the best result, use a bit that fits the screw head, keep the drill aligned, and apply steady pressure. Stop if the bit slips, the motor stalls, or the tool makes unusual noises. If the selector fails or the drill cannot run in reverse, check the manual and seek service rather than forcing the switch.
💡 Key Takeaway
Release the trigger, select reverse, confirm the chuck turns backward with a brief test, and then remove the screw with a correctly fitted bit. Disconnect the drill from power before changing bits or inspecting a jam.
A dewalt brushless drill set sounds simple until you notice some bundles include a hammer drill, others add a bit set, and only some clearly claim a brushless…
A good driver drill set shouldn’t make you switch battery families halfway through a project. I compared DEWALT’s 20V MAX options, including a drill, an impact…
Finding a twotool kit shouldn’t mean sacrificing the battery platform you already own. I compared five impact drill set makita options through battery fit,…