How to operate a cordless drill: Easy guide
Learning how to operate a cordless drill sounds simple. You squeeze the trigger, a hole appears, right? Not quite.
Most first-timers skip the clutch setting, grab the wrong bit for the material, and wonder why the screw head is now a rounded, useless circle. The whole system clicks into place once you understand what each control actually does and when to shift between them.
Manufacturer specs for a standard 18V lithium-ion combo drill as of 2026 list 0 to 1,500 RPM on high speed and anywhere from 15 to 60 ft-lb of torque, depending on the model. That is a wide range, and the settings you pick will decide whether you get a clean 1/4-inch hole in oak or a blown-out drywall anchor. Let's walk through the controls, the decisions, and the steps in the order that actually works.
Quick Answer
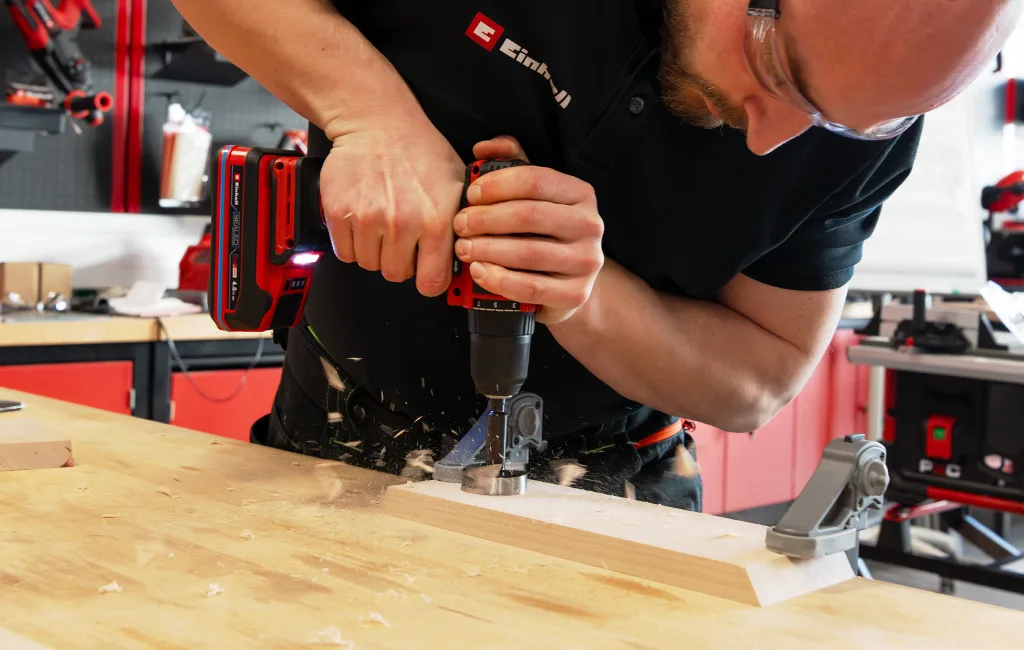
To operate a cordless drill: set the clutch to the number matching your material. Pick low speed for most drilling, high speed for boring in wood. Squeeze the trigger gently, let the bit seat, then add steady pressure.
Release the trigger and pull the bit straight out when the hole is done.
Why Most First-Time Drill Users Get Stuck (And It's Not the Trigger)
The trigger gets blamed for everything. If the hole is crooked, the bit slipped, or the screw head rounded off, people assume they just "used too much force." That is rarely the whole story.
In practice, three things go wrong before the trigger even gets squeezed:
- The clutch is set wrong. Driving a drywall anchor at clutch 30 means it keeps spinning past the point the anchor seats. The anchor spins instead of driving in, and the drywall face cracks.
- The bit does not match the material. A standard HSS twist bit on a concrete block chews through its tip in about four seconds. A masonry bit on a steel plate walks and chips the surface.
- The workpiece is not clamped. If the board, pipe, or panel can rotate, the bit cams out, kicks back, or pulls your wrist with it. OSHA's powered hand tool safety guidance specifically calls out unsecured workpieces as a top cause of hand-tool injuries.
The fix for all three is the same: a 20-second setup ritual before you touch the trigger. Pick the bit, set the clutch, clamp the piece. Do that once and the rest of the operation is just "grip, squeeze, feed, release."
The 4 Controls That Do 90% of the Work: A 60-Second Orientation
Before you drill a single hole, spend 60 seconds learning the four controls on your tool. Every manufacturer lays them out differently, but the functions are the same.
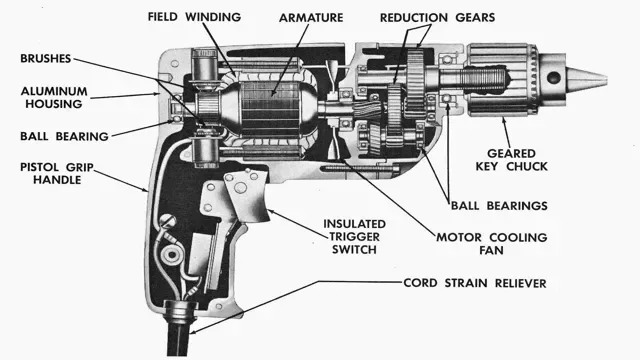
| Control | Where to find it | What it does |
|---|---|---|
| Variable-speed trigger | Inside the handle grip | Squeeze = go. Release = stop. Depth of squeeze = RPM. |
| Forward / reverse toggle | Small flip switch above the trigger | Forward drives the bit in. Reverse extracts it. |
| Two-speed gearbox | Sliding selector on top of the body | "1" = low RPM, more torque. "2" = high RPM, less torque. |
| Torque clutch ring | Numbered collar around the nose | Sets the max torque before the clutch slips. Asterisk = full drill mode. |
Four quick pairings to remember:
- Low speed + low clutch number = driving screws into soft material like drywall, pine, or plastic.
- Low speed + high clutch or locked = boring holes in wood or metal.
- High speed + locked clutch = boring long, clean holes in wood.
- Reverse = unjamming a bit or spinning a broken screw out counterclockwise.
You do not need to memorize all of this on day one. You just need to know which control you are turning and what it changes.
Clutch Numbers, Speed Selector, and Forward/Reverse: What They Actually Control
The clutch ring confuses people most. You see numbers from 1 to 30 (or 1 to 65 on bigger tools) and a hole or asterisk at the end, and you think "higher number, more power, always better." That is the opposite of what the clutch is for.
The clutch is a torque limiter. Here is how it works in plain terms:
- Low number (3 to 8): The internal spring releases at low torque. Use this for #8 or #10 drywall screws that seat at roughly 5 to 8 ft-lb. The clutch clicks open before the bit can crush the drywall.
- Mid number (10 to 20): Good for deck screws into soft pine or pre-drilled pilot holes in hardwood. Torque threshold sits around 15 to 25 ft-lb.
- High number (25 to 40+): For lag screws, structural wood, or dense hardwoods where the screw needs real torque to seat.
- Locked (asterisk or open hole): The clutch is disengaged. The motor runs at full torque. Use this for boring holes, not for driving screws. Drive a screw in locked mode and you will strip the head.
The speed selector works like a car's gearbox. Speed 1 gives you more torque at the bit tip. Use it for metal, masonry, and any situation where the bit needs to bite before it cuts.
Speed 2 gives you more RPM. Use it for boring long holes in wood where cutting speed matters more than raw torque.
Forward/reverse is simpler than you'd think. Forward is the only direction you drill or drive in. Reverse handles two jobs: extracting a jammed or broken bit, and spinning a broken screw out counterclockwise.
If the bit ever stalls and the motor hums, kill the trigger, flip to reverse, and gently back it out.
Three Variables That Change Every Step You'll Take Next
Before you set up the drill, lock in three variables. They determine your bit choice, your clutch number, and your speed selection. Change any one of them and the rest shift.
Variable 1: The material you are cutting into.
- Wood (soft pine, hardwood oak, plywood) → brad-point or HSS twist bit, speed 1 or 2, clutch locked for boring.
- Metal (sheet steel, mild steel, aluminum) → HSS twist bit, center punch mark first, speed 1 only, cutting oil for anything over 1/4 inch thick.
- Masonry / concrete → carbide-tipped masonry bit, speed 1, hammer-drill mode if your tool has it, ANSI Z87.1 safety glasses minimum.
- Drywall → 1/8 to 1/4 inch twist bit or a dedicated anchor bit, speed 1, low clutch.
Variable 2: The task (bore a hole vs. drive a screw).
- Boring → clutch locked, steady feed, back the bit out every 3 to 4 inches in deep holes to clear chips.
- Driving → clutch set to the screw's torque threshold, bit fully seated in the recess before you squeeze.
Variable 3: Whether the workpiece is clamped or free.
- Clamped (vise, C-clamp, buddy holding) → feed with confidence. The piece will not rotate under the bit.
- Free / hand-held → use your lowest clutch, your slowest speed, and a center punch dimple to stop the bit from walking. If the piece is thin or small, clamp it. Full stop.
Run these three through your head before you pick up the tool. "I'm boring a 3/8-inch hole in a clamped 2×4 pine board." That one sentence tells you: brad-point bit, speed 1, clutch locked, medium feed pressure. Done.
Picking the Right Bit and Setting the Clutch Before You Start
This is the step that separates a clean hole from a chipped one, and a seated screw from a galled head.
Bit selection by material:
| Material | Bit type | Typical sizes | Notes |
|---|---|---|---|
| Soft wood (pine, poplar) | Brad-point twist | 1/8" to 1/2" | Two tiny centering tips keep the bit from walking. |
| Hardwood (oak, maple) | HSS twist or brad-point | 1/8" to 3/4" | Slow speed, steady feed, back out to clear chips. |
| Sheet / mild metal | HSS twist (black-oxide) | #2 to 1/2" | Center punch first. Add cutting oil above 1/4" stock. |
| Concrete / masonry | TiN-coated carbide masonry bit | 3/8" to 1" | Speed 1 only. Let the bit walk the hole. |
| Drywall / plaster | HSS twist or Forstner | 1/8" to 3/4" | Low clutch. Watch the back side for burst. |
Clutch setting quick guide:
- Drywall screw (#8, 1 to 2 inch) → clutch 5 to 8
- Deck or fence screw (21/4 inch into soft wood) → clutch 12 to 18
- Lag bolt (1/2 inch into hardwood, pilot pre-drilled) → clutch 25 to 35, or locked if using an impact driver
- Boring any hole → clutch locked, speed 1 for metal and masonry, speed 2 for wood
One last check before you squeeze the trigger: run your thumb along the bit flutes. Any nick, flat spot, or visible chip means the bit will walk, bind, or snap. A $4 replacement bit costs less than an hour of frustration and a cracked workpiece.
Drilling a Clean Hole: Wood, Metal, Drywall, and Masonry, Step by Step
The bit is loaded, the clutch is set, the piece is clamped. Now you cut material. The steps shift depending on what you are boring through, so here is the branching path.
Wood (soft and hard)
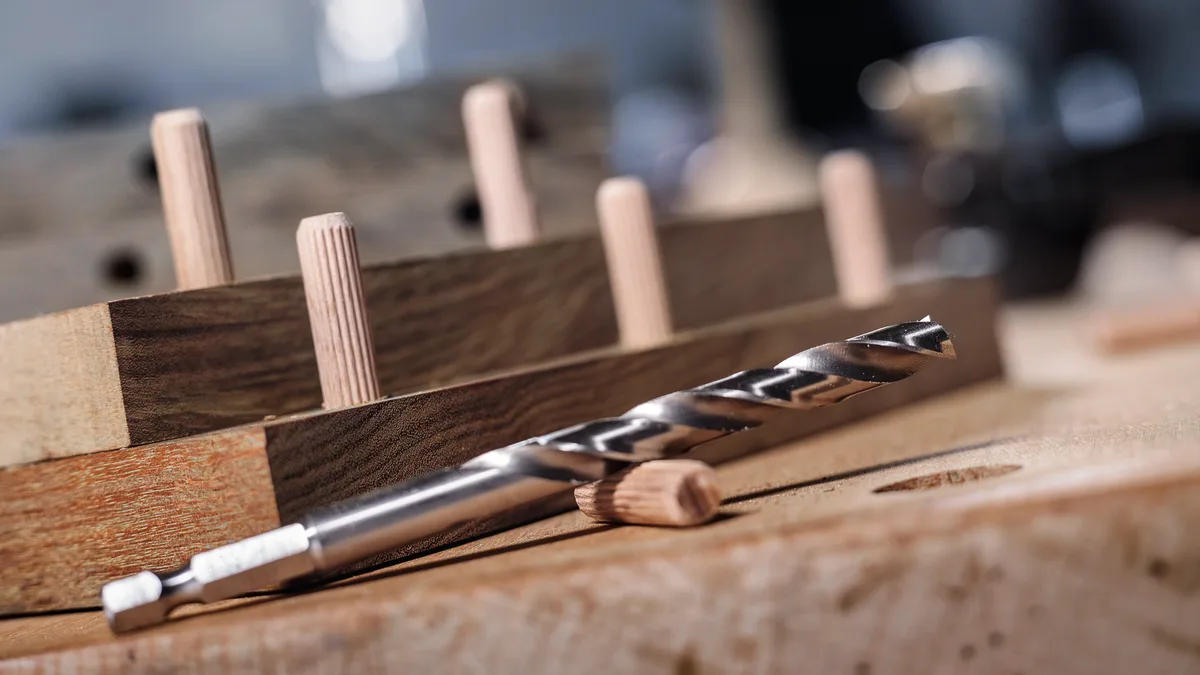
For pine, poplar, or plywood: brad-point bit, speed 1, clutch locked. Press the tip into your pencil crosshair. Squeeze the trigger at about 30 percent.
Let the two centering tips bite first, then feed with steady, even pressure. For holes deeper than 2 inches, back the bit out every 3 to 4 inches to clear chips.
For oak, maple, or walnut: same bit, same speed, but halve your feed rate. Hardwood generates heat fast. Listen for the motor pitch dropping.
That is your cue to ease off or back out and clear.
Metal (sheet, mild steel, aluminum)
For anything over 18 gauge: center punch a dimple first. HSS twist bit, speed 1, clutch locked. Add a drop of cutting oil on the entry point for stock thicker than 1/4 inch.
Back the bit out every 1/2 inch to clear the metal swarf. If the bit starts to screech, stop. The tip is likely nicked or dull.
Drywall and plaster
For a pilot hole for an anchor: 1/8 to 1/4 inch HSS twist bit, speed 1, clutch locked. Press lightly. You want the bit to bite, not chew.
Stop 1/4 inch before the back side to avoid a burst. For a 3/4 inch Forstner cable pass-through, use speed 1 and let the cutting ring do the work. Do not add pressure.
Masonry and concrete
If your tool has a hammer-drill mode: carbide masonry bit, speed 1, hammer mode on, clutch locked. Let the percussive action do the work. Do not press hard.
If you have a standard drill with no hammer function: use a short "peck" rhythm. Squeeze, let it advance 1/8 inch, release, rotate slightly by hand, repeat. Slower, but it works up to about 3/4 inch in cured concrete.
Driving Screws Without Stripping the Head or Blowing Out the Drywall
The biggest screw-driving mistake is starting the bit before it is fully seated in the recess. If the bit is even slightly off-angle, the flat of the bit skims the corner of the Phillips or square drive. One squeeze and you have a rounded, unusable head.
The correct sequence:
- Press the bit tip into the screw recess until the shank sits flush against the workpiece surface. No gap, no rocking.
- Set the clutch to the number from the table above. For a #10 drywall screw into a stud, that is clutch 6 to 8.
- Squeeze the trigger at 20 to 30 percent. The screw should start advancing slowly.
- As the head nears the surface, the clutch clicks open. That is your stop signal. Release the trigger.
- For lag or deck screws into hardwood, you may need two or three short squeezes. Let the clutch cycle between them.
If the head is already rounded: do not keep driving. Switch to a screw extractor. Forcing a stripped head further just destroys the surrounding material.
When a Cordless Drill Is Not the Right Tool: Impact Driver, Hammer Drill, and Other Splits
A cordless combo drill handles 80 percent of home tasks. But specific jobs call for a different tool.
- Driving lag screws longer than 3 inches into hardwood or concrete. The drill's clutch slips or the motor stalls. An impact driver delivers 700 to 1,200 in-lb of rotational torque in short hammering bursts, driving the screw without reaction torque twisting your wrist.
- Boring into concrete, brick, or stone. A combo drill will walk, overheat, and dull the bit in seconds. A hammer drill (rotary-percussive, not an impact driver) strikes the bit tip 2,500 to 4,000 times per minute.
- Boring large-diameter holes (3/4 inch and up) in wood. A Forstner bit on a standard drill works, but a hole saw with a mandrel cuts cleaner and faster.
The rule is simple: if the torque demand exceeds your drill's clutch max, or if the material needs percussive action, step up to the dedicated tool.
The Six Mistakes That Ruin Bits, Crack Workpieces, and Waste an Hour
These six errors show up in nearly every "why is my drill doing this" thread we track. All are preventable with 30 seconds of setup.
- Bit does not match the material. A twist bit on concrete. A masonry bit on steel. The chip-out is instant and the bit is usually trash.
- No center punch on metal. The bit walks, skates across the surface, and you end up with a crescent gouge instead of a round hole.
- Clutch not switched to locked for boring. You set clutch 10 for a screw job, forget to turn it, and your "hole" is actually a clutch-slip groove.
- Workpiece not clamped. The piece rotates, the bit cams out, and you get a kidney-shaped hole or a snapped bit.
- Feeding too hard on hardwood or metal. The motor stalls, the bit heats up, and the HSS flute softens. You just bought a new bit.
- Holding the trigger through a deep hole. Chips pack the flutes. The bit binds. The motor strains. Back out, clear, re-enter. Repeat.
What to Check Before Drilling Into a Wall (Wires, Pipes, and the Study Behind It)
If you are boring into drywall, plaster, or masonry to hang something, you are boring blind. Behind that surface are electrical cables, water supply lines, HVAC ducts, and structural studs. Hitting one of those is not a chipped-bit situation.
It is a shut-off valve and an electrician.
The NEC calls for a minimum 1/2 inch clearance from in-wall wiring to any penetration point. Per NFPA code guidance, you can mitigate this risk with a non-magnetic stud finder or a cable-detecting tool before you mark your hole.
Pre-drill checklist for any wall:
- Run a stud finder with AC wire detection. Mark every stud, wire path, and (if available) pipe path.
- Check your electrical panel map. Know which circuits run vertically at which stud bays.
- For kitchens and bathrooms: shut off the main water supply before boring above a sink or behind a vanity.
- Boring above a ceiling into the floor above: use a shallow depth stop. You do not want a 2-inch hole through a subfloor.
- Exterior masonry walls: call your utility district. Gas and water mains run 18 to 36 inches below grade, but in older homes they can sit higher.
Two minutes of scanning saves a thousand dollars in drywall, pipe, or circuit replacement.
Battery Drop in Cold Weather and Why Your 18V Pack Feels Like 12V in January
Lithium-ion cells lose roughly 30 to 40 percent of their rated amp-hours below 40 degrees F. An 18V 4.0 Ah pack that runs 75 minutes in a garage will hit 40 minutes on a Minnesota February. Keep your spare pack in a jacket pocket to precondition it before the next squeeze.
Keeping the Chuck, Trigger, and Battery Healthy Past the First Season
Blow compressed air through the chuck face and trigger housing monthly. Store any Li-ion pack at 40 to 60 percent charge for long gaps. Never leave a swollen or cracked pack on a charger.
Per UL 2580 battery safety standards, a bulged cell is a thermal event waiting to happen.
Quick-Reference Table: Material, Task, Bit, Speed, and Clutch Setting
| Material | Task | Bit | Speed | Clutch |
|---|---|---|---|---|
| Pine, plywood | Bore 3/8" | Brad-point HSS | 2 | Locked |
| Oak, maple | Bore 1/2" | HSS twist | 1 | Locked |
| Sheet metal | Bore 1/4" | HSS + punch | 1 | Locked |
| Concrete | Anchor hole 3/8" | Carbide masonry | 1 + hammer | Locked |
| Drywall | #10 screw | Magnetic driver bit | 1 | 6 to 8 |
| Softwood | 2" deck screw | Hex drive bit | 1 | 15 to 22 |
FAQs From People Who Are Mid-Project and Googling Fast
What speed do I use for drilling into wood versus metal?
For wood, use speed 2 on softwoods and speed 1 on hardwoods. For any metal, use speed 1 only. Higher RPM on metal heats the bit tip and dulls the cutting edge within seconds.
Let the slower speed and steady feed do the work.
My drill bit keeps slipping out of the chuck. Why?
Two causes. The bit shank is too small for the chuck opening, so a 1/8-inch bit in a 3/8-inch chuck will not grip firmly. Or the chuck jaws are worn or have debris inside.
Open the chuck, blow out the jaws, and reseat the bit. If the chuck is keyed, make sure the key is fully seated before tightening.
Do I need hammer-drill mode for every concrete hole?
No. For small anchor holes (1/4 to 3/8 inch) in cured concrete, a standard masonry bit on a combo drill with a peck-drilling rhythm works fine. Save the hammer-drill mode for 1/2 inch and larger holes, or for soft, chalky mortar where the bit would just skate without percussive force.
How do I know when my lithium-ion battery is degraded?
If your 18V pack runs roughly 40 percent less time than it did six months ago, the cells are losing capacity. A swollen or bulging pack means the internal separator is failing. Stop using it, do not charge it, and dispose of it at a battery recycling drop-off.
Can I skip the impact driver and just use my combo drill for everything?
For drywall, cabinet, and light-wood screws up to 2 inches, yes. A clutch-set combo drill handles them fine. For 21/4-inch and longer deck screws, lag bolts, or any screw going into masonry, the impact driver is the better tool.
The reaction torque on a drill at that length will twist your forearm or strip the fastener head.
The 30-Second Pre-Flight Checklist to Tape Inside Your Garage Cabinet
Clamp the piece. Confirm the bit matches the material. Set the clutch or lock it.
Pick speed 1 or 2. Check your glasses are on. Squeeze the trigger at 30 percent.
Let the bit seat before adding feed. That is the entire skill set. Everything else is just repetition.