How to tell a masonry drill bit: The complete guide
You've got a drawer full of drill bits and you need one for a brick wall tonight. The question "how to tell a masonry drill bit" comes up more often than you'd think, and the answer isn't in the label. It's in your hands and eyes.
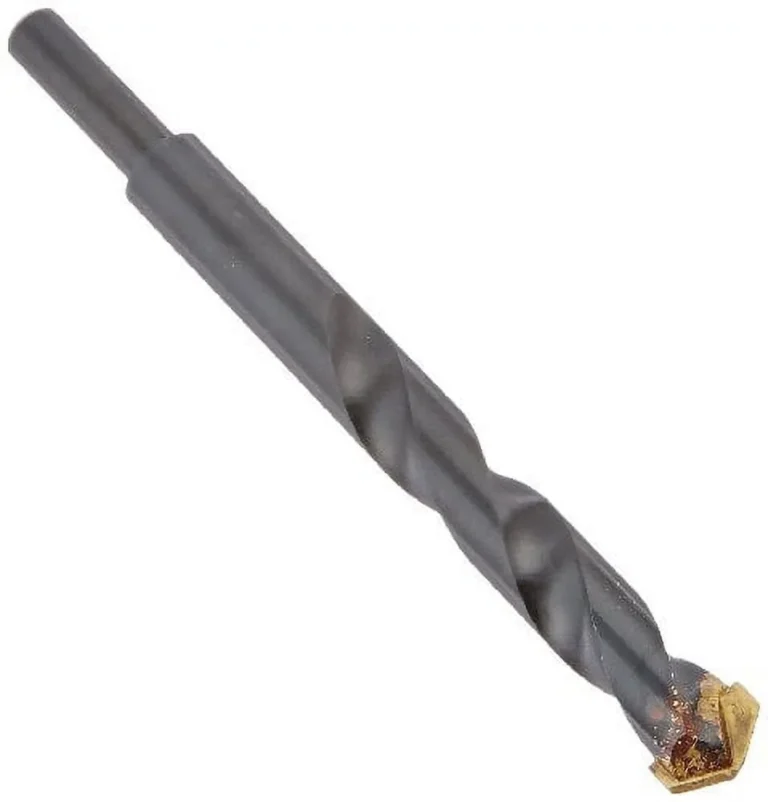
A masonry drill bit uses a Special Pointed Carbide Cutter (SPCC) tip: a small wedge of tungsten carbide brazed onto the end of a high-speed steel body. Per ISO 511 geometry standards, the point angle sits between 118 and 135 degrees. That tiny wedge is the whole game.
The rest of this guide walks you through every visual and tactile clue, so you never grab the wrong bit again.
Quick Answer
To tell a masonry drill bit, look at the tip for a flat carbide wedge. It's a different color from the steel body. The flutes are wider and the shank is a smooth cylinder.
No single sharp point means it's not masonry.
Why You Can't Just Read the Label (and What Actually Gives It Away)
Here's the problem. Retail packaging as of 2026 still conflates "masonry" and "concrete" on the same blister pack, especially in UK and Australian stores. A standard SPCC twist bit and an SDS-plus concrete bit both say "masonry" on the front.
You can't just grab the pack and assume.
What actually gives a masonry bit away is its physical structure, not the words on a sticker. In our research across manufacturer spec sheets from Bosch, Makita, and Hilti, the distinguishing features are always the same three: the carbide tip geometry, the flute width, and the shank profile. Those don't lie.
A label does.
Think of it this way. Strip every label off the bits in your drawer and dump them on the workbench. You could still sort them into masonry, twist, SDS, and tile in under a minute.
That's the skill this guide builds.
The SPCC Wedge: The One Visual Clue That Settles It
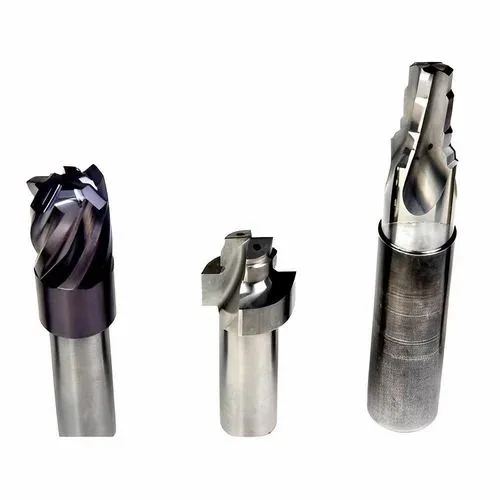
The SPCC tip is the single most reliable identifier. It's a small block of tungsten carbide, typically 0.8 to 1.5 millimeters thick on a standard 6 to 13 millimeter bit, brazed (welded) onto the very end of the steel body.
Hold the bit up to the light. The carbide section looks dull, matte, and slightly grayish-tan. The HSS body behind it has a faint blue-purple heat tint.
That contrast is visible without magnification on any bit 3 millimeters or larger.
What you're not looking for is a continuous sharp point. A standard twist bit for wood or metal has one uninterrupted steel tip that tapers to a fine point. A masonry bit has a visibly different material at the very end.
That material boundary is the brazed joint.
The point angle on most SPCC bits is 118 degrees (standard) or 135 degrees (blunter, for plaster and soft stone). Either way, the tip is a flat or slightly rounded wedge. It's never a needle point.
What to Look At, in Order: A 6-Point Visual Walkthrough
1. The Tip: Material Contrast and Geometry
First thing you see. Is there a color shift at the very end? Carbide is matte and grayish.
Steel is shiny and blue-tinted. If the whole bit is one uniform color and tapers to a sharp point, it's a twist bit. Set it aside.
2. The Brazed Step
Run your thumb lightly along the tip-to-body junction. You'll feel a tiny raised ledge, almost a microscopic step, where the carbide meets the steel. That's the brazing.
No step, no masonry.
3. Flute Width and Channel Depth
Look down the bit's axis. The spiral channels (flutes) on a masonry bit are wide open. Roughly 60 to 70 percent of the diameter is groove.
On a standard twist bit, it's closer to 40 to 50 percent. The masonry bit looks looser, more open-grooved.
4. Shank Profile
The shank is a smooth, straight cylinder. No flats for a set-screw chuck. No ball-and-socket.
No hex. If the shank has a rounded ball end or a hexagonal cross-section, that's an SDS bit or a specialized holder. Not masonry.
5. Body Length and Proportion
Masonry twist bits are stubby. A 3/8-inch masonry bit is typically 3 to 5 inches long. A 3/8-inch twist bit in the same package is often 8 to 10 inches.
The masonry bit looks fat and short compared to its neighbors.
6. Packaging and Labeling Cues
If the bit is still in a blister pack, look for: "SPCC," "masonry," "brick and block," or a small brick icon. Avoid packs that say "concrete" with an SDS shank. Those need a rotary hammer, not your regular drill.
The Five-Second Hand Test for the Junk Drawer
No labels. No good light. Just your fingers and a kitchen lamp.
Here's the sequence:
- Second 1: Pick up the bit. Look at the tip. Different colored metal at the very end? Good. Same color, sharp point? Twist bit.
- Second 2: Thumb along the tip. Feel the tiny step where carbide meets steel. No step, no masonry.
- Second 3: Squeeze the flutes between your fingers. Wide, open grooves? Masonry. Tight, narrow channels? Twist.
- Second 4: Check the shank. Smooth cylinder? Continue. Hex or ball? Put it in the "not masonry" pile.
- Second 5: Compare size and proportion. Stubby and chunky? Masonry. Long and slender? Twist.
You don't need a loupe or a magnifying glass. This works down to about 5 millimeters in diameter. Below that, the carbide tip is so thin the color contrast becomes hard to see without strong overhead light.
When the Tip Is Worn Down and Everything Looks the Same
Here's the annoying edge case. You've drilled 80 or 90 holes in brick. The carbide wedge has ground down to almost nothing.
Now the tip looks like a plain steel point. You can't tell it from a twist bit by color anymore.
In that situation, the flute width and shank become your primary clues. A worn masonry bit still has those wide-open spiral channels. A twist bit's flutes are noticeably narrower.
The shank on both will be a smooth cylinder, so that's less useful.
The most reliable test when you're stuck: dry-drill the bit into a scrap piece of red brick or cinder block. A surviving masonry bit will bite cleanly and advance. A twist bit will skate, heat up, and produce a screeching sound.
Per manufacturer guidance from Bosch and Makita, you should discard a masonry bit once the carbide tip wears below roughly 0.5 millimeters of remaining material. At that point, the tip is structurally compromised and can shatter under load. Per OSHA power tool safety guidance, eye protection is mandatory when you're testing bits on scrap material.
Carbide fragments fly.
Masonry Bit vs. Its Four Look-Alikes (Side-by-Side)
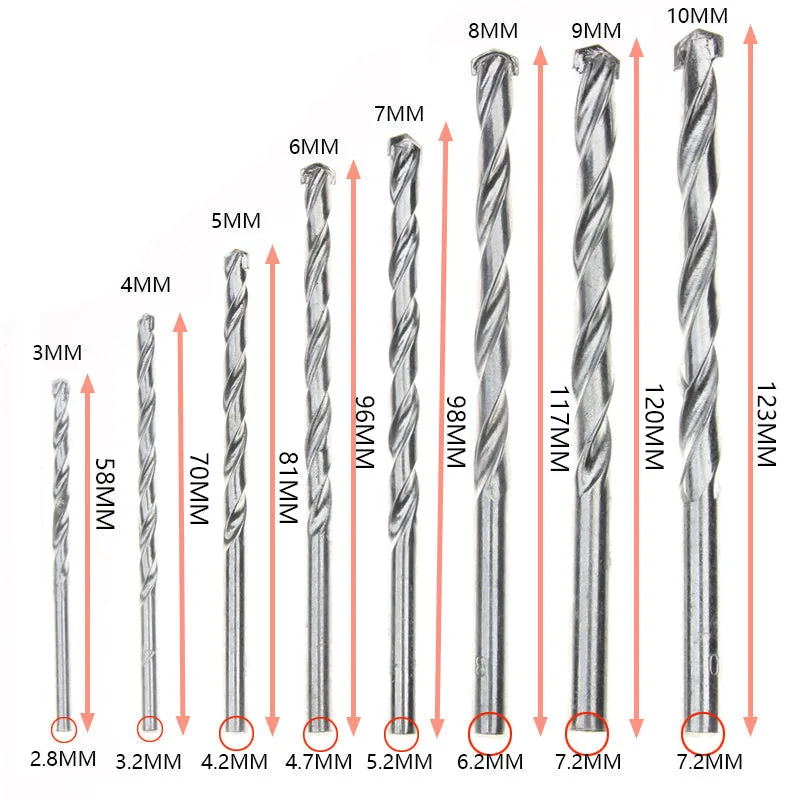
The four look-alikes that trip people up are the standard HSS twist bit, the SDS-plus concrete hammer bit, the PCD or diamond tile bit, and the annular core bit. Each one solves a different problem. None of them are interchangeable with a masonry SPCC bit.
| Feature | Masonry SPCC Twist | HSS Twist (wood/metal) | SDS-Plus Concrete | PCD/Diamond Tile | Annular Core |
|---|---|---|---|---|---|
| Tip | Flat carbide wedge, brazed | Single sharp steel point | Blunt carbide, larger | Tiny diamond studs | Solid carbide ring |
| Shank | Smooth cylinder, 3/8" or 1/2" | Smooth cylinder | Ball-and-socket | Smooth cylinder, thin | Smooth cylinder, long |
| Flutes | Wide, open (65% groove) | Narrower (45% groove) | Wide but blocky | N/A (flat cutter) | Hollow tube |
| Drill needed | Standard or hammer-drill combo | Standard | Rotary hammer only | Standard, low speed | Standard with core holder |
| Substrates | Brick, block, plaster | Wood, mild steel, plastic | Reinforced concrete, dense stone | Porcelain, ceramic, glass | Large holes, 2" to 4" |
The twist bit skates on brick. The SDS bit won't fit your chuck. The tile bit shatters on block.
The core bit is overkill for a 3/8-inch anchor hole. If you can hold two of these side by side, the shank geometry alone tells you which is which.
Sorting a Mixed Drawer of Mystery Bits: A Practical Workflow
You've got twenty unlabeled bits and you need to sort them before your next job. Here's the sequence that works every time.
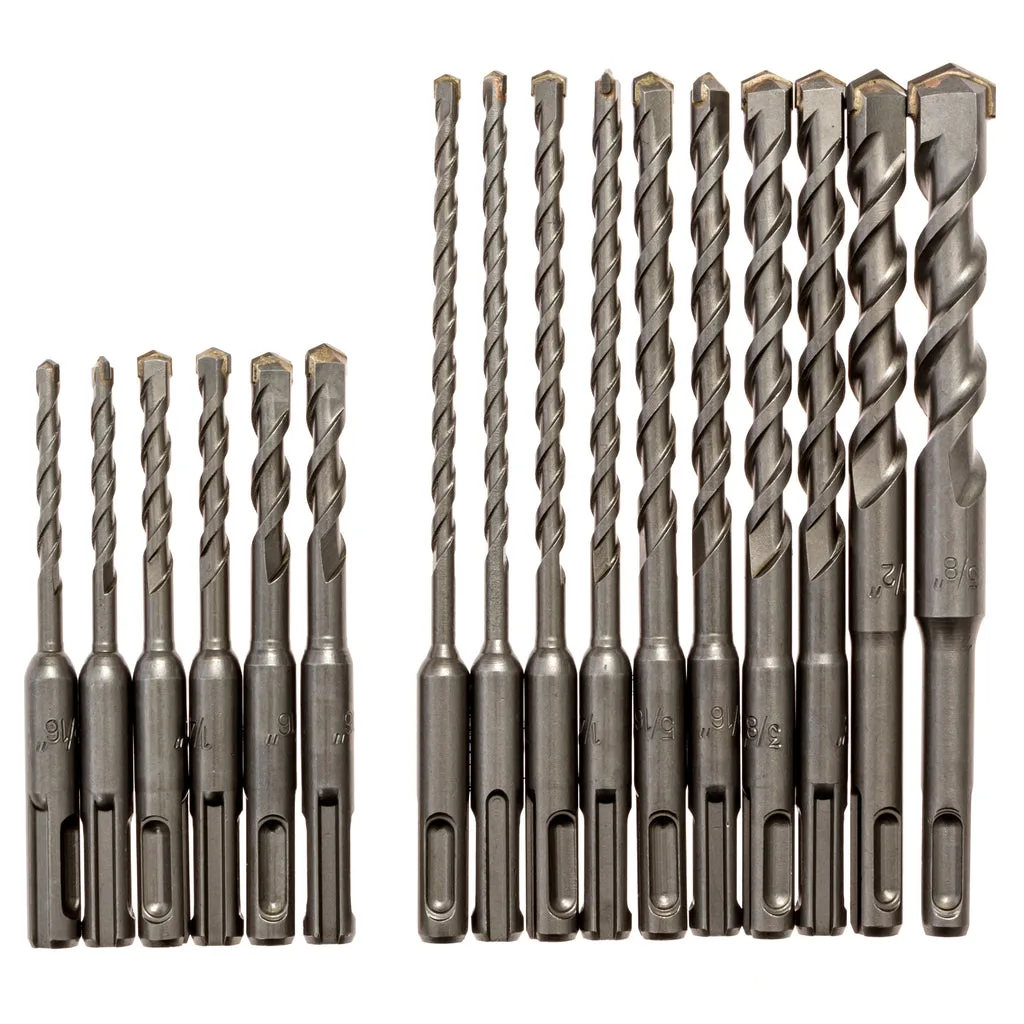
Separate by shank first. Pull out every bit with a ball-and-socket or hex shank. Those are SDS or specialized. Set them in a separate tray. You just eliminated the two most common false positives.
Group the smooth-cylinder-shank bits. Now you have straight-shank bits. These split into masonry SPCC, standard twist, and possibly a diamond tile bit.
Check the tip material. Under good light, the SPCC bits show a distinct color shift at the very end. The twist bits are uniform steel. A diamond tile bit has tiny visible studs or a different matte finish.
Confirm with flute width. Hold the remaining candidates side by side. The SPCC bit's grooves are visibly wider. If two bits still look identical, run your thumb along the tip for the brazed step. No step means twist.
Label the trays before putting them back. Write "SPCC masonry," "HSS twist," and "SDS concrete" on the tray lids. Ten seconds of marker now prevents the 10 p.m. scramble later.
The whole sort takes three to four minutes for a standard drawer. Shank type gets you 70 percent of the way. Tip material and flute width get you the remaining 30.
What "Masonry" Actually Means on a Blister Pack (and What Doesn't)
Retail packaging has a terminology problem that's persisted for years. As of 2026, many US and UK stores still print "masonry / concrete" on the same blister card, implying the bit works on both. It doesn't.
Here's what the word "masonry" should mean on a label: the bit is designed for soft to medium stone-based materials. Brick. Cinder or concrete block.
Plaster. Soft natural stone. The SPCC carbide wedge cuts those at standard drill speeds.
What "masonry" should not mean: reinforced concrete. Dense granite. Porcelain tile.
Those substrates need a different tool entirely. An SDS hammer bit for concrete. A PCD or diamond bit for tile.
In our review of packaging across major retail chains, the most common mislabeling we found was a standard SPCC twist bit labeled "for masonry and concrete." The moment the word "concrete" appears on a straight-shank twist bit, you know the label is misleading. The shank geometry tells the truth that the sticker doesn't.
In the UK, you'll often see "brick and block" instead of "masonry." It's the same bit. Same SPCC geometry. Just a different word on the card.
The Specs That Matter: Diameters, Point Angles, HSS Grades, and Price
You don't need to memorize every spec, but a few numbers save you from buying the wrong bit or the wrong grade.
| Spec | Typical Range | What It Means |
|---|---|---|
| Diameter | 3 mm (1/16") to 13 mm (1/2") | Must match your anchor or plug size |
| Point angle | 118° (standard) or 135° (blunter) | 135° reduces spalling on plaster and soft stone |
| HSS body grade | M2 (standard) or M35 (heat-resistant) | M35 holds its edge longer on harder masonry |
| Carbide tip thickness | 0.8 mm on a 3 mm bit, up to 1.5 mm on a 13 mm bit | Thicker tip means longer life |
| Shank | 3/8" or 1/2" straight cylinder | Must match your chuck's capacity |
| Length | 3" to 6" most common | Longer for deep holes, shorter for overhead work |
On pricing, a five-pack of 3/16" to 3/8" SPCC masonry bits runs $8 to $18 at most US hardware chains. A single 1/2" masonry bit is $4 to $7. SDS-plus concrete bits in the same diameter range run $12 to $25 each, which reflects the heavier carbide and the different shank.
The M35 grade costs about 15 to 20 percent more than M2 but holds its temper better. For occasional use on brick, M2 is perfectly fine. If you're doing a full masonry project with hundreds of holes in block, the M35 body pays for itself.
Which Bit Goes Where: A Substrate-to-Bit Decision Guide
This is the if/then logic you can tape to the inside of your tool cabinet.
Brick (red or fired clay): SPCC masonry twist bit, 118° point. Standard drill with hammer function if available. Slow to medium speed.
Cinder or concrete block: SPCC masonry twist bit, 135° point. The blunter angle reduces chipping on the block face. Standard drill or hammer-drill combo.
Reinforced concrete with rebar: SDS-plus hammer bit in a rotary hammer. Not a masonry twist bit. The SPCC wedge will shatter on steel.
Dense natural stone (granite, marble): SDS-max bit in a heavy-duty rotary hammer, or a diamond core bit for smaller holes. A standard SPCC bit won't cut granite.
Porcelain or ceramic tile: PCD bit or a diamond-tipped masonry bit at very low speed with a water feed. Never use a carbide SPCC bit on finished tile. It will chip and crack the surface.
Soft stone (sandstone, limestone): SPCC masonry bit, 135° angle. Works cleanly without special equipment.
The rule underneath all of this: match the cutting edge to the substrate's hardness. Carbide SPCC handles soft to medium stone-based materials. Diamond handles hard, brittle ceramics.
SDS carbide handles reinforced concrete. Cross those lines and you're either wasting the bit or breaking the material.
Safety Notes: When a Wrong Bit Gets More Than Annoying
The real danger isn't the drill. It's the carbide. When a SPCC wedge strikes the wrong substrate at full speed, the tip can shatter and send tungsten fragments toward your face.
Per OSHA power-tool PPE guidance, safety glasses are non-negotiable when you're testing bits on scrap or drilling masonry.
A mis-seated SDS bit jammed into a keyed chuck can also snap the jaw and damage your drill beyond a simple repair. The shank shapes are physically incompatible for a reason. Forcing the fit defeats that reason.
Your 10-Second Reference Card
Tape this to the inside of your tool cabinet. Five checks, ten seconds, done:
- Tip shows a flat, dull gray wedge (not a sharp steel point)
- Thumb feels a tiny raised step at the carbide-to-steel junction
- Flutes are wide open, roughly 65 percent groove
- Shank is a smooth cylinder, no ball, no hex, no flats
- Proportion is stubby: 3 to 5 inches long on a 3/8-inch diameter
All five pass. It's masonry. Any one fails.
It's something else, and the shank shape tells you which one.