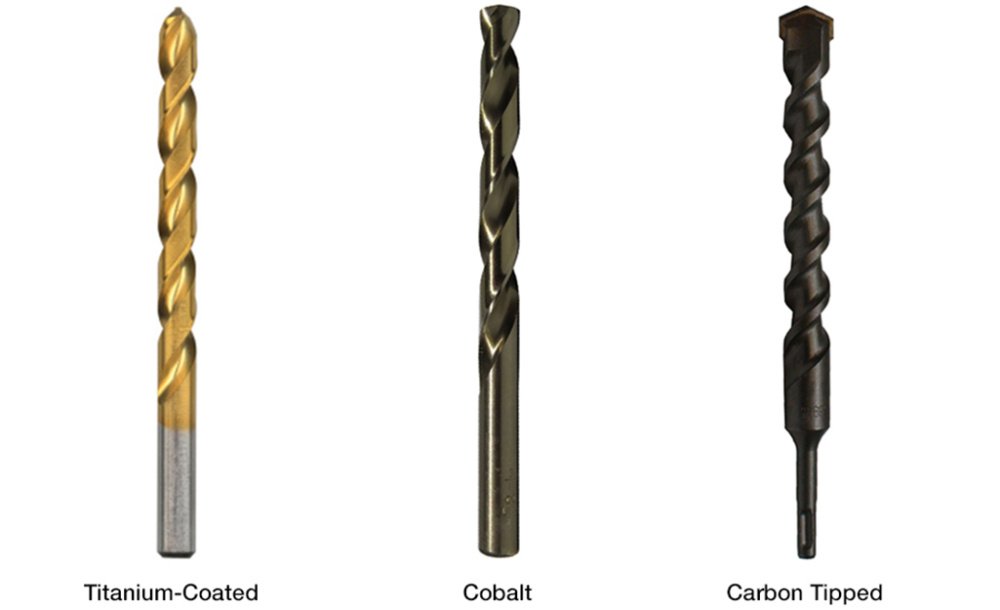
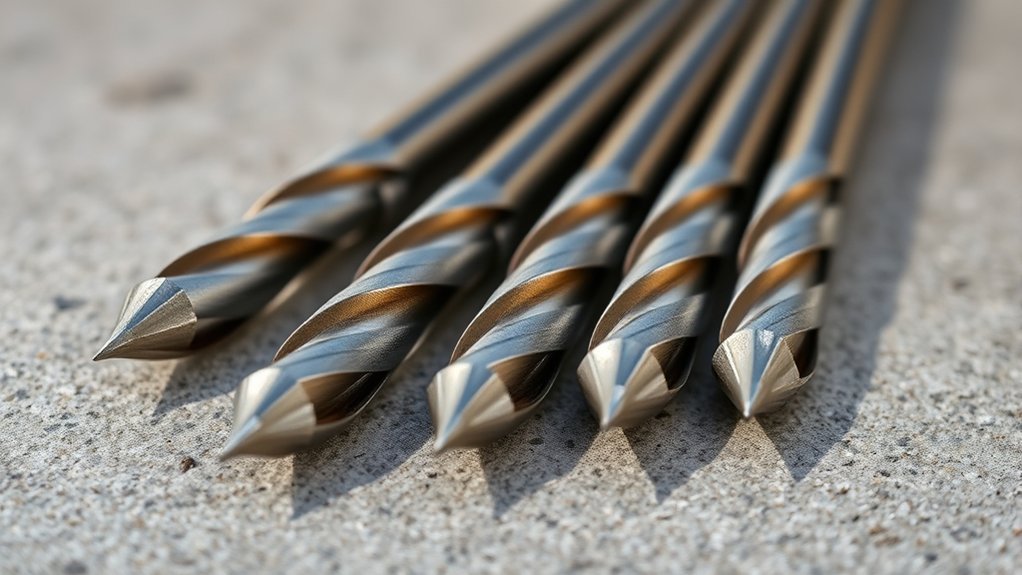
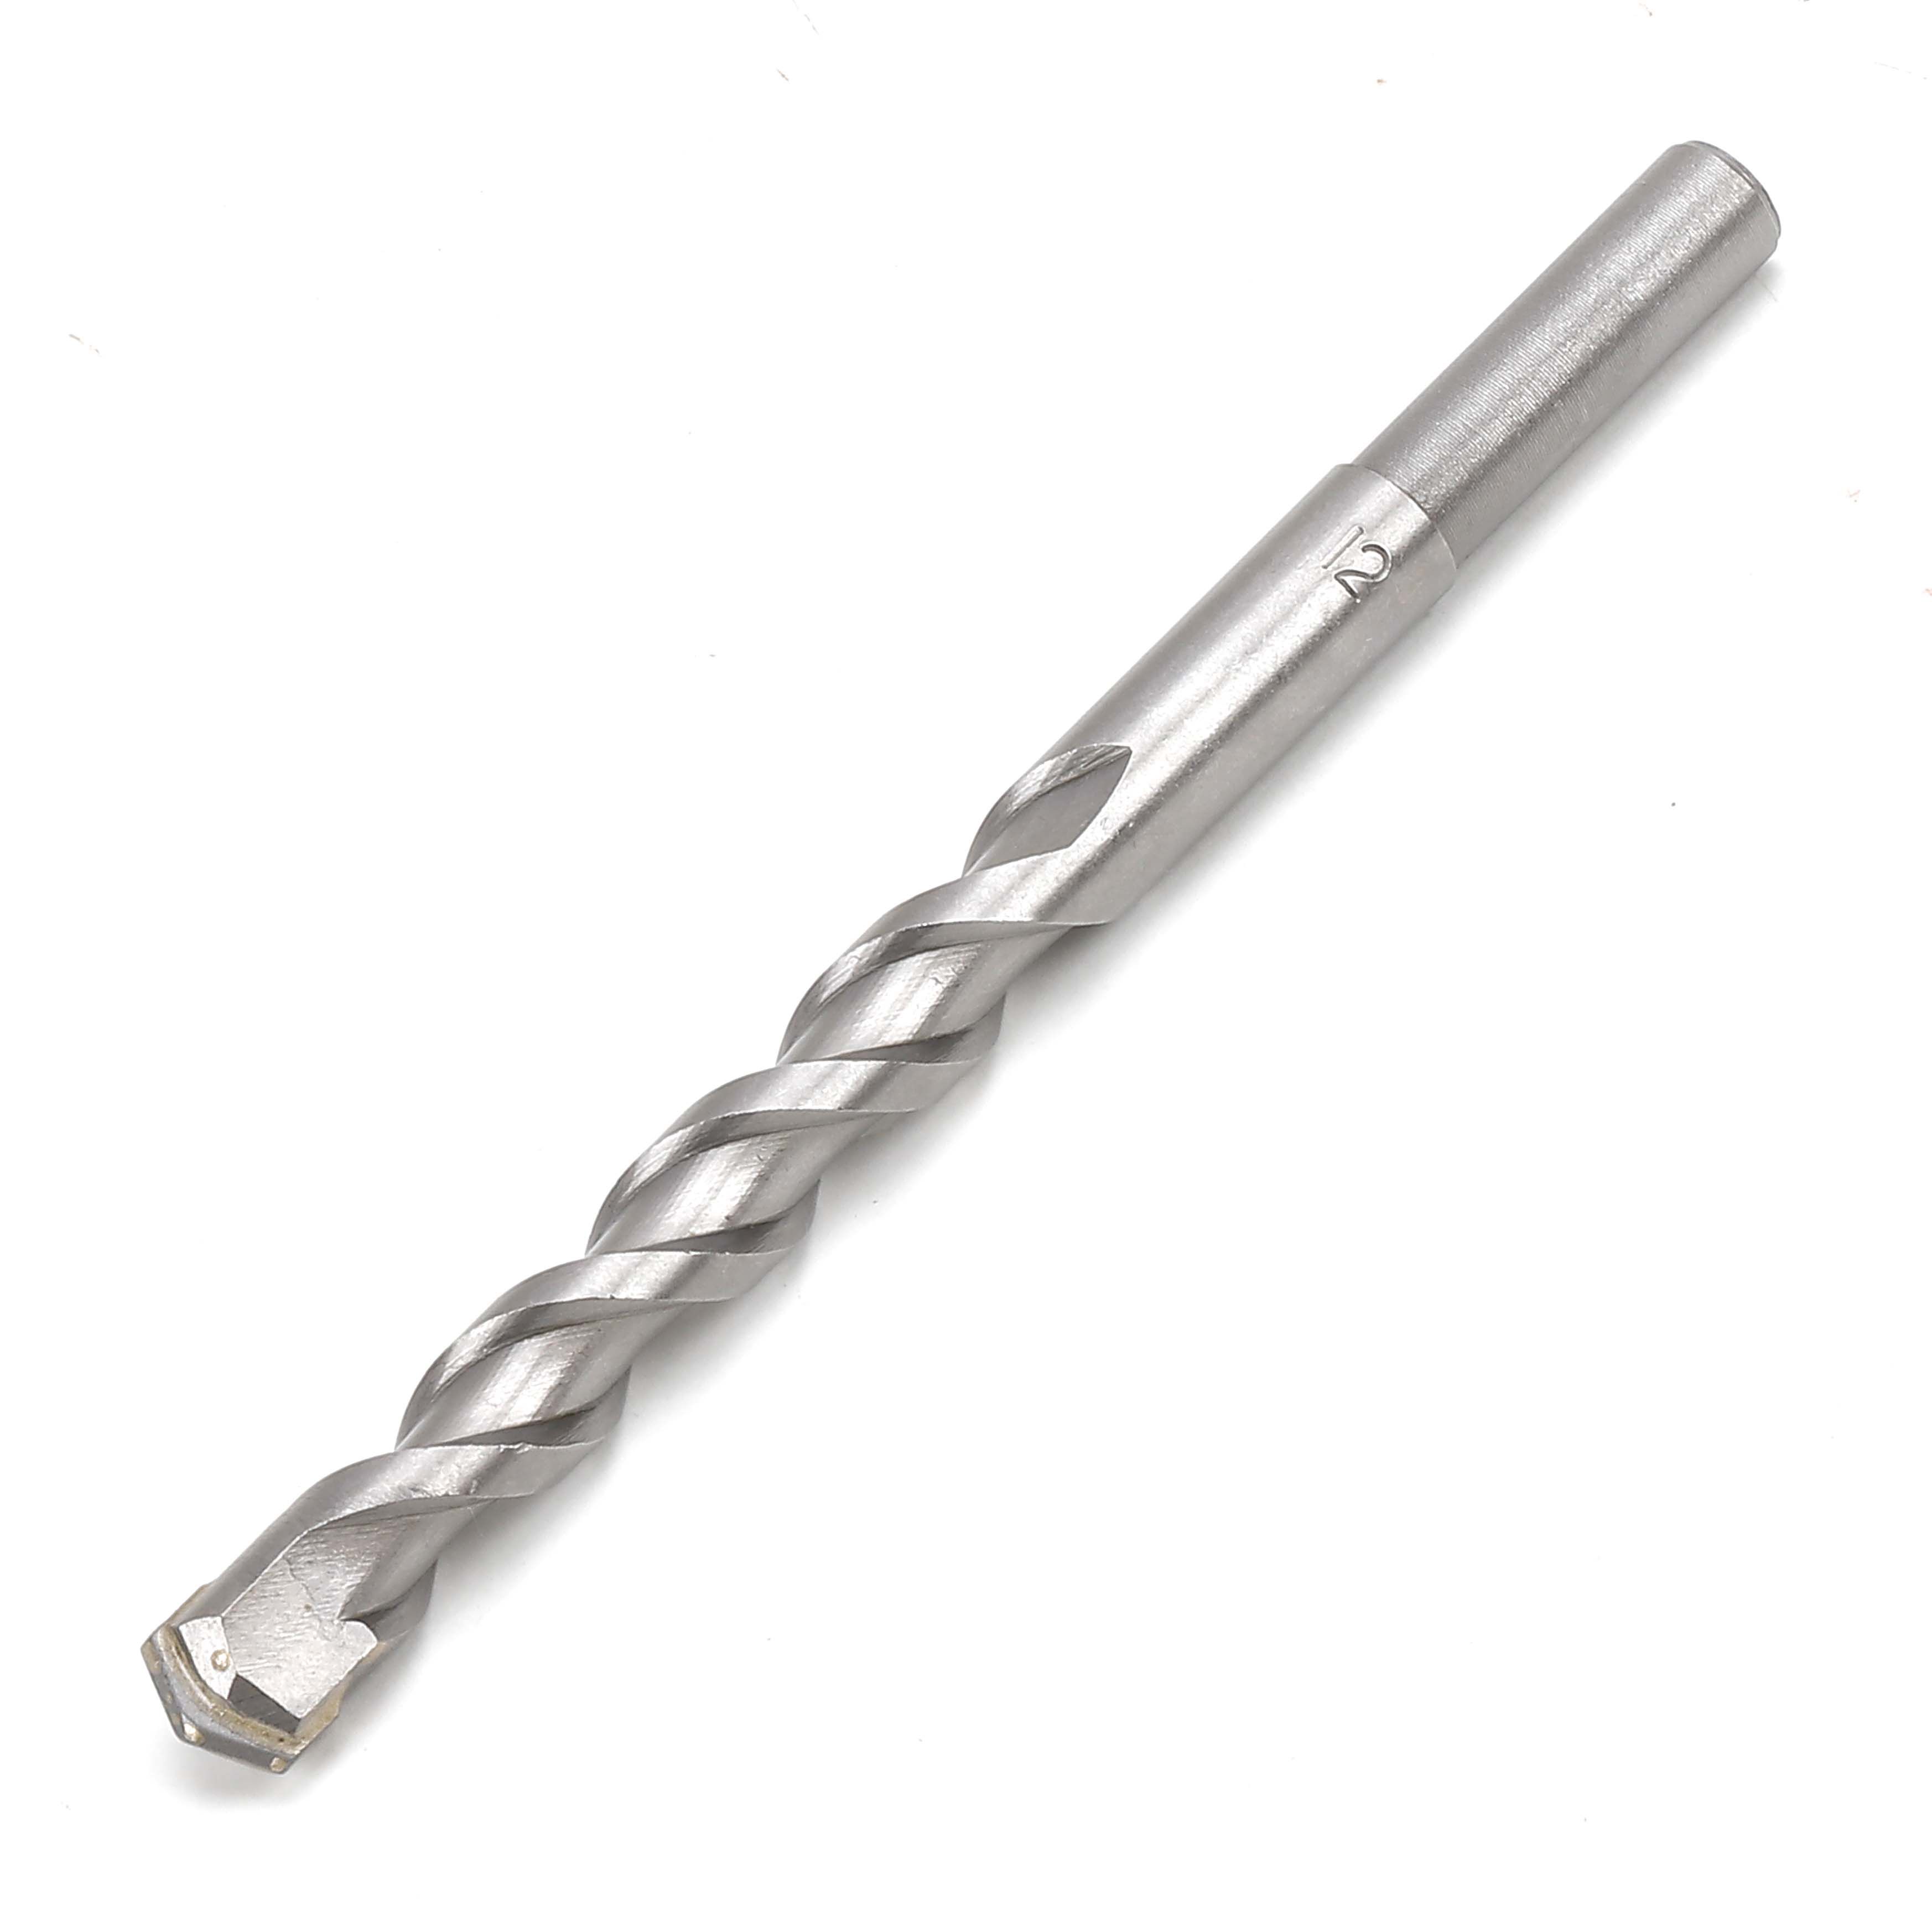
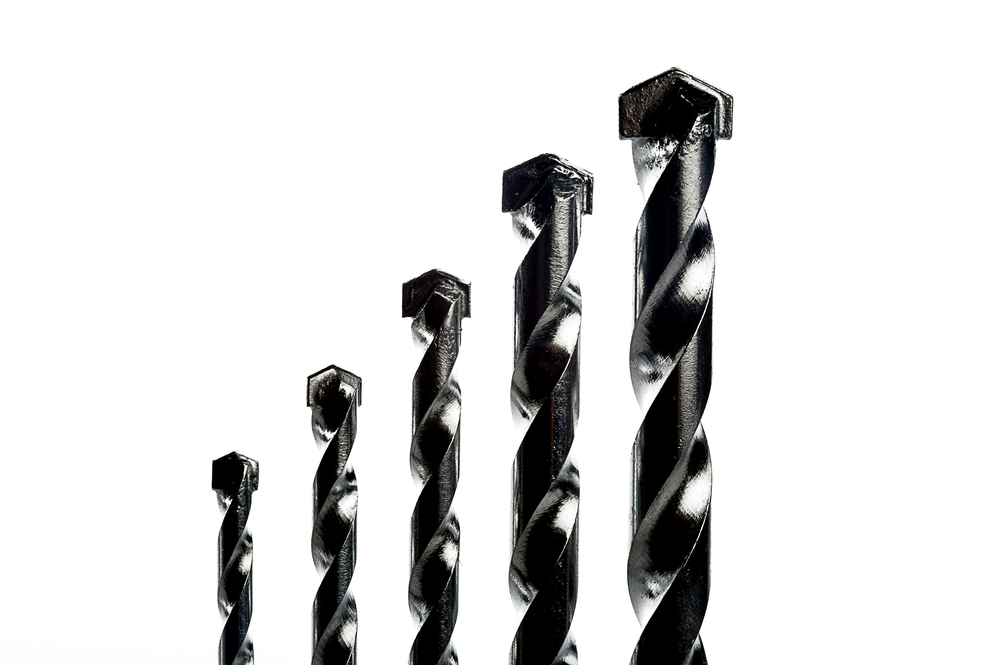
Masonry drill bits have a hard, chisel-shaped tip, a thick metal body, and spiral grooves that remove dust from brick, concrete, and stone.
If you are hanging shelves in an American home, mounting a TV on a brick wall, or fixing a loose railing in a concrete garage, the right drill bit matters. A masonry bit is easy to spot once you know what to look for. Its tip looks wider and flatter than the sharp point on a typical wood drill bit.
Most standard masonry bits have a steel shaft with spiral grooves and a hard cutting tip, often made with tungsten carbide. The tip may look like a small arrowhead or a flat chisel. This shape helps the bit break down hard material as the drill turns. The grooves carry dust out of the hole.
Not every bit with a gray or silver finish is made for masonry. Some wood and metal bits look similar at first glance. The safest way to identify a bit is to check its tip, markings, shank, and stated use. You should also match the bit to your drill and the material you plan to drill.
Source: Bing
What Do Masonry Drill Bits Look Like?
Masonry drill bits look like sturdy metal drill bits with a blunt, angled cutting head. Their most noticeable feature is the hard tip, which often appears wider than the shaft. On many standard models, the tip has two sloping sides that meet in a flat or chisel-like edge.
The body usually has two spiral channels called flutes. These grooves run from near the tip toward the shank, which is the part held by the drill. As the bit cuts into masonry, the flutes help carry dust out of the hole.
A common masonry bit is silver, gray, black, or dark steel in color. Some have a shiny finish, while others have a dull coating. Color alone cannot tell you what a bit is made for, so inspect the cutting tip and read the packaging or markings.
Source: Bing
A broad cutting tip
The tip often has a small carbide insert with a wedge-like or chisel-like shape. It is designed to break up hard material rather than slice it like a sharp wood bit.
Spiral flutes
The grooves help move masonry dust away from the cutting area. Their shape may look similar to the flutes on other twist bits, but the tip is the key visual clue.
A solid metal shaft
The shaft connects the tip to the shank. It may have printed size markings, a coating, or a plain steel finish.
A drill-compatible shank
Many small masonry bits have a straight, round shank. Bits made for rotary hammers may have special slots or grooves instead.
How Does the Tip Look Up Close?
Look at the very end of the bit. A standard carbide-tipped masonry bit often has a flattened point with two angled faces. It may resemble a tiny chisel or arrowhead. The cutting part can look slightly wider than the steel shaft behind it.
The carbide piece is much harder than ordinary steel. It helps the bit withstand the impact and abrasion involved in drilling brick and concrete. Some advanced bits use different head shapes or multiple cutting edges, so not every masonry bit has the same outline.
Wide or flat end
A wider, blunt-looking head is a common sign of a masonry bit.
Hard cutting insert
The tip may have a distinct seam where the carbide piece meets the steel body.
No needle-like point
Unlike many wood bits, a standard masonry bit usually does not have a long, sharp center point.
What Do the Grooves Look Like?
The grooves form raised metal ridges and recessed channels around the shaft. Many look like the spiral shape found on ordinary twist drill bits. Their job is to help clear fine dust and fragments from the hole.
The exact flute design varies by bit type. Some heavy-duty masonry bits have wider channels or a thicker body. SDS rotary-hammer bits may also have shaft features that support their use with a hammering mechanism.
Two main spiral channels
Many standard masonry bits have two flutes running along the shaft.
Raised spiral ridges
The ridges separate the channels and help guide the bit as it rotates.
How to Tell a Masonry Bit From Other Drill Bits
The fastest way to identify a masonry bit is to compare its tip with the tips of wood and metal bits. The shape often tells you more than the color or the length. If the bit is loose in a toolbox, check its markings before using it.
Wood, metal, and masonry bits are designed for different cutting tasks. A wood bit may have a sharp center point, while a metal bit often has a conical point with two cutting edges. A common masonry bit has a tougher, flatter head that can break up hard mineral material.
There are exceptions. Some multipurpose bits can drill several materials, and some specialized masonry bits have unusual tip designs. When the appearance is unclear, the manufacturer’s label or product specification is the best guide.
Source: Bing
Masonry bit
Usually has a broad carbide-tipped head and spiral flutes. It is intended for approved masonry materials such as brick, concrete, and some stone.
Wood bit
Often has a sharp center spur and outer cutting edges. Brad-point bits and auger bits are made to guide the cut and remove wood chips.
Metal bit
Often has a pointed, cone-shaped end with two cutting lips. Many are made from high-speed steel or cobalt-bearing steel.
Tile bit
May have a spear-shaped carbide tip or a diamond-coated cutting edge. It is designed for particular tile types and may require drilling without hammer action.
Masonry Bits vs. Wood Bits
A standard wood bit often looks sharper at the center. On a brad-point bit, a small center spur sticks out beyond the cutting edges. That spur helps keep the bit in place when starting a hole in wood.
A common masonry bit has a flatter head with a hard cutting insert. It is built to withstand abrasion and, where approved, hammering. Using a masonry bit on wood may produce a rough or slow hole, while a wood bit is not suitable for drilling concrete.
Check the center
A long, sharp center spur often indicates a wood bit rather than a standard masonry bit.
Check the material rating
Use the bit only on materials listed by its manufacturer.
Masonry Bits vs. Metal Bits
Metal drill bits often have a sharply tapered cone at the tip. Their cutting lips are formed into the steel itself. Many masonry bits instead have a separate-looking carbide head with a wider profile.
A metal bit can sometimes make a small mark in soft masonry, but it is not the right tool for normal concrete drilling. The abrasive surface and impact loads can quickly wear or damage a bit that is not designed for the job.
Point shape
A narrow, pointed cone is common on metal bits; a wider chisel-like tip is common on standard masonry bits.
Tip material
Masonry bits often use a carbide insert, while many ordinary metal bits use high-speed steel.
What Are the Main Parts of a Masonry Drill Bit?
A masonry drill bit has several parts that work together to cut a hole and remove dust. Knowing these parts helps you identify the bit and spot wear before a job begins.
The cutting head does the work at the front. The fluted body moves debris away, and the shank connects the bit to the drill. The size, shape, and strength of each part depend on the bit’s design and intended use.
Source: Bing
Carbide tip
The hard cutting end breaks up masonry. Check it for chips, cracks, severe rounding, or missing material.
Fluted body
The spiral channels help clear dust from the hole. Packed debris can reduce cutting performance.
Shank
The rear section fits into the drill chuck or rotary hammer. It must match the tool’s connection system.
Size markings
Some bits show a diameter in inches or millimeters, along with a brand or model code.
Why the Carbide Tip Matters
Masonry is abrasive and may contain hard aggregate. A common steel cutting edge can wear quickly under these conditions. A carbide tip offers greater hardness and helps the bit continue breaking down the material.
Carbide does not make a bit indestructible. Excess heat, incorrect use, severe side pressure, or striking hidden metal can damage the tip. Stop using a bit if its head is cracked, loose, or badly chipped.
Inspect before drilling
Look for cracks, missing carbide, and an uneven or badly rounded cutting edge.
Avoid side loading
Keep the bit aligned with the hole. Pushing it sideways can damage the tip or bend the shaft.
What the Shank Tells You
The shank can help you identify the drill system a bit is designed for. Many basic masonry bits use a smooth, round shank that fits a standard three-jaw chuck. Larger bits for rotary hammers often use a grooved SDS shank.
SDS-Plus and SDS-Max are different connection systems. Their sizes and designs are not interchangeable, and a bit should only be used with a compatible tool. Never force a shank into a chuck that does not accept it.
Straight shank
A smooth, round shaft is common on standard drill bits for conventional chucks.
SDS-Plus shank
A grooved shank made for compatible SDS-Plus rotary hammers.
SDS-Max shank
A larger shank system used with compatible heavy-duty rotary hammers.
Different Types of Masonry Drill Bits and Their Appearance
Masonry drill bits do not all look alike. Small bits for basic home repairs may resemble ordinary twist bits with a blunt carbide head, while heavy-duty rotary-hammer bits have larger bodies and specialized shanks.
The best type depends on the material, hole size, depth, and drill you plan to use. A bit that works well for a small anchor hole in brick may not be suitable for a deep hole in reinforced concrete.
Source: Bing
Standard carbide-tipped masonry bits
These have a familiar spiral shaft, a hard chisel-like head, and often a straight shank. They are common for small holes in brick, mortar, and suitable concrete.
SDS masonry bits
These usually have a more substantial body and a grooved shank for a rotary hammer. Some feature two cutting edges, while advanced models may use multiple edges.
Tile and glass bits
These may have spear-shaped carbide tips or diamond-coated heads. They are made for specific brittle surfaces and are not interchangeable with every concrete bit.
Masonry core bits
These are larger, hollow or ring-shaped cutters that remove a circular section of material. Their shape differs from the narrow, solid shaft of a standard masonry bit.
Standard Masonry Drill Bits
A standard masonry bit is often the easiest type to recognize. It has a long, narrow shaft with two spiral flutes and a hard, slightly wider tip. Small sizes are common in household drill-bit sets.
These bits are often used for small fastener and wall-anchor holes. Whether a hammer setting is suitable depends on the bit’s rating, the drill, and the material. Follow the tool and bit instructions rather than assuming every masonry bit can withstand hammer action.
Typical use
Small holes for approved masonry anchors, screws, and light mounting tasks.
Visual clue
A compact carbide head on a spiral steel shaft.
SDS and Rotary-Hammer Bits
SDS bits are easy to spot because their shanks have grooves instead of a simple smooth cylinder. Those grooves allow the bit to lock into a compatible rotary hammer while moving as the tool’s mechanism drives it forward.
The cutting head may be wider and more robust than the head on a small standard masonry bit. Some are designed for reinforced concrete, but the exact capability depends on the model. A general-purpose bit should not be assumed to be suitable for drilling through rebar.
Typical use
Drilling holes in concrete and other approved masonry with a compatible rotary hammer.
Visual clue
A grooved shank and often a heavier cutting head.
Tile Drill Bits
Tile bits may look very different from ordinary concrete bits. Some have a pointed spear-shaped head, while diamond bits may have a small coated cutting surface rather than a distinct carbide chisel.
Ceramic and porcelain can crack if you use the wrong bit or apply hammer action. Check the bit’s instructions, use the specified speed and cooling method, and keep hammer mode off unless the tool and bit makers explicitly allow it for the material.
Typical use
Drilling through tile types specifically listed by the bit manufacturer.
Visual clue
A spear-like point or diamond-coated cutting edge.
How to Choose the Right Masonry Drill Bit by Size
Masonry drill bits come in many diameters and lengths. The right size depends on the fastener or anchor, the required hole depth, and the material you are drilling. A larger bit is not automatically better because an oversized hole may prevent an anchor from gripping properly.
For many masonry anchors, the package specifies the required hole diameter and depth. Follow those instructions rather than guessing from the screw’s width. The screw and the drilled hole often have different diameters because the anchor needs a particular amount of room to fit and expand.
Bit length also matters. A short bit may suit a shallow hole for a small wall plug, while a longer bit may be needed for a deeper installation. A longer bit can flex more easily, so start carefully and keep it straight.
Source: Bing
Diameter
Choose the diameter specified by the anchor, fastener, or installation instructions.
Working length
Make sure the bit can reach the required depth without using an unsuitable extension.
Overall length
Check that the bit and drill fit in the available space.
Shank compatibility
Match the bit to the drill chuck or rotary-hammer system.
Inches and Millimeters
In the United States, drill bits may be marked in fractional inches, decimal inches, or metric sizes. For reference, 1/4 inch is 6.35 millimeters, while 3/8 inch is 9.525 millimeters. A metric bit marked 6 mm is slightly smaller than a 1/4-inch bit.
Do not swap a nearly matching size without checking the anchor instructions. Even a small diameter difference can affect the fit of a masonry anchor.
Read the label
Look for a diameter marking on the shaft, package, or product documentation.
Match the anchor
Use the exact size the anchor maker specifies.
Choose a Bit for the Material
Brick, concrete, mortar, and natural stone differ in hardness and structure. A bit suitable for soft brick may not be the best option for hard concrete. Some stone is brittle or abrasive and needs a specific cutting design.
Identify the material before drilling. If you are unsure whether a wall is masonry, drywall over framing, tile over concrete, or a mixed assembly, inspect the wall carefully and consult reliable building information before choosing a bit.
Brick
Use a bit rated for the brick type and task. Drilling into a mortar joint may be suitable for some light tasks, but the anchor’s instructions should guide the location.
Concrete
For regular concrete drilling, use a bit rated for concrete and a compatible drill or rotary hammer.
Natural stone
Check the bit rating because stone hardness and brittleness vary.
How to Use a Masonry Drill Bit Correctly
A correctly identified masonry bit still needs the right setup. Before drilling, confirm that the bit is suitable for the material, that the shank fits the drill, and that the chosen operating mode matches the bit’s instructions.
For a basic home project, gather the drill, the correct masonry bit, the required anchor, safety glasses, and any dust-control equipment specified for the task. Keep other people away from the work area, and do not begin until you have checked for hidden electrical cables, plumbing, and other hazards.
The steps below apply to ordinary small-hole drilling in suitable masonry. Large holes, reinforced concrete, overhead work, and work near services may require specialized tools, controls, or a qualified professional.
Source: Bing
Prepare the work area
Secure the workpiece where possible, clear the area, and check for hidden services and hazardous dust.
Fit the bit
Insert the shank correctly and tighten or lock it according to the drill manufacturer’s instructions.
Mark the hole
Mark the location and verify the specified diameter and depth.
Drill with control
Hold the tool securely, keep the bit aligned, and use the speed and hammer mode permitted by the manufacturers.
Check the hole
Stop the tool before inspecting the hole. Remove dust using an appropriate method and follow the anchor instructions.
Should You Use a Hammer Drill?
A hammer drill adds a forward tapping action as the bit rotates. This action can help a suitable masonry bit penetrate brick and some concrete more effectively than rotation alone.
A rotary hammer uses a different impact mechanism and is often better suited to heavier concrete drilling. The tools and their bits are not automatically interchangeable, so check the shank system and tool instructions before use.
For tile, glass, and other brittle surfaces, hammer action can cause cracking. Use the drilling mode required by the material and bit maker.
Standard drill
May work for some light masonry tasks when the bit and material permit it, but drilling can be slower.
Hammer drill
Can combine rotation with impact for suitable masonry bits and applications.
Rotary hammer
Uses a different mechanism and usually accepts compatible SDS-style bits.
How to Know the Bit Is Working
A suitable bit should advance into the material while producing dust and small fragments. The drill should remain controllable, and the bit should stay securely held in the chuck or bit holder.
If progress stops, do not respond by leaning harder on the tool. Stop and check for a worn tip, packed dust, an unsuitable drill mode, or a hard obstruction. A hidden metal bar, pipe, or cable can create a serious hazard.
Normal progress
The bit advances at a steady rate without unusual movement or severe vibration.
Warning signs
Excessive heat, smoke, unusual noise, repeated slipping, or no progress calls for a stop and inspection.
Common Masonry Drill Bit Problems and How to Fix Them
When a masonry bit does not cut well, the problem may be the bit, the drill, or the material. Start with the simplest checks before replacing equipment or applying more force.
Switch off the drill and disconnect its power source or remove its battery before inspecting the bit. Let hot parts cool, and never touch the cutting tip immediately after drilling.
Source: Bing
The bit will not cut
Check whether the tip is worn or damaged, whether the bit is rated for the material, and whether the drill is set to the correct mode.
The bit overheats
Stop and check the speed, pressure, material rating, and cooling instructions. Do not apply water unless the bit and tool instructions permit it.
The hole fills with dust
Dust can block the flutes and slow progress. Stop the tool and clear the hole with an approved dust-removal method.
The bit slips in the chuck
Check the shank and chuck for damage, confirm compatibility, and secure the bit as instructed by the tool maker.
The hole is too large
Verify the bit diameter and anchor requirements. Do not assume a larger hole will hold the same anchor securely.
When Should You Replace a Masonry Bit?
Replace a bit when its carbide tip is cracked, badly chipped, loose, or too worn to cut as intended. A bent shaft, damaged shank, or severe wear is also a reason to stop using it.
A dull bit may drill more slowly and generate extra heat. Some specialized bits can be serviced according to the maker’s instructions, but do not grind or reshape a carbide tip unless the manufacturer provides an approved procedure.
Visible damage
Cracks, missing tip material, or a bent body are clear warning signs.
Poor cutting performance
A sudden loss of progress may indicate wear or damage, although the material and tool should also be checked.
What If the Bit Hits Metal?
Stop drilling if you strike metal unexpectedly. Do not assume it is harmless reinforcement. The obstruction could be rebar, a metal conduit, a pipe, or another embedded object.
If the hole is near a power outlet, switch, plumbing fixture, or other service route, treat the obstruction as a possible hazard. Identify it before continuing. For structural concrete or a location where hidden services may be present, seek qualified help if you cannot verify what is behind the surface.
Stop the tool
Release the trigger and secure the drill before checking the situation.
Do not force the bit
Extra pressure can damage the bit or create a dangerous situation.
Masonry Drill Bit Safety for Home Projects
Drilling into brick and concrete can create fine dust, flying fragments, noise, and vibration. Some masonry materials, especially concrete and mortar, can contain crystalline silica. Breathing respirable silica dust can cause serious lung disease, so dust control should be part of the job from the start.
Wear suitable eye protection and use the dust-control measures required for the material and work setting. Depending on the task, this may include a compatible dust-extraction system, a suitable respirator, and other protective equipment. A basic disposable face covering should not be assumed to provide adequate silica protection.
Before drilling a wall, check for hidden wiring, pipes, and other services. In the United States, construction requirements may apply to work that creates silica dust, and the right controls depend on the job. Follow applicable OSHA requirements and the instructions for your tools and dust-control equipment.
Source: Bing
Protect your eyes
Use suitable safety glasses or goggles to guard against flying chips and dust.
Control dust
Use a suitable dust collection or suppression method designed for the tool and material.
Protect your hearing
Use hearing protection when the noise level and duration of the task call for it.
Keep a firm grip
Hold the drill securely and stand in a stable position. Avoid loose clothing and anything that could catch in rotating parts.
Check the wall first
Use appropriate methods to check for wires, pipes, and other hidden hazards before drilling.
Why Masonry Dust Needs Special Care
Masonry dust can contain respirable crystalline silica, which is fine enough to reach deep into the lungs. The risk depends on the material, the amount of dust released, how long the task lasts, and the controls used.
Do not rely on a room fan or an ordinary household vacuum to control hazardous dust. Use equipment designed and rated for the task. If the work involves substantial concrete drilling or repeated exposure, review the applicable OSHA silica rules and obtain qualified guidance on exposure controls.
Use suitable extraction
Choose a dust-control system compatible with the drill and the work.
Avoid dry sweeping
Do not spread fine dust into the air during cleanup. Use a suitable approved cleanup method.
A Quick Visual Checklist for Identifying Masonry Bits
If you are sorting a mixed drill-bit set, use this checklist to narrow down which bit is intended for masonry. The tip is the first clue, but it should not be the only one.
A visual match is useful for initial identification, not proof of suitability. A bit can resemble a masonry bit but still be designed for tile, glass, or a special drilling system. Confirm its rating before fitting it to the drill.
Source: Bing
Look at the head
A wide, blunt, or chisel-like carbide tip is common on standard masonry bits.
Follow the shaft
Spiral flutes often extend from the head along the metal body.
Inspect the shank
A smooth round shank often fits a standard chuck, while an SDS shank has distinct grooves.
Read the markings
Look for a size, material rating, brand, or model number that can be checked against the packaging.
Match the application
Confirm the bit is approved for the material, hole diameter, depth, and drill mode.
A Simple Example for a Homeowner
Suppose you need to mount a small shelf on a brick wall in a home in the United States. You open a mixed drill-bit case and find three similar-looking bits. One has a sharp center point, one has a narrow cone-shaped steel tip, and one has a broader carbide head.
The first is likely a wood bit, the second may be a metal bit, and the third may be a standard masonry bit. Check the markings and packaging to confirm. Then select the diameter specified for your wall anchor and make sure the bit fits the drill you intend to use.
This approach helps prevent a common mistake: choosing a bit because it looks close enough. A few seconds spent checking the head, shank, and rating can save a damaged bit, an oversized hole, or an unsafe drilling attempt.
Identify
Use the cutting-head shape as the first clue.
Verify
Check the manufacturer’s stated use and drill compatibility.
Prepare
Confirm the anchor size, hole depth, and safety precautions before drilling.
Frequently Asked Questions
Q
What is the easiest way to recognize a masonry drill bit?
Look for a broad, relatively flat or chisel-shaped tip, often made with carbide, on a metal shaft with spiral flutes. The tip usually looks less pointed than the end of a common wood or metal drill bit. Check the packaging or manufacturer’s markings to confirm its intended use.
Q
Are masonry drill bits always silver or gray?
No. Masonry bits may be silver, gray, black, or another finish. Their color depends on the material and coating used. Color alone cannot confirm that a bit is suitable for brick or concrete; inspect the cutting head and verify the product rating.
Q
Can I use a masonry drill bit on wood or metal?
A masonry bit may make a hole in some softer materials, but it is not usually the best tool for wood or metal. Wood bits often have a sharp center point, while metal bits have cutting edges designed for metal. Choose a bit rated for the material to get the intended result and reduce the risk of damage.
Q
Do all masonry drill bits work with a hammer drill?
No. Compatibility depends on the bit design and the drill. Some masonry bits are rated for hammer-drill use, while others may be intended for rotary-only drilling or a particular rotary-hammer system. Check the manufacturer’s instructions before switching on hammer mode.
Q
Can I use a masonry drill bit on ceramic or porcelain tile?
Only if the bit is specifically suitable for the tile type. Some tile bits have spear-shaped carbide tips, and others use diamond-coated cutting edges. Use the recommended speed and cooling method, and keep hammer action off unless the manufacturer explicitly permits it for that material.
Q
What does a worn masonry drill bit look like?
A worn bit may have a rounded or chipped carbide tip, missing cutting material, or visible cracks. It may also drill much more slowly than before. Stop using a bit with a damaged head or shank, and replace it when it can no longer cut safely and effectively.
Q
What size masonry drill bit do I need for a wall anchor?
Use the hole diameter and depth specified by the anchor manufacturer. The correct drill-bit size does not always match the screw’s diameter. A hole that is too wide may prevent the anchor from gripping properly, so check the package before drilling.
✦ Wrapping Up
Conclusion
Masonry drill bits usually have a hard, broad, chisel-like tip, a metal body with spiral flutes, and a shank designed for a compatible drill. These features help distinguish them from wood and metal bits, which often have sharper, differently shaped cutting ends.
The right choice depends on more than appearance. You need to match the bit to the material, the hole size, the required depth, and the drill system. A standard carbide-tipped bit may suit a small hole in brick, while concrete work or tile drilling may call for a different design.
Before you begin a project, inspect the tip and shank, read the manufacturer’s instructions, check for hidden services, and plan for dust control and eye protection. If the bit’s purpose or the wall’s contents are uncertain, pause and verify them rather than taking a guess.
💡 Key Takeaway
Check for a broad carbide tip and spiral flutes, confirm the bit’s material rating and shank compatibility, and use the diameter specified for your anchor before drilling.
A pink drill set should still be judged like any other power tool, not like a novelty gift. A cordless drill is a batterypowered tool that drives fasteners and…
A dewalt drill set xr should save you from buying separate drill and impact tools, then discovering the battery platform doesn’t fit. I know why these kits are…