How to use a cordless drill: The complete guide
The question "how to use a cordless drill" sounds simple, but the answer branches the moment you pick your first bit. Drilling a hole in a 2×4, chipping into cinder block, and driving a #8 drywall screw are three completely different workflows. Get the branch wrong and you walk the bit, strip the head, or crack the masonry.
A typical 18V consumer drill-driver (as of 2026) runs 0 to 1,600 no-load RPM and delivers 4 to 60 Nm of clutch torque, depending on the brand and class. That range covers nearly every home task. But only if you match the settings to the material.
Here is how the workflow actually breaks down.
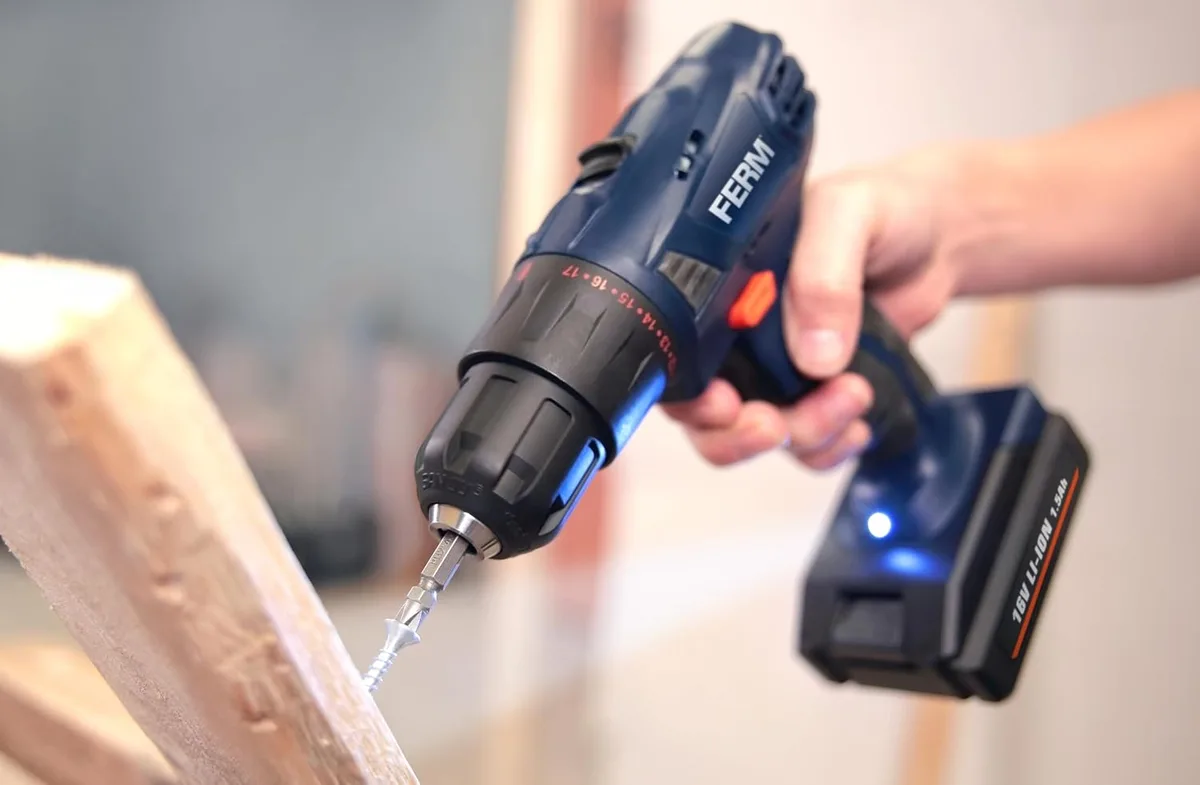
Quick Answer
To use a cordless drill, match your bit to the material.
Set the clutch torque to the correct numbered stop.
Select forward on the direction toggle.
Squeeze the trigger and apply steady, even pressure.
Let the bit cut. Never force it.
The cordless drill isn't one tool, it is a drill, a driver, and a hammer in one body
Most people grab a cordless drill-driver and assume it does one thing. It doesn't. Under the hood, you are looking at three distinct functions that each need a different setup.
- Drilling (rotary): The chuck spins the bit. You control speed with the trigger. This is for making holes in wood, metal, or masonry.
- Driving (clutch-engaged): The clutch collar clicks at a set torque. The bit spins, then the clutch disengages. This is for driving screws without stripping them.
- Hammer-drilling (masonry): A piston slams the bit back and forth while it spins. You only use this on brick, concrete, or block.
If you are drilling a pilot hole in a door frame, you want the clutch off (free-spin) and medium RPM. If you are driving a deck screw into cedar, you want the clutch on, set to a medium stop. If you are chipping a 3/8-inch hole into a concrete block, you want the hammer toggle on and the RPM low.
Each of those branches changes your next five steps. The rest of this guide walks through each path in order.
The parts that actually change your outcome: chuck, clutch, hammer toggle, and trigger
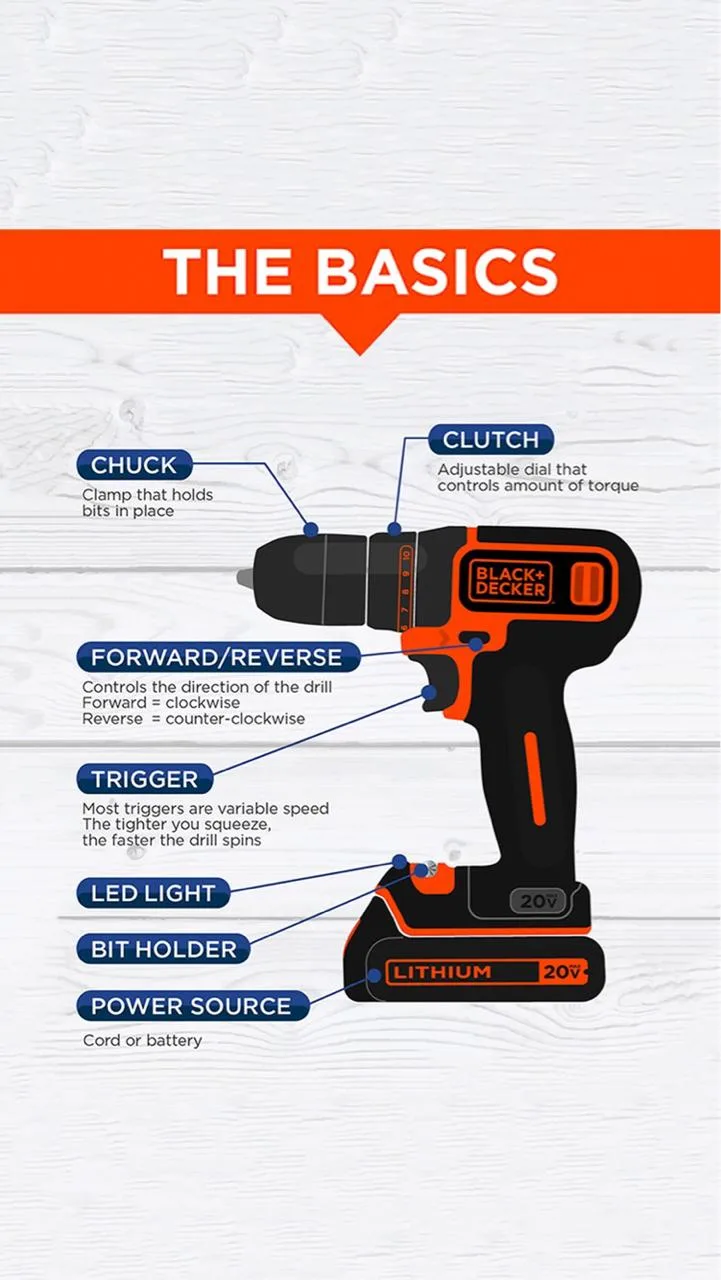
Before you can run the workflow, you need to know which physical part does what. Four components control 90% of your results.
- Chuck (keyless, 3-jaw): Holds your bit. Most 18V consumer drills take 1/4-inch to 3/8-inch round-shank bits. You open the jaws with your thumb and forefinger, drop the bit in, and close. If the bit wobbles under load, the jaws are worn and it is time for a new tool.
- Clutch collar (the numbered ring): This is the torque limiter for screw driving. It has 1 to 15 (consumer) or 1 to 24 (pro) numbered stops, plus a free-spin icon. Each stop is roughly 2 to 4 Nm on a typical 18V unit. You turn the ring before driving a screw.
- Hammer toggle (masonry models only): A small sliding switch near the chuck. When pushed to "hammer," a quick-piston mechanism adds 10,000 to 14,000 blows per minute of axial impact behind the spin. Leave it off for wood, metal, and drywall or you will walk the bit and crack the case.
- Variable-speed trigger: You control RPM by how far you squeeze. A light tap gives 200 to 400 RPM. Full squeeze hits the no-load max. The forward/reverse detent sits under your thumb or above the trigger, depending on the model.
Per ANSI B72.7 test methods, no-load RPM and torque figures are measured with a calibrated dynamometer at 77°F (25°C). Manufacturer spec sheets list these numbers, and they tell you the realistic ceiling for your unit.
Before you pull the trigger: the material to bit to speed to torque cascade
The single biggest mistake new users make is skipping this cascade. You pick the bit, jam it in, and start drilling. If the cascade is wrong, everything downstream fails.
Here is the chain:
- Identify the material. Wood, metal, masonry, plastic, composite. This is your first branch.
- Pick the bit type. Twist (HSS) for wood and soft metal. Cobalt HSS for stainless. Carbide-tipped brad-point for brick and concrete. Step bit for sheet metal. Forstner for flat-bottom holes.
- Set the RPM. Bigger bit, slower RPM. Harder material, slower RPM.
- Set the clutch or torque. Driving a screw? Pick the clutch stop. Drilling a hole? Free-spin (clutch off).
- Engage hammer mode only if you are in masonry.
The table below gives you starting numbers for the most common home tasks:
| Material | Bit Type | RPM Range | Clutch / Torque | Hammer? |
|---|---|---|---|---|
| Softwood (pine, cedar) | HSS twist, 1/8" to 3/8" | 900 to 1,400 | Free-spin (drill) / 3 to 5 (drive) | No |
| Hardwood (oak, maple) | HSS twist, 1/8" to 3/8" | 600 to 1,000 | Free-spin / 5 to 8 | No |
| Mild steel, aluminum | Cobalt HSS, 1/16" to 3/8" | 400 to 700 | Free-spin / 4 to 6 | No |
| Brick, cinder block | Carbide brad-point, 3/16" to 1/2" | 400 to 900 | Free-spin / 6 to 10 | Yes |
| Drywall (screw) | Phillips #6, #8, #10 | N/A (drive) | 2 to 4 (clutch stop) | No |
| Plastic, PVC | HSS twist, shallow bevel | 300 to 500 | Free-spin / 1 to 2 | No |
These numbers come from manufacturer torque curves and OSHA power-tool safety guidance, which recommends matching feed pressure to the tool's designed capacity rather than brute-forcing it.
Drilling into wood: matching RPM to bit diameter and stopping before break-through
Wood is the most forgiving material, which is exactly why people over-squeeze the trigger. Don't.
Pick the RPM. A 1/8-inch twist bit in pine wants around 1,200 to 1,400 RPM. A 3/8-inch bit in oak drops to 600 to 800. The rule of thumb: multiply bit diameter in inches by 3,000, then divide by a material factor (softwood = 1, hardwood = 1.5).
That gives you a starting RPM. Adjust from there.
Use the clutch off. For drilling holes, you want free-spin. The clutch is for driving screws, not for making holes. If the clutch is set to a number and you try to drill, it will click and stop every half-turn, chattering the bit and walking it off center.
Withdraw to clear chips. Every 4 to 6 seconds of continuous drilling, back the bit out two or three inches. Sawdust packs the flutes. Once they are full, the bit stops cutting and starts rubbing.
You will feel the RPM drop and the motor get hot.
Stop before break-through. When you are drilling a through-hole in a 1×4 shelf, slow your RPM as you get within 1/4 inch of the exit side. Punching through at full speed tears the wood fibers outward and leaves a ragged, splintered hole. Decelerate, let the bit finish, and the hole comes out clean.
Pilot holes for screws. Driving a 1/4-inch bolt into a 2×4? Drill a 5/16-inch pilot. Driving a #8 drywall screw into a stud?
No pilot needed. Pilot holes prevent splitting, and they only matter near the edge or in hardwood.
Drilling into metal: why 600 RPM and a drop of cutting oil beat full throttle every time
Metal is where cordless drills start to show their limits, and where most home users burn bits in under a year.
Slow the RPM way down. A 1/4-inch cobalt bit in mild steel wants 400 to 700 RPM. Full throttle at 1,600 RPM generates enough friction heat to temper the bit tip, literally changing its hardness. The bit goes from cutting to plowing, then breaks.
Per ASME B29.1.4 tool-steel guidelines, stay under 800 RPM for bits 3/16 inch and larger in steel.
Apply cutting oil or tap lube. A drop of machine-shop cutting oil on the bit entry point drops friction by 40 to 60%. The bit stays cooler, lasts longer, and the hole comes out smoother. For stainless steel, use a sulfur-based cutting fluid.
Plain oil will not grip enough.
Do not force it. Metal drilling is a pressure game. Steady, even forward pressure. Let the bit cut at its own pace.
If you lean your shoulder into it, the bit flexes, the shank wobbles in the chuck, and you get an oval hole or a snapped shank.
Match the bit to the alloy. For mild steel and aluminum, standard HSS is fine. For 304 and 316 stainless, you need M42 cobalt HSS (8% cobalt) or a carbide-tipped bit. A standard HSS bit work-hardens stainless on the first pass, and every subsequent pass is harder than the one before.
Clear the chips. Metal chips are long, curling swarf. They pack the flutes fast. Withdraw every 3 to 4 seconds, blow the flutes clear, and re-enter.
If you do not, the bit jams, the motor stalls, and the battery drains in 30 seconds.
Drilling brick, concrete, and cinder block: hammer mode, brad-point bits, and clearing chips before the bit chokes
Masonry is the branch where your workflow restructures completely. If you are drilling into brick, cinder block, or poured concrete, you need three things: a carbide-tipped brad-point bit, the hammer toggle engaged, and steady low RPM.
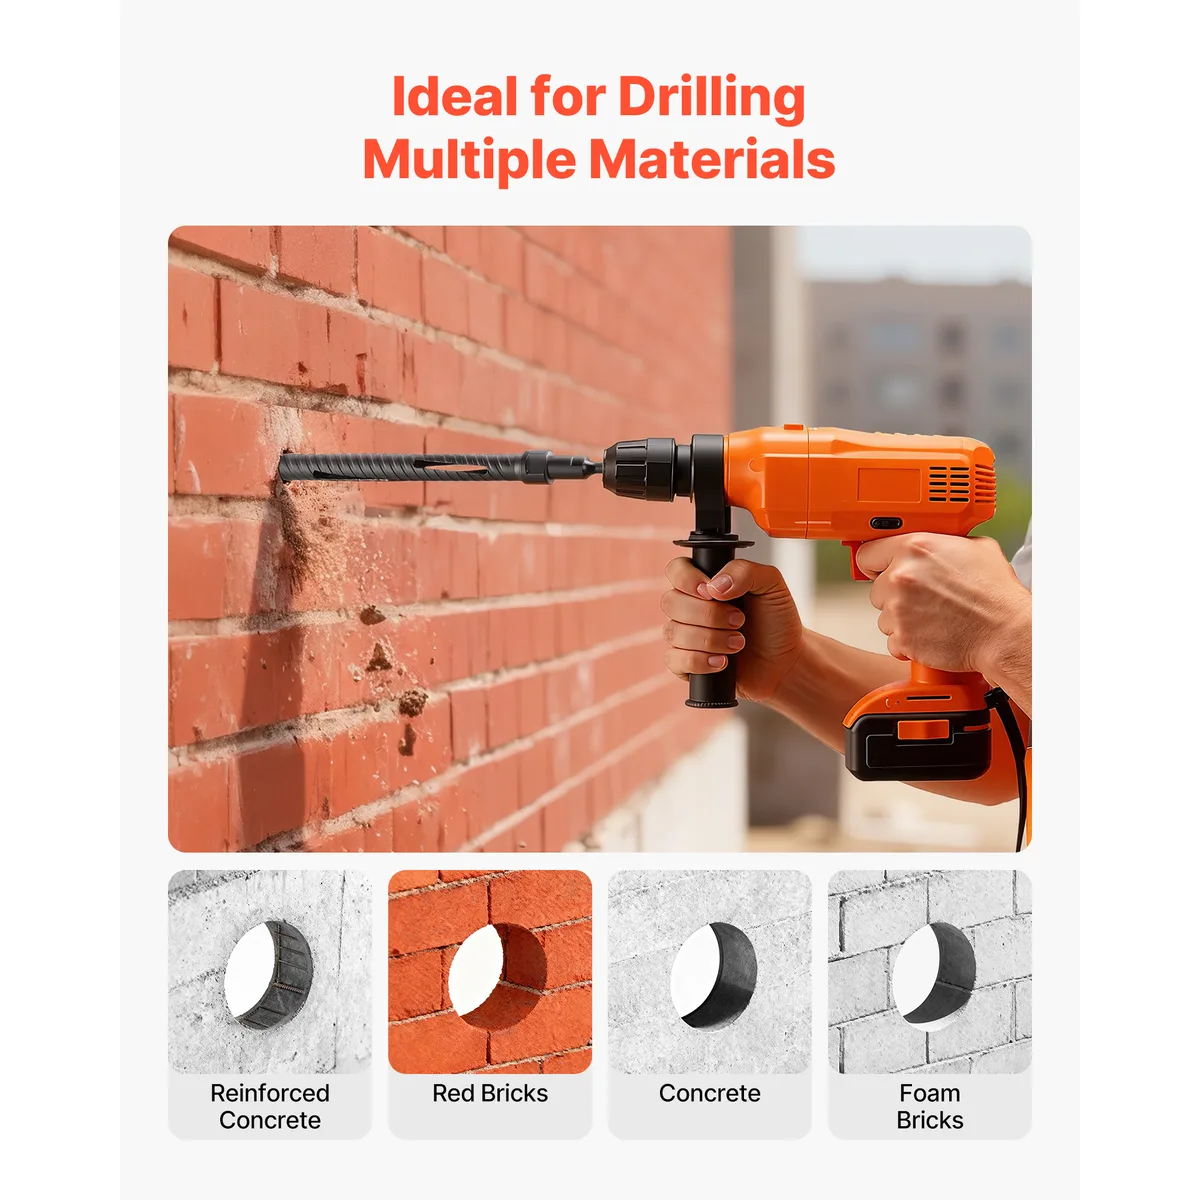
Here is the sequence. Mark your hole with a center punch. The sharp dimple stops the bit from walking on the rough surface.
Insert a 3/16-inch to 1/2-inch carbide brad-point bit. Engage the hammer toggle. Set your trigger to the 400 to 900 RPM range.
Apply even forward pressure, no more than 10 to 15 pounds of force.
If you feel the bit stall, back out completely and blow the flutes clear. Cement and brick dust packs the flutes fast, and a packed bit generates heat that softens the carbide tip. Withdraw every 4 to 6 seconds.
Re-enter at the same spot.
For cinder block, the voids make this easier. For solid poured concrete, expect 3 to 5 minutes per 3/8-inch hole in 2-inch-thick material. A 40V brushless rotary hammer with an SDS-plus shank will do it in under 60 seconds.
A standard 18V hammer drill will grind for a while. Match the tool to the job.
Driving drywall, deck, and structural screws: reading the clutch dial so you don't strip or bottom-out
The clutch is your built-in torque limiter. You set a numbered stop, the motor spins the bit, and at the preset torque the clutch opens. The bit keeps spinning but no torque reaches the screw head.
This is how you avoid stripping.
For a #8 drywall screw into a stud, set the clutch to stop 2 or 3. You will hear two or three clicks, then the bit spins freely. The screw seats flush.
For a #10 deck screw into 5/4-inch cedar, bump it to 4 or 5. For a 1/4-inch lag bolt into a structural beam, you will likely need 8 to 10 or max drive.
The key rule: if the clutch clicks more than three times before the screw seats, you are under-set. Bump it up one. If the screw strips and the wood fibers tear around the head, you are over-set.
Drop it one.
For torque-critical applications like gas-line fittings or structural bolts, do not rely on the clutch. Use a calibrated torque wrench on a hex driver bit. Clutch numbers vary by manufacturer, so a "5" on one tool is not a "5" on another.
The five mistakes that walk your bits, crack your masonry, and cook your bits
Aggregate user reviews and manufacturer troubleshooting pages point to the same five failure patterns:
- Bit walking on the surface. You start at full RPM and the bit skids instead of biting. Fix: use a center punch on metal and masonry, or start at quarter-speed on wood and let the tip seat before you accelerate.
- Forcing shoulder weight into masonry. You lean your body into the drill, the bit jams, the motor stalls, and the battery drops 20% in 30 seconds. Fix: let the hammer do the chipping. You just guide.
- Leaving hammer mode on for wood or drywall. The axial blows crack the case, walk the bit, and round the hole. Fix: toggle hammer off the moment you switch from masonry to anything else.
- Running a metal bit at 1,600 RPM. The heat tempers the tip in 8 to 10 seconds. The bit goes from cutting to rubbing. Fix: stay under 700 RPM for 1/4-inch and above in steel.
- Not clearing chips between passes. Packed flutes mean the bit is wedging, not cutting. The motor strains, the bit overheats, and you break the bit or kill the battery cycle. Fix: withdraw and clear every 3 to 5 seconds.
RPM, torque setting, and bit-size reference: what to dial in for each fastener
The cascade table above covers starting RPM. This one maps clutch stops to fastener types, which is the detail most users cannot find in the manual:
| Fastener / Task | Material | Clutch Stop (18V consumer) | Note |
|---|---|---|---|
| #6 drywall screw | 1/4" drywall into stud | 1 to 2 | Two max clicks, then free-spin |
| #8 drywall screw | 1/4" drywall into stud | 2 to 3 | Three clicks, seat flush |
| #10 deck screw | 5/4" cedar or IPE | 4 to 6 | Adjust for wet vs. dry wood |
| 1/4" lag bolt | 2×4 structural | 8 to 10 or max | Confirm with torque wrench |
| 3/8" anchor bolt | cinder block | 10 to 12 or max | Hammer drill for hole, impact driver for bolt |
| Self-tapping metal screw | 18-gauge sheet steel | 1 to 3 | Slow trigger, light pressure |
Each stop on a typical 18V unit is roughly 2 to 4 Nm. A #8 drywall screw needs about 5 to 8 Nm to seat properly. A #10 deck screw into dry cedar wants 12 to 18 Nm.
You can back into the clutch stop from those numbers.
The safety checks you skip until you bore into a wall and pop a 14-gauge wire
This is the section that saves you from a trip to the ER or a dead electrical panel. Before you drill into any wall, cabinet back, or ceiling, run through this list:
- Scan for wiring. In standard US residential construction, Romex runs vertically from the outlet or switch, then horizontally to the next box. Wires sit 1.25 to 1.5 inches from the top or bottom of a plate. Use a voltage-sensitive stud finder in deep-scan mode.
- Check for plumbing. Shutoff valves, P-traps, and supply lines hide behind cabinets and inside walls near fixtures. If you are drilling within 12 inches of a faucet or drain, confirm the pipe location first.
- Wear ANSI Z87.1-rated safety glasses. Masonry dust at 900 RPM with hammer action throws sharp particles at 40 mph or more.
- Clear the area. Long hair, loose sleeves, and gloves catch the chuck. No exceptions.
- Battery handling. Do not charge a swollen or cracked Li-ion pack. Store spare packs at 40% to 60% charge, cool and dry. Per UL 2595 (the safety standard for battery-operated hand tools), a damaged pack is retired, not recharged.
These checks take 60 seconds. Skipping them costs a half-day at the electrical panel or a flooded cabinet.
Storing, cleaning, and charging so your drill outlasts the warranty
Store your Li-ion pack at 40% to 60% charge, cool and dry, away from direct sun. Blow out the gear case and chuck with compressed air monthly, and add a light drop of oil to the chuck jaws once a year. Per UL 2595, a swollen or cracked pack gets retired, not recharged.
Quick decision guide: I am doing X into Y, here is the exact sequence
Use this as your at-a-glance cheat sheet. Match your task to the row, then follow the sequence in order.
| Task | Exact Sequence |
|---|---|
| Drive #8 drywall screw into stud | Clutch stop 2 or 3, forward, quarter trigger, even pressure, let it click free |
| Drill 3/8" hole through a 2×4 | Free-spin, 800 RPM, withdraw every 4 seconds, slow at exit side |
| Drill 1/2" masonry hole for anchor | Hammer ON, 600 RPM, brad-point carbide bit, center punch first, withdraw every 5 seconds |
| Drill 1/4" hole in 16-gauge steel | Cobalt HSS bit, 500 RPM, drop of cutting oil, withdraw every 3 seconds |
Questions that come up on the job site and in the workshop
Why does my drill click and stop when I am driving a screw?
That is the clutch doing its job. Bump the stop up one or two numbers and the screw seats without the repeated clicking.
Can I use my 18V drill as a hammer drill into concrete?
Only if the unit has a hammer toggle. If yours is a standard drill-driver without one, you will grind for 20 minutes and get a shallow scratch. Rent or buy a rotary hammer for solid concrete.
What clutch setting do I use for a stripped screw I am trying to back out?
Set it to the lowest stop, select reverse, and use a slightly smaller Phillips bit. The low torque prevents further cam-out while you back the head free.
How long should a cordless drill battery last on a charge?
A 2.0 Ah pack drives roughly 150 to 200 drywall screws. A 4.0 Ah pack handles a full day of light home projects. Continuous masonry work drains any pack in 15 to 20 minutes.