How to sharpen drill bits with grinder: Easy guide
You've got a drawer full of bits that wander, burn chips, or just refuse to cut, and you're asking how to sharpen drill bits with grinder equipment you already own. The answer is simpler than most tutorials make it. But the geometry matters more than you'd think, and one wrong angle writes the bit off.
A standard HSS twist bit carries a 118° included point angle, which breaks down to 59° per lip. That spec comes straight from ANSI B8.19 dimensional standards. Get that number right and the bit cuts clean.
Get it wrong and you've made a very expensive paperweight. Let's walk through the actual geometry, setup, and technique so your next pass doesn't waste a good bit.
Quick Answer
To sharpen drill bits with a grinder, clamp the bit in a collet and touch only the cutting lip to the outer rim of a 36 or 60 grit aluminum oxide wheel. Set the bit's web face parallel to the wheel's flat face. Make 1 to 2 second passes at 59° per side.
Keep both lips the same length. Air-cool only. No water on a hot HSS bit.
Why "Just Follow the Steps" Fails When You're Grinding a Drill Bit
Most written guides tell you to "tilt the bit at an angle and grind lightly." That's where things fall apart. The angle isn't arbitrary. It's a fixed geometric relationship between the bit's axis and the wheel's face, and it changes with the bit type.
A standard twist bit for wood and mild steel wants 59° per lip. A masonry brad-point wants 45° per lip (90° included). A bit for stainless or hardened alloy wants 67.5° per lip (135° included).
If you follow a generic "45 degrees" instruction on a 118° bit, you shave off too much material on the top face and create a hook that grabs and pulls.
The second failure mode is visual. You can't feel a 1° lip mismatch through a collet. You have to see it.
That's why the whole process leans on spatial understanding: where the wheel touches, which face is parallel, and what the spark color tells you about temperature.
What You're Actually Grinding: Lip, Point, and Where the Wheel Touches
Before you spin the wheel, know the anatomy. A twist bit has two cutting lips running diagonally from the center point to the outer edge. The chisel edge, or center point, connects those two lips at the very tip.
The flutes are the twisted channels that carry chips out of the hole. The web is the solid steel core between the flutes.
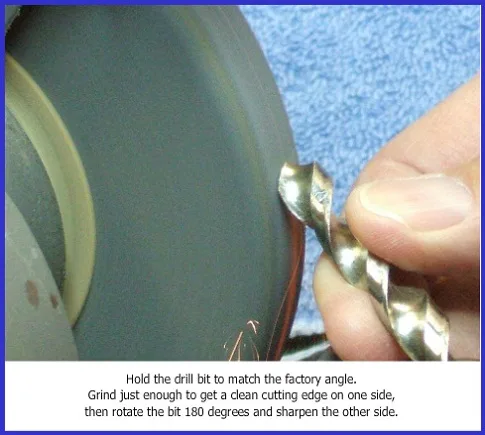
You grind only the outer face of each cutting lip. That face touches the peripheral rim of the wheel, the outer 3/16" or so where the wheel spins fastest. You do not touch the flat face of the wheel.
You do not grind the flute walls. You do not drag the shank across anything.
Think of it this way. Hold the bit with the chisel edge pointing at you. Each lip is a little bevel, like the edge of a new pencil.
You're regrinding that bevel. The top of the lip, the part closest to the bit's axis, must stay flat and level. If it curves upward, that's a hook, and the bit will dig in and bind on the next hole.
Setting Up Your Bench Grinder: Tool Rest, Vise, and Face-Parallel Alignment
Grab a 6-inch bench grinder running at 3,450 RPM with a fresh 36 or 60 grit aluminum oxide wheel. OSHA 29 CFR 1910.215 requires the wheel guard in place and the tool rest set no more than 1/8" from the wheel face. Check that gap before every session.
A tool rest that has slipped back gives you zero support and turns the bit into a lever.
Clamp the bit in a small bench vise or a dedicated collet fixture. The shank goes in, the cutting point sticks out free. Here's the critical alignment: the flat side of the bit (the web face, the side that looks like a flat plane when you face the tip) must be parallel to the plane of the spinning wheel.
If you sight along the bit's axis and the web looks like it's tilting toward or away from the wheel, you're set up to make asymmetric lips.
As of 2026, most shop-floor bit-sharpener jigs on the market include a machined 59° ramp. You set the bit in the ramp, clamp it, and the angle is done for you. If you're working freehand, mark a reference line on the bit's shank with a scribe and check it against a machinist's square before each pass.
A 1° error at the rim looks tiny at the tip but compounds into a wandering bit at 1,500 RPM in a drill.
For the full regulatory language on grinder setup and guard requirements, the OSHA 29 CFR 1910.215 standard is the reference point. It covers wheel balance, face velocity limits, and the tap-test you should do before every spin-up.
The Grinding Pass: Peripheral Contact, 59° Lip Angle, and What the Sparks Tell You
Now the actual grinding. Bring the lip to the outer rim of the wheel with light, even pressure. One pass lasts 1 to 2 seconds.
You should feel the bit warm up but not get hot. Watch the sparks:
- Bright yellow-white, short stream: correct temperature, HSS temper intact.
- Orange to dull red, longer stream: you're running hot. Back off pressure or shorten the pass.
- Blue glow on the bit face: the temper is drawing out. That lip is now soft. Stop, let it cool, and regrind that spot.
- No sparks, bit just slides: you're not touching the rim. You're on the wheel's flat face. Reposition.
The rule is always the same: skim, don't dig. You're removing maybe 0.005" to 0.010" of metal per pass. Three to five passes per lip, max, before you check symmetry.
If you need more than six passes, you've walked the bit too far and it's time to re-evaluate your starting angle.
Grinding Lip 1, Then Lip 2, Then the Center Point
Order matters. Grind lip 1 (say, the left one as you face the point) first. Make your 3 to 5 light passes.
Stop. Pull the bit back and look. Now flip the bit 180° in the vise and grind lip 2 to match.
Compare both lips by eye or with calipers. They should be the same length to within a hair's breadth.
Finally, dress the chisel edge. Give it 1 to 2 very light touches on the wheel's rim. You want a sharp, clean center point.
If you leave the chisel edge rounded or cracked, the bit will hunt instead of starting clean in the material.
Reading Your Lips: How to Spot Asymmetry, a Hook, or a Worn Chisel Edge by Eye
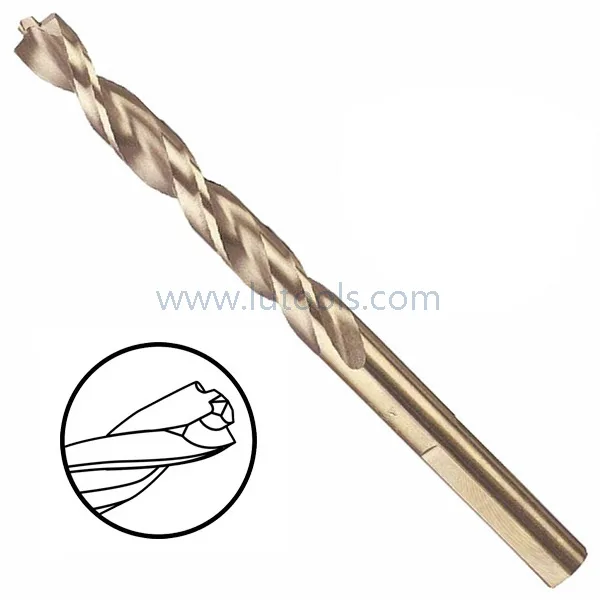
Hold the bit up to bright light and look at the point from the front. Three defects jump out if you know what to check:
- Asymmetry: one lip visibly longer or thicker than the other. The bit pulls to the shorter side and you get off-center holes every time.
- Hook: the top edge of a lip curves up like a small claw instead of sitting flat. It catches the material, grabs, and can twist the bit in the drill. You feel it as a sudden jerk.
- Worn or rounded chisel edge: the center point looks blunt or broken. The bit skates on the surface instead of biting, and you need way more feed pressure to start the hole.
If you see any of these, you don't need to regrind the whole bit. You just touch up the offending spot. A hook gets one light skim on the top face until it's flat.
A rounded chisel gets 1 to 2 passes on the rim. A 1° lip mismatch gets corrected by grinding the longer lip down to match the shorter one. Never grind the short lip to meet the long one, because you're throwing away cutting edge you'll need later.
One last check before you put the bit in the drill: run your fingernail across the top of each lip. It should feel sharp and flat. If it feels rounded or catches your nail, it's not ready.
Five Visual Mistakes That Ruin a Bit in a Single Pass
Most ruined bits die from the same five errors, and all of them are visible if you pause between passes.
- Grinding the wheel face instead of the rim. The bit slides across a flat, cold zone and the lip rounds off with no sharp edge. You feel zero resistance and see no sparks.
- Lifting the bit tip above the wheel centerline. This tilts the lip angle too shallow, creates a hook on the top face, and the bit grabs on the next hole.
- Grinding both lips in one continuous drag. You skip the symmetry check. One lip always comes out 0.5° longer, and the bit pulls.
- Pressing hard to speed things up. You blow through the HSS temper in 3 seconds. The lip turns blue, softens, and the edge rolls off before you notice.
- Leaving the chisel edge untouched after grinding the lips. The center point stays rounded or cracked. The bit skates instead of biting, no matter how sharp the lips look.
Each of these takes 5 seconds to catch if you stop and look. The cost of not stopping is a bit that's now 0.015" shorter, one grinding cycle closer to being too thin to hold an edge, and a hole that wanders on your next job.
HSS vs. Carbide-Tipped Bits: What Changes When the Wheel Meets the Tip
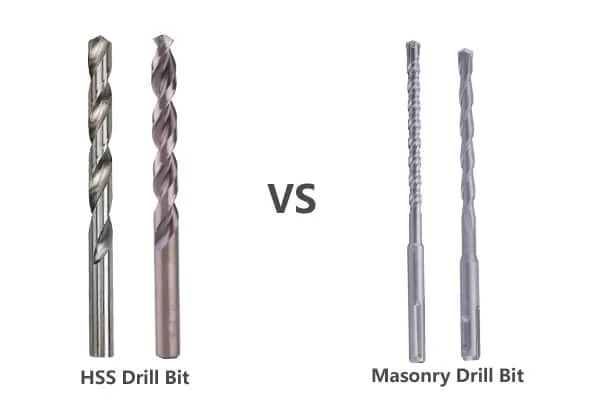
An HSS twist bit is all steel. The entire cutting edge, flutes, and shank are the same material. You grind the lip on an aluminum oxide or CBN wheel, and the steel sheds clean, predictable chips.
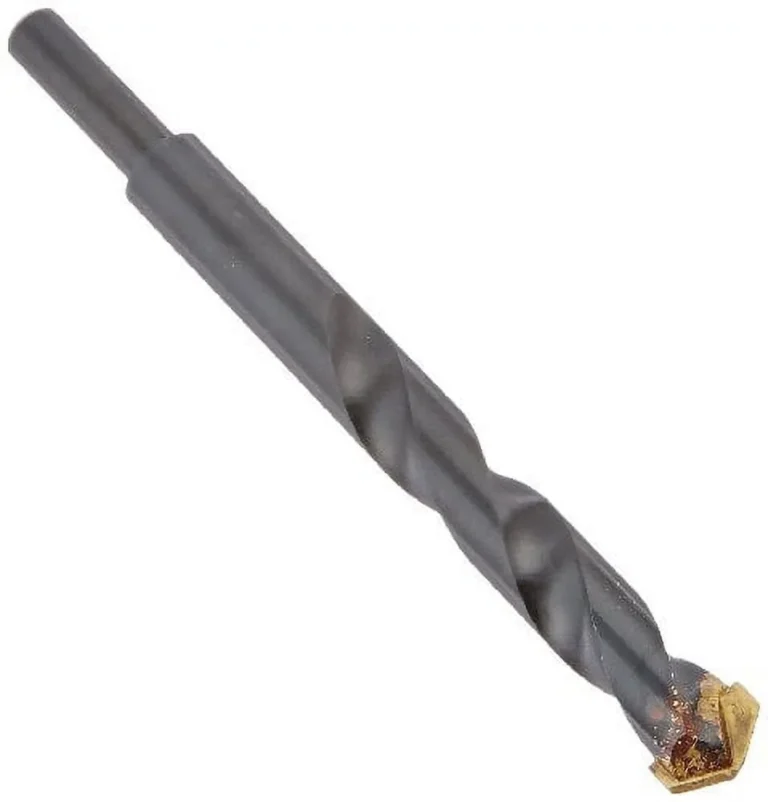
A carbide-tipped masonry bit is different. The body is plain steel, but the tip is a small tungsten carbide insert brazed on. That insert is roughly 4,000 times harder than the steel body.
An aluminum oxide wheel won't touch it. You need a CBN or diamond wheel, and you only grind the flat top of the carbide insert, not the steel body.
If you try to sharpen a carbide masonry bit on a standard 60 grit bench wheel, you'll just round off the steel shoulders and waste the insert. The carbide itself stays exactly as it was. Most masonry bit manufacturers specify CBN at 120 to 320 grit for this job.
Testing the Bit on Scrap: Biting, Skating, and Chip Patterns That Mean It's Done
Pull a scrap piece of the same material you'll actually drill. Run the bit at your working speed and feed rate. You're looking for three things:
- Clean bite at the surface. The bit should grab and start cutting within a fraction of a second. If it skates or slides, the chisel edge is still rounded or the lip angle is too shallow.
- Continuous chip formation. Healthy chips come out as short, curled segments. Long, thin, stringy chips mean the flutes are clogging or the web is too thick for the material.
- No burn or discoloration on the test hole. If the steel around the hole looks blued or you smell a sharp burnt-metal odor, the feed rate is too high for the geometry you just ground.
If the test hole is clean, the chips curl, and there's no smell, the bit is done. Wipe it, give it a thin coat of oil, and rack it up.
Quick-Reference Table: Point Angles, Wheel Grits, RPM, and G×D Limits by Bit Type
| Bit Type | Included Angle | Wheel Material | Grit Range | G×D Limit (in × RPM) |
|---|---|---|---|---|
| HSS twist (general) | 118° | Al-oxide or CBN | 36 to 60 (al-ox) / 120 to 220 (CBN) | 100,000 |
| HSS twist (hard metals) | 135° | CBN preferred | 120 to 220 | 100,000 |
| Brad-point / masonry steel body | 90° | Al-oxide | 36 to 60 | 100,000 |
| Carbide-tipped masonry insert | 90° | CBN or diamond | 120 to 320 | 80,000 |
| Cobalt HSS (5% Co) | 118° or 135° | CBN | 120 to 220 | 100,000 |
The G×D limit comes from wheel manufacturer data sheets. Multiply the wheel diameter in inches by the max RPM and keep that product at or below the stated number. Exceed it and the wheel can fracture.
A 6-inch wheel at 3,450 RPM gives 20,700, well under the limit. A 4-inch Dremel wheel at 30,000 RPM gives 120,000, which exceeds the al-oxide rating. That's why small wheels need lower speeds or CBN construction.
Grinding Wheel Care: Dressing a Flat Spot, Balancing, and Knowing When to Replace
A vitrified al-oxide wheel develops flat spots on the side you use most. After a few dozen grinding sessions, one edge of the wheel is worn down and the other is still round. The result is a wobble that makes your angle inconsistent.
Dress the wheel with a diamond dressing tool or a sharp ceramic rod. Run the dresser across the rim at 50 to 100 contact points, a full revolution of the wheel per pass. You'll hear the pitch of the grinding change as the fresh abrasive breaks in.
Do this every 10 to 15 sessions, or whenever you notice the wheel humming instead of hissing.
Before every use, tap-test the wheel. Give it a light tap with a wooden mallet. A clean ring means it's sound.
A dull thud or crack sound means it's internally stressed. Pull it from the grinder, tag it, and order a replacement. OSHA requires this check, and for good reason.
A shattered vitrified wheel at 3,450 RPM is a shrapnel event, not a tooling issue.
Check the balance too. Spin the wheel up with no load. If it wobbles visibly, re-mount it with the balance weights set.
A heavy spot on the wheel translates into a pulsing force on your bit every revolution, and your 1° angle tolerance just went out the window.
Before You Spin the Wheel Up: Guards, Tool Rest Gap, and Eye Protection
Before the wheel hits 3,450 RPM, run a 10-second visual check. The wheel guard must be in place and the tool rest must sit within 1/8" of the wheel face. Per OSHA 29 CFR 1910.215, if that gap has opened up, the bit has no support and becomes a lever you can't control.
Put on a full-face shield, not just safety glasses. At 3,450 RPM, a chip or a wheel fragment exits at roughly 133 feet per second. Sunglasses won't stop it.
A face shield over your glasses will.
No loose sleeves, no gloves, no jewelry. The wheel grabs fabric fast, and the consequences at that speed are not a minor one.
When to Stop Grinding and Just Buy a New Bit
You stop grinding when the web (the solid core between the flutes) drops below roughly 40% of its original thickness. At that point, the bit has lost enough material that it flexes, wanders, and chips more than it cuts. For a 1/4" bit, that means you've ground off about 0.020" to 0.030" of diameter across three or four full sharpening cycles.
A practical rule: if you've resharpened a bit three times and the flutes look shallow or the web is visibly thinner than a new bit of the same size, scrap it. A $2 replacement costs less in frustration than a fourth grind that barely holds an edge.
Common Questions That Pop Up Mid-Session
Can I use a Dremel or die grinder instead of a bench grinder?
Yes, but only with a small CBN or diamond bit, not a flat wheel. The 1/8" to 1/4" carbide bits on a rotary tool give you more control on smaller bits under 5/16". You lose the peripheral-rim advantage and gain the risk of chipping the point with too much pressure.
Why does my bit still wander after a good-looking grind?
You likely ground the top face of the lip slightly curved instead of flat. That micro-hook catches the hole wall on each revolution. Take one more light pass across the top of each lip until it reads flat under your fingernail.
Do I need to grind the flutes or the shank?
No. The flutes are chip-removal channels and don't sharpen. The shank is a fit surface for your drill's chuck, and grinding it ruins your grip.
You only ever touch the two cutting lips and the chisel edge.
What grit wheel do I need for cobalt bits?
Cobalt HSS (5% Co) is harder than plain HSS. Use a CBN wheel at 120 to 220 grit rather than standard al-oxide. Al-oxide will glaze on cobalt and stop cutting.
If you only have al-oxide, expect two to three times more passes and watch for blue lines at the lip.
The "One Good Kit" Approach: How Many Bits You Actually Need to Keep Sharp
You do not need 40 sizes in a rack. A working set of 8 to 12 bits, from 1/16" to 3/4", covers 90% of wood, metal, and masonry jobs. Keep them on a 118° or 135° geometry for your primary material, and resharpen them every 3 to 5 hours of cutting.
That small, maintained set outperforms a big, dull drawer every time.