To use a drill, fit the right bit, secure your work, select the correct direction and speed, then squeeze the trigger slowly while keeping the tool straight.
From hanging shelves in a suburban home to assembling furniture in a small apartment, a power drill can make everyday DIY work much easier. In the United States, common home projects include mounting curtain rods, building decks, fixing loose cabinet hardware, and putting together flat-pack furniture. You do not need years of workshop experience to get started, but you do need to understand the tool before you press the trigger.
A drill can make holes and drive screws. Some models also offer a hammer setting for approved masonry work. The key is to match the bit, speed, torque, and drill mode to the material. With a few basic checks and some practice on scrap wood, you can learn how to use a drill with better control and fewer mistakes.
This guide explains how to prepare a drill, choose accessories, drill into wood and other common materials, drive screws, and solve basic problems. It also covers safety steps that matter when working around electrical wiring, pipes, dust, and hidden objects inside walls.
Source: dunnlumber.com
Understand the Parts of a Power Drill
Before learning how to use a drill, take a moment to identify its main parts. Knowing what each control does helps you work with more confidence and makes it easier to correct mistakes.
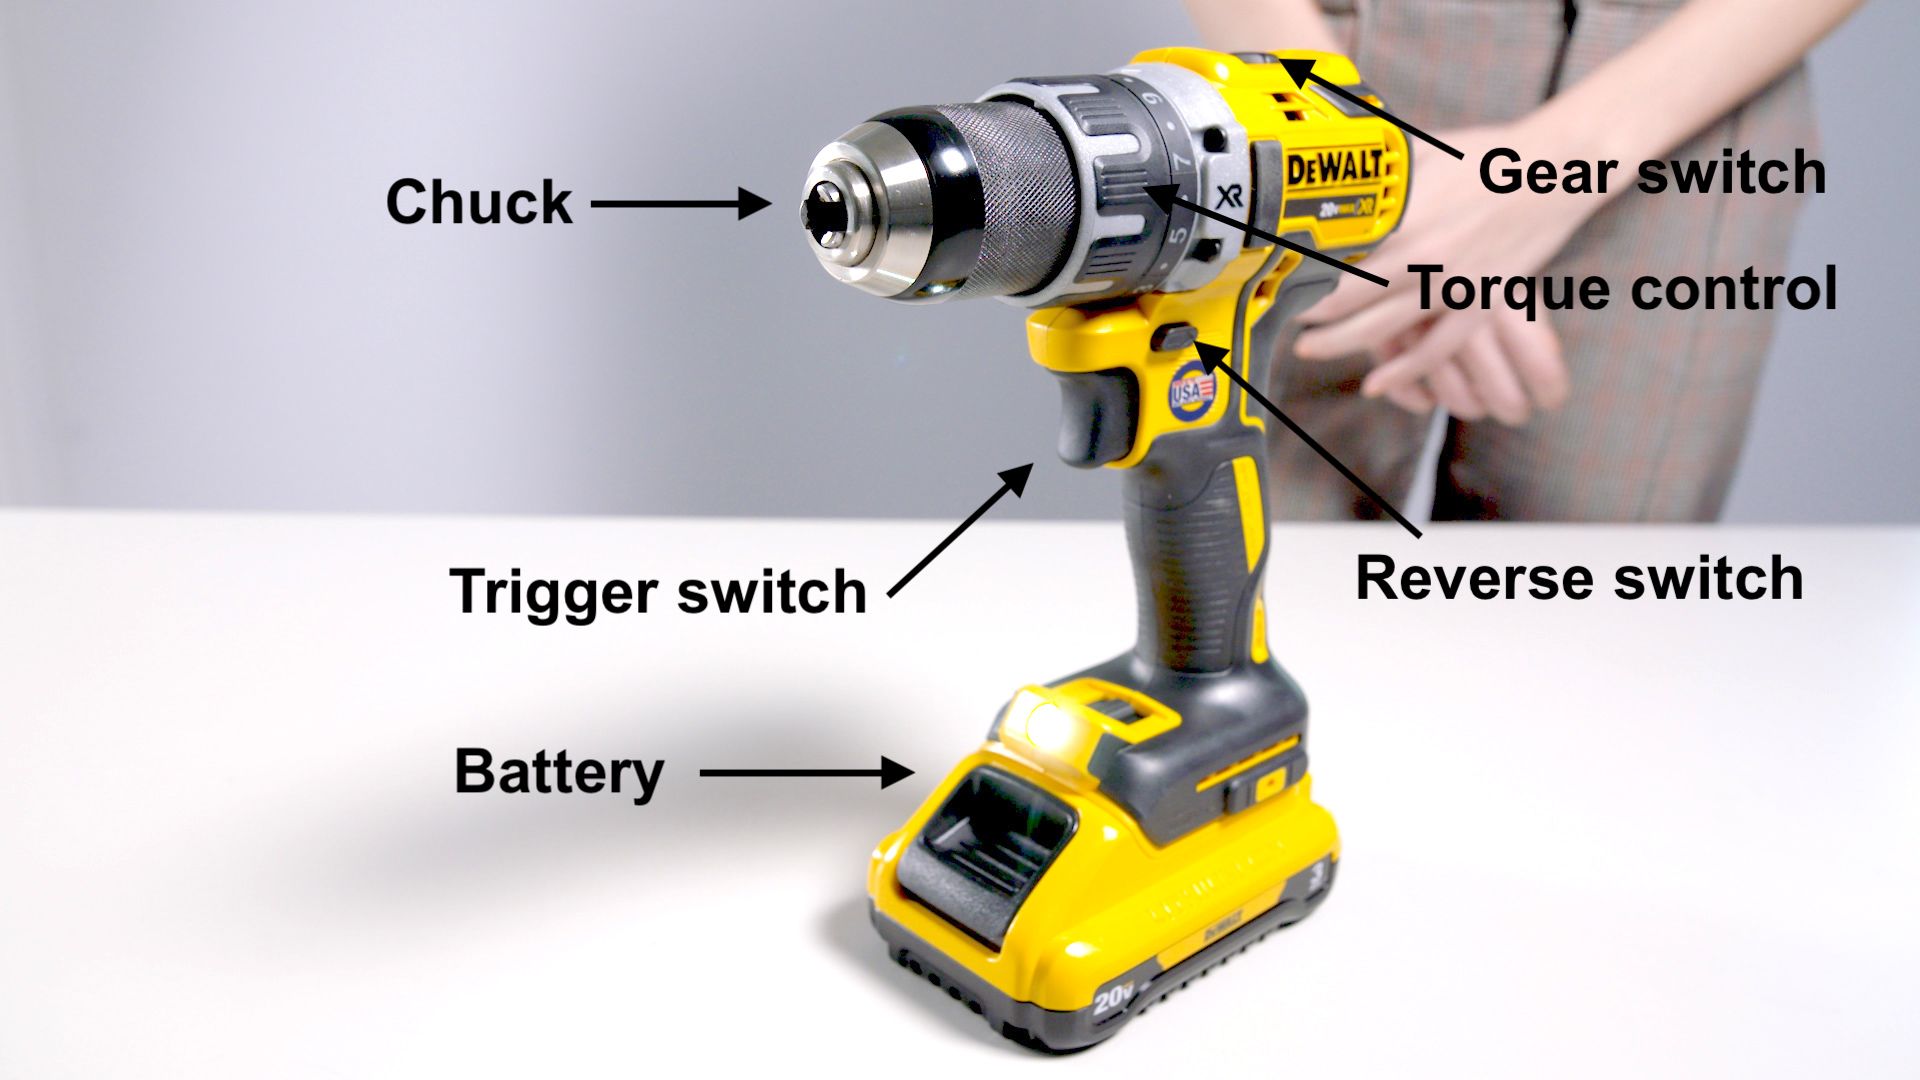
Most cordless drills have a battery, handle, trigger, chuck, direction selector, and speed control. Many also have an adjustable clutch and a ring for selecting drill mode. The exact layout varies by model, so read the manufacturer’s manual before using an unfamiliar tool.
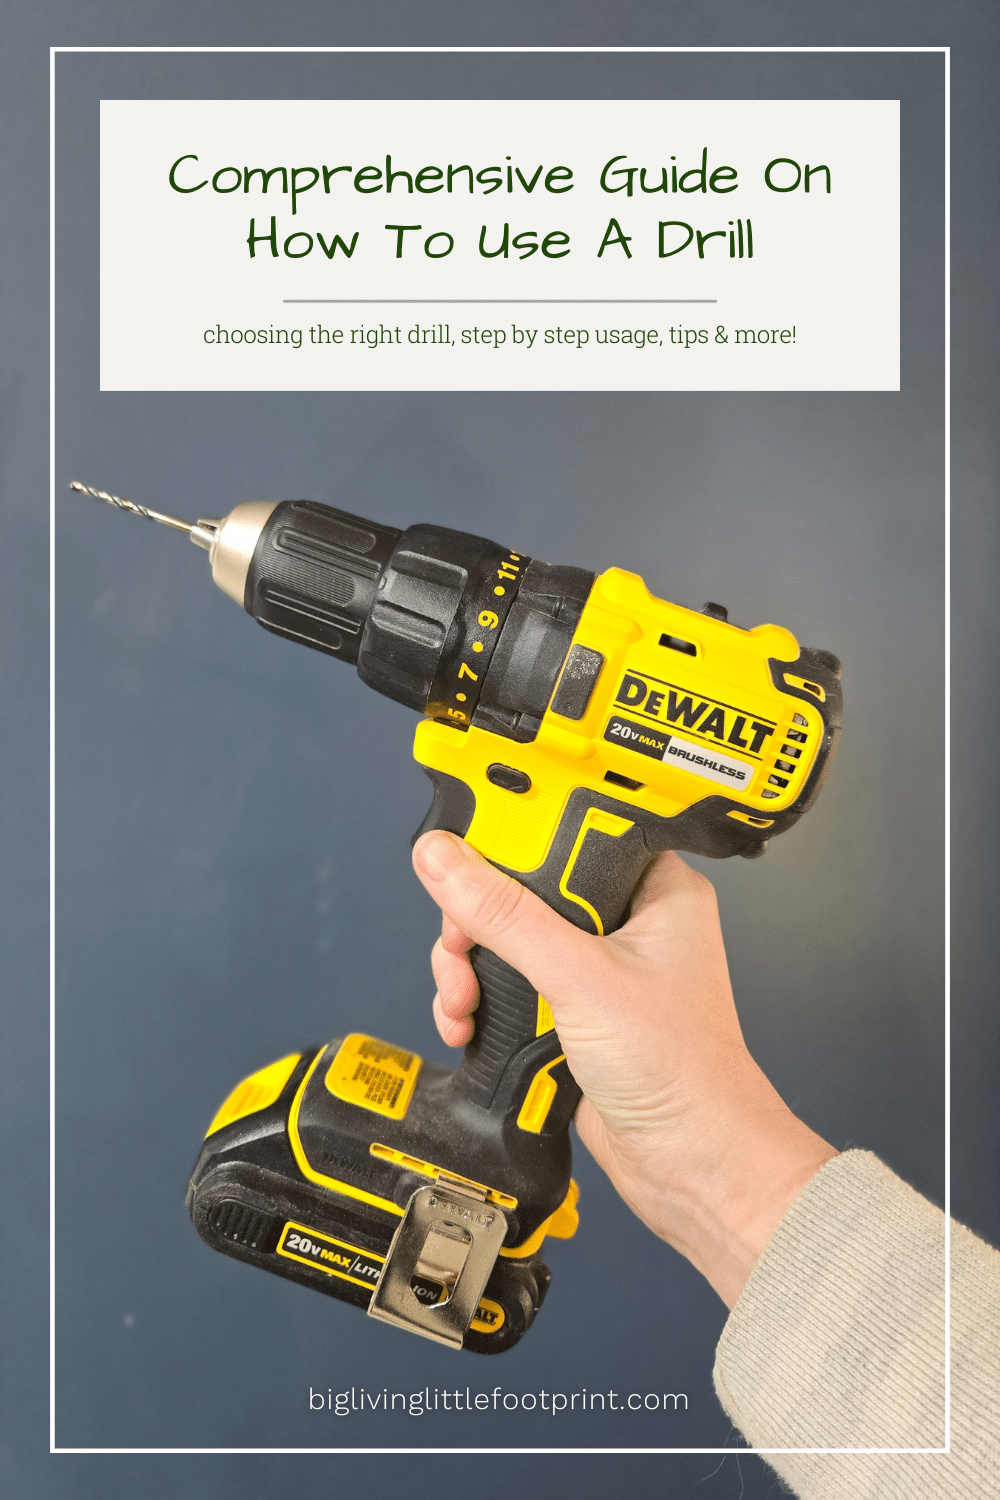
Source: biglivinglittlefootprint.com
Chuck
The chuck grips the drill bit or screwdriver bit. Many modern drills use a keyless chuck that you tighten by hand.
Trigger
The trigger starts the motor. On variable-speed drills, pressing it farther usually increases speed.
Forward and reverse switch
This switch changes the direction of rotation. Forward is generally used for drilling and driving screws; reverse helps remove screws.
Speed selector
A two-speed gearbox often offers a lower speed with more control and a higher speed for many ordinary drilling tasks.
Clutch adjustment ring
The clutch limits turning force during screwdriving. It can help prevent stripped screw heads and damaged materials.
Battery or power cord
A cordless drill uses a rechargeable battery, while a corded model draws power from an outlet. Follow the applicable charging or electrical safety instructions.
Choose the Right Drill for the Job
A standard drill driver works well for common household tasks, including drilling into wood and driving screws. An impact driver is designed mainly to drive fasteners and is not a direct substitute for a regular drill when you need clean, accurately sized holes.
A hammer drill adds a hammering action that can help drill into suitable masonry when paired with the correct bit. Ordinary drill mode alone may struggle with concrete or brick. Check the tool’s instructions and use equipment rated for the material.
Basic home repairs
A standard drill driver is often enough for furniture, cabinets, pilot holes, and many wood projects.
Brick or concrete
Use a suitable hammer drill or rotary hammer, a masonry bit, and the required dust controls and protective equipment.
Large or repeated holes
Check the tool’s rated capacity and consider a drill designed for the bit size and workload.
Gather the Tools and Materials You Need
Collect the right tools before you begin. A suitable bit, a stable work surface, and the correct safety gear can make a greater difference than using a more powerful drill.
For a simple project, you may need only a drill, a bit, a pencil, a tape measure, safety glasses, and a clamp. Wall projects may also require a stud finder, a suitable anchor, and a reliable method for checking for hidden services.
Source: rainonatinroof.com
Power drill and charged battery
Check that the battery is secure and has enough charge, or inspect a corded drill and its power cord before use.
Correct drill or driver bit
Choose a bit made for the material and sized for the hole or fastener. A wood bit, masonry bit, and metal bit are not interchangeable in every situation.
Safety glasses
Wear impact-rated eye protection to guard against flying chips, dust, and broken bit fragments.
Clamps or a vise
Hold the workpiece firmly so it cannot spin, slide, or lift when the bit makes contact.
Measuring tools
Use a tape measure, pencil, square, or depth stop as needed to mark the hole location and guide accurate work.
Check the Work Area Before Drilling
Clear clutter from the work area and make sure you have stable footing. Keep children and pets away from the active work zone, and ensure that loose clothing, hair, and jewelry cannot reach the rotating parts.
Before drilling into a wall, floor, or ceiling, assess the risk of hidden electrical wires, water pipes, gas lines, and other services. Use an appropriate detector where suitable, review building plans if available, and follow local requirements. A detector cannot guarantee that every hidden service will be found.
Inspect the surface
Look for cracks, loose material, existing fasteners, and signs of hidden services.
Secure loose material
Clamp small pieces to a stable bench. Never try to hold a small workpiece against a spinning bit with your fingers.
Protect against dust
Use suitable dust extraction and respiratory protection when the material and task require them. Follow special precautions for silica, lead paint, and other hazardous dusts.
Choose the Correct Drill Bit
The correct bit depends on what you are drilling and the size of the hole you need. Using the wrong bit can produce a rough hole, damage the surface, overheat the bit, or cause the drill to bind.
Read the markings on the bit and check its packaging when you are unsure. Diameter, material compatibility, and the manufacturer’s stated limits all matter. A bit that fits the chuck is not automatically suitable for the job.
Source: www.homedepot.com
Twist drill bits
Common general-purpose bits are used for many holes in metal and, when designed for it, other materials. Check the bit’s specific rating.
Brad-point bits
These bits are designed for wood and have a pointed tip that helps locate the hole and reduce wandering.
Spade bits
These flat bits make wider holes in wood. They can produce rougher openings and require firm control.
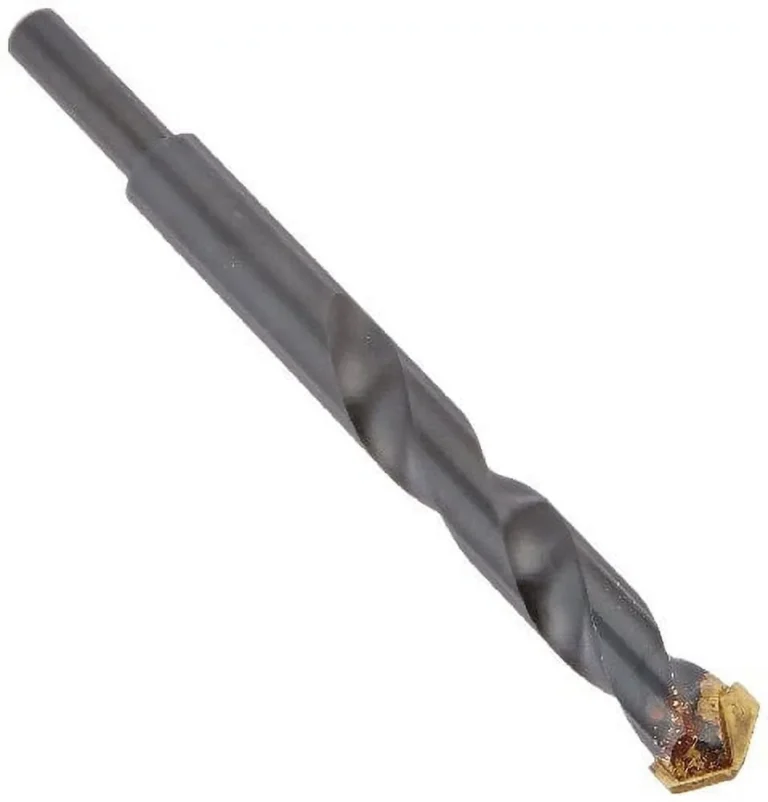
Masonry bits
These have cutting tips designed for brick, concrete, and similar materials. The drill must also be suitable for the task.
Screwdriver bits
These fit screw heads such as Phillips, slotted, Torx, and square-drive types. The bit must match the fastener to reduce slipping.
Countersink bits
These create a tapered recess around a hole so a compatible screw head can sit closer to or flush with the surface.
Match the Bit to the Material
For wood, use a wood-rated bit with the diameter required by the plan or fastener. For metal, use a bit rated for that metal and follow any required lubrication and speed guidance. For masonry, use a masonry bit and the correct drill mode.
When driving screws, choose the driver tip that fits the screw head closely. A loose fit can cause the bit to slip, damage the screw, or scratch the surface. Replace worn or damaged bits rather than forcing them to work.
Pilot holes
A pilot hole guides a screw and may reduce splitting in wood. Select its diameter based on the screw, wood type, and project instructions.
Hole diameter
Use a bit with the specified diameter. For anchors, follow the anchor maker’s instructions rather than guessing.
Bit condition
Check for bends, cracks, worn cutting edges, or damaged shanks before inserting a bit.
How to Insert and Tighten a Drill Bit
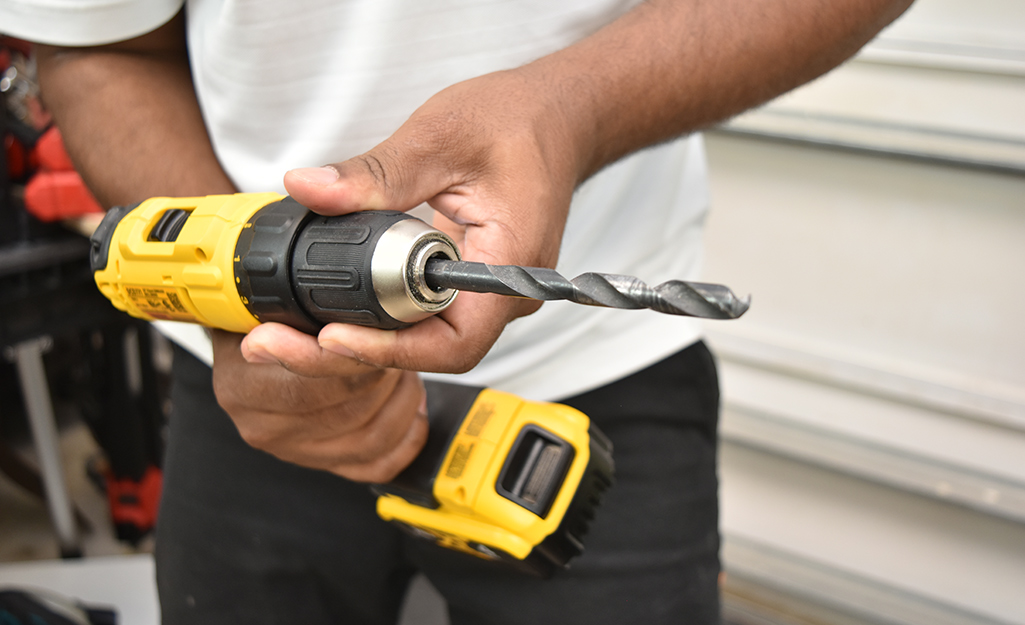
Always stop the drill before changing bits. Remove the battery or unplug the tool when the manufacturer’s instructions call for it, especially before adjustments or maintenance. This prevents an accidental trigger press from starting the motor.
A loose bit can wobble, slip, or fly out during use. Tightening the chuck correctly helps the bit stay centered and secure.
Source: ar.inspiredpencil.com
Follow These Steps to Install a Bit
First, set the direction switch to the center lock position if the drill has one. Remove the battery or disconnect the power when directed by the manual. Open the chuck enough to accept the bit without forcing it.
Step 1: Open the chuck
Turn the keyless chuck sleeve to loosen the jaws. For a keyed chuck, use the correct chuck key.
Step 2: Insert the bit
Place the bit shank between the chuck jaws and keep it reasonably centered. Avoid gripping the fluted cutting area when the smooth shank is available.
Step 3: Tighten the chuck
Tighten it according to the drill’s instructions. With a keyed chuck, secure the bit at the designated points as the manual directs.
Step 4: Check the fit
With the tool disconnected from power, confirm that the bit is held firmly and appears straight. Remove the chuck key before operating a keyed chuck.
How to Remove a Bit Safely
Stop the motor and isolate the power before loosening the chuck. Wait until the bit has cooled if it is hot, then open the jaws and remove the bit carefully. Store sharp bits in a case to protect both the cutting edges and your hands.
If the bit is stuck
Do not grip a hot bit with bare fingers or force the chuck with an unsuitable tool. Follow the manual’s release procedure and seek repair help if the chuck will not open.
Set the Speed, Direction, and Torque
Correct settings help you control the drill and protect the material. Start with a conservative setting when you are unsure, then adjust only within the tool and bit manufacturer’s guidance.
Many drills have a two-speed selector and an adjustable clutch. The speed selector controls the gearbox range, while the clutch limits turning force during screwdriving. These controls serve different purposes.
Source: storage.googleapis.com
Understand Drill Speed
Low gear usually provides slower rotation and greater mechanical advantage. It is useful for many screwdriving tasks and applications that need careful control. High gear provides faster rotation and is often used for smaller holes when the bit and material permit it.
There is no single speed that works for every material or bit. Large bits often need lower speeds than small bits, while metal drilling may require a different speed and lubricant from wood drilling. Follow the bit maker’s instructions.
Start slowly
Use light trigger pressure to establish the hole or engage the screw before increasing speed.
Avoid changing gears while running
Stop the motor and follow the manual’s instructions before moving the mechanical speed selector.
Select the Correct Direction
The forward setting is used for most drilling and screw installation. Reverse turns the bit or driver in the opposite direction, which is useful for removing screws and backing out a bit when the tool’s instructions allow it.
Stop the drill completely before switching direction. Do not use reverse as a way to force a jammed bit free while the tool is under load.
Forward
Use it for ordinary drilling and driving screws into the material.
Reverse
Use it to remove screws or carefully withdraw a bit when appropriate.
Center lock
On models with this position, it prevents the trigger from operating during storage or bit changes.
Adjust the Clutch for Screws
The clutch helps limit the force applied to a screw. A lower setting generally makes the clutch slip sooner, while a higher setting allows more turning force before it slips. The numbered settings do not represent a universal torque value across different drill models.
Begin with a low clutch setting on scrap material. Increase it gradually only if the screw stops before reaching the desired depth. For drilling holes, select the drill setting where the model provides one rather than using a low screwdriving clutch setting.
Soft wood
Use a cautious clutch setting and test it first to avoid sinking the screw too far.
Hard wood
A pilot hole and a suitable screw may reduce resistance and improve control.
Delicate surfaces
Use a low setting, gentle trigger pressure, and frequent checks of screw depth.
How to Use a Drill Step by Step
The safest way to learn is to practice on a stable piece of scrap material before starting your real project. The steps below cover a typical drilling task using a standard drill driver.
Read the manual for your exact model first. If the task involves structural framing, unknown wall contents, hazardous materials, or a bit size beyond the tool’s rating, pause and obtain suitable guidance.
Source: www.pinterest.com
Step 1: Mark the Hole Location
Measure the planned position and mark it with a pencil or another suitable marking tool. Check the distance from edges and nearby holes, since holes too close to an edge can split wood or weaken a part.
For a project that needs precision, use a square or guide to help keep the hole aligned. Before drilling into an existing structure, check for hidden services and make sure the planned depth is appropriate.
Helpful tip
For some wood bits, a small center mark can help the tip stay in place as you start.
Step 2: Secure the Workpiece
Clamp the material to a stable bench or use a suitable fixture. A loose board can spin or jump when the bit catches, which can injure your hand or damage the work surface.
Keep the intended drilling area clear of the clamp jaws and anything beneath the material. Confirm that the bit will not strike the bench or another object when it passes through.
Never rely on hand pressure alone
Do not hold a small object in one hand while drilling it with the other. Secure it before starting.
Step 3: Hold the Drill Correctly
Grip the handle firmly and keep your wrist in a natural, straight position. Place your other hand on an approved auxiliary handle if the tool has one and the task requires it. Keep both hands away from the rotating chuck and bit.
Position the bit at the marked point before pulling the trigger. Aim to keep the drill aligned with the intended hole. Leaning the tool to one side can make the hole crooked and place extra stress on the bit.
Maintain a stable stance
Stand with your feet balanced and avoid reaching so far that you lose control.
Step 4: Start the Hole Slowly
Set the drill to forward and choose a suitable speed. Apply light trigger pressure to start the bit without making it jump across the surface. Once the tip has established a small opening, increase speed within the bit’s recommended range if needed.
Keep steady, moderate pressure. The cutting edge should do the work. Pushing too hard can overheat the bit, stall the motor, damage the material, or make the tool harder to control.
If the bit wanders
Stop and reposition it rather than trying to steer the rotating bit sideways. For precise work, use a suitable center mark, guide, or drill press.
Step 5: Control the Drilling Depth
If the hole must stop at a specific depth, mark the bit with a suitable depth reference or use a compatible depth stop. Keep the limits of the tool and accessory in mind, especially when drilling near the back of a board or into a wall.
When drilling through wood, reduce pressure as the bit approaches the far side. A backing board can help reduce splintering when the project allows one. Make sure the backing board is also secured and that the bit cannot strike the workbench.
Watch for breakthrough
As the bit reaches the far side of the material, ease off the pressure and maintain control of the tool.
Step 6: Stop and Inspect the Hole
Release the trigger and wait until the bit has stopped completely before moving the drill. Inspect the hole for the required diameter, depth, and position. Remove loose debris with a safe method after the rotating parts have stopped.
If the hole is rough or off-center, identify the cause before trying again. A worn bit, poor workpiece support, incorrect speed, or an unstable starting point may be responsible.
Signs of success
The hole is close to the marked position, has the intended diameter and depth, and shows no unexpected cracking or damage.
How to Use a Drill to Drive Screws
A drill driver can install many common screws faster than a hand screwdriver. The secret is to use a matching driver bit, suitable clutch setting, and steady control rather than relying on maximum speed or force.
For delicate work, practice on scrap material first. This helps you learn how the clutch behaves and how much trigger pressure is needed to seat a screw without damaging the surface.
Source: artofit.org
Step 1: Match the Driver Bit to the Screw
Choose a bit that fits the screw head closely. A poorly fitting tip can slip out, damage the screw, or leave scratches around the fastener. Replace worn bits when they no longer grip the screw properly.
Check the screw type
Match the bit to the head design, such as Phillips, slotted, Torx, or square drive.
Step 2: Set the Clutch and Direction
Set the direction switch to forward and choose a low clutch setting to begin. If the screw requires too much force and stops before reaching the intended depth, test a slightly higher setting. Do not increase torque blindly if the screw is binding.
Use a pilot hole when appropriate
A correctly sized pilot hole can make screw installation easier and help reduce splitting in wood.
Step 3: Start the Screw Slowly
Place the screw tip at the intended location and hold the drill in line with the fastener. Apply light trigger pressure while maintaining enough downward pressure to keep the driver bit seated in the screw head.
As the screw enters the material, increase speed only as needed. Stop when the screw reaches the intended depth. For many finish tasks, the head should sit as specified by the project rather than being driven far below the surface.
Avoid overdriving
Stop if the screw head begins to damage the material, the screw turns without tightening, or the driver bit slips repeatedly.
Step 4: Remove a Screw with Reverse
Release the trigger and wait for the drill to stop. Set the direction switch to reverse, seat the driver bit firmly in the screw head, and squeeze the trigger slowly. Keep the drill aligned as the screw backs out.
If the screw does not move, stop and inspect the head and bit. A stripped head, corrosion, the wrong driver bit, or excessive binding may be the cause. Use an appropriate screw-removal method rather than forcing the drill until the bit slips.
Protect the surface
Support the surrounding material and control the screw as it comes free so it does not fall or scratch nearby surfaces.
How to Drill Different Materials
The material changes which bit, speed, pressure, and safety steps you need. A method that works well for a soft pine board may be unsuitable for steel, tile, or concrete.
Always check the material, bit rating, and tool instructions before starting. If you cannot identify the material or the risks involved, do not assume that an ordinary drill bit will work.
Source: House Beautiful
Drilling into Wood
Wood is a common material for beginner projects. Use a wood-rated bit, secure the board, and begin slowly so the bit does not wander. A pilot hole can help when installing screws, particularly near an edge or in harder wood.
To reduce splintering on the exit side, use a backing board when practical and safe. Ease off the pressure as the bit approaches the far side and make sure there is no hidden obstruction behind the board.
Common problem
If the wood burns or the bit produces excessive heat, stop and check the bit condition, speed, and cutting method.
Drilling into Metal
Use a drill bit designed for the type of metal and secure the workpiece in a vise or with suitable clamps. Metal can grab the bit suddenly, so keep your hands away from the cutting area and use a controlled speed.
Some metal drilling tasks require cutting fluid or lubricant. Follow the bit maker’s instructions for the material, speed, and lubrication. Never hold a small piece of metal by hand while drilling it.
Common problem
If the bit skates across the surface, stop and use an appropriate center mark or other method recommended for that metal.
Drilling into Brick or Concrete
Masonry usually requires a masonry-rated bit and a drill suited to the material. A hammer drill may help with suitable holes, while harder concrete or demanding work may call for a rotary hammer. Check the tool and bit ratings before proceeding.
Masonry drilling can create fine dust, including respirable crystalline silica. Use suitable dust extraction and protective measures for the material and setting. In occupied homes, avoid creating dust that can spread into living areas. Stop if you suspect asbestos-containing material or another hazardous substance.
Common problem
If progress stops, do not push harder without checking the bit, drill mode, material, and tool capacity.
Drilling into Tile
Tile can crack if the wrong bit, speed, or pressure is used. Use a bit specifically rated for the tile type, follow its instructions, and begin with careful control. Do not use hammer mode on tile unless the tool and procedure specifically permit it for the stage of work being done.
Check what lies behind the tile before drilling, especially in bathrooms and kitchens where water pipes and electrical services may be present. If the tile is part of a waterproofed shower or wet area, consider whether drilling could compromise the waterproofing system.
Common problem
If the bit slips, stop and reassess the bit, guide method, and surface. Do not keep pressing a spinning bit against the tile.
Drilling into Drywall
Drywall is relatively soft, but mounting objects safely requires more than making a hole. Choose the correct fastener for the load and the wall construction. For heavy objects, use a suitable structural fixing or stud-mounted attachment as required by the mounting system.
Before drilling, check for hidden wires and pipes. A wall detector can help, but it cannot guarantee that every service has been identified. Follow the fastener manufacturer’s hole size, depth, and installation directions.
Common problem
If an anchor spins or pulls out, stop loading it. Check the hole size, wall condition, anchor rating, and whether a different mounting method is needed.
Drill Speed and Bit Selection: A Practical Guide
Use the following table as a starting point for choosing a drill setup. It gives broad guidance rather than universal speed settings, because the correct range depends on the exact bit, drill, material, hole diameter, and manufacturer instructions.
When the bit packaging gives a speed range, use that information instead of relying on a general rule. Start in a controlled way and stop if the bit binds, overheats, or produces an unexpected result.
Source: www.homedepot.com
Wood and wood screws
Use a wood-rated bit for holes and a matching driver bit for screws. Begin at a controlled speed and use the clutch for screwdriving.
Metal
Use a metal-rated bit and follow the specified speed and lubrication guidance. Larger bits often require slower speeds.
Masonry
Use a masonry bit and a drill mode suitable for the material. Apply dust controls and avoid forcing the tool.
Tile
Use a tile-rated bit and a method suitable for the tile. Follow the bit manufacturer’s instructions for speed, cooling, and pressure.
How to Choose Between Low and High Gear
Low gear is often useful when driving screws, working with larger bits, or starting a task that needs more control. High gear is often suitable for smaller bits and faster drilling when the accessory and material allow it.
If the drill stalls repeatedly, do not assume that more trigger pressure is the answer. The bit may be too large for the tool, the material may need a different bit, the battery may be low, or the setup may be binding.
For better control
Use gentle trigger pressure, secure the workpiece, and choose a speed range that matches the bit and material.
Common Drill Problems and How to Fix Them
When a drill does not behave as expected, stop first and inspect the setup. Continuing to squeeze the trigger can damage the material, overheat the tool, or make a stuck bit more dangerous.
Disconnect the battery or power before inspecting the chuck, bit, or moving parts. Never touch a hot bit or attempt to clear debris while the drill is running.
Source: biglivinglittlefootprint.com
The Drill Bit Keeps Slipping
A bit that slips in the chuck may not be secured correctly, may have a damaged shank, or may exceed the chuck’s capacity. Stop the drill, isolate the power, and check that the bit is suitable and properly tightened.
What to do
Reinstall the bit according to the manual. If the chuck jaws are damaged or cannot grip the bit, have the tool inspected.
The Drill Will Not Make a Hole
The bit may be designed for a different material, the speed may be unsuitable, or the drill may lack the capacity for the task. A blunt bit or low battery can also reduce performance.
Check the bit’s rating, inspect its cutting edges, confirm the selected mode, and review the tool’s limits. For masonry, verify that both the bit and drill are suitable for the specific material.
What to do
Correct the bit or setting before trying again. Do not force the tool through a material it is not designed to drill.
The Screw Head Is Stripped
A stripped screw head often results from a mismatched or worn driver bit, poor alignment, excessive speed, or too much force. Stop as soon as the bit begins to slip repeatedly.
Try a correctly sized, undamaged bit if the screw head still has enough shape to grip. If the head is badly damaged, use a suitable screw-extraction method and protect the surrounding surface.
Prevention
Keep the drill aligned with the screw, start slowly, and use a suitable clutch setting.
The Drill Gets Hot or Smells Burnt
Heat can build up when a bit is dull, the speed is unsuitable, the tool is overloaded, or the drill is used continuously beyond its intended duty. Stop immediately if you notice smoke, a burning smell, unusual noise, or signs of electrical damage.
Let the tool cool according to its manual and inspect the bit and work setup. Do not continue if the battery, charger, cord, or motor shows signs of damage. Contact the manufacturer or a qualified repair service if the cause is unclear.
Important
Do not cool a hot drill or battery by immersing it in water or using an unapproved cooling method.
The Hole Is Crooked or Too Large
A crooked hole can result from a tilted drill, a bit that wandered at the start, an unstable workpiece, or a bent bit. An oversized hole may result from bit wobble, movement, or using the wrong diameter.
Check that the bit is straight, the chuck is secure, and the workpiece cannot move. For repeated precision holes, consider a drill guide or drill press when the job and material permit it.
What to do
Correct the cause before making another hole. If the existing hole affects a structural connection or safety-critical fixing, get suitable professional guidance.
Power Drill Safety Rules Every Beginner Should Know
A drill is useful, but its rotating parts and cutting accessories can cause serious injuries when handled carelessly. Eye protection, a secure workpiece, and a clear work area should be part of every drilling task.
Read the tool manual and follow the safety information for the exact model and accessory. The general rules below are a starting point, not a replacement for instructions specific to the task.
Source: ar.inspiredpencil.com
Wear eye protection
Use suitable safety glasses or goggles that protect against flying debris. Add hearing and respiratory protection when the job requires it.
Secure the material
Use clamps or a suitable fixture. Never drill into a loose object held only by hand.
Keep hands clear
Keep fingers, clothing, hair, and jewelry away from the chuck and rotating bit.
Avoid unsafe body positions
Maintain stable footing and do not overreach, particularly when using a ladder or working overhead.
Disconnect power for adjustments
Remove the battery or unplug the drill as directed before changing bits, clearing jams, or performing maintenance.
Inspect the tool
Do not use a drill with a cracked housing, damaged cord, faulty switch, loose chuck, or damaged battery.
Manage dust
Use suitable dust collection and protective measures for wood, masonry, and other materials. Do not disturb suspected asbestos-containing material.
Watch for hidden services
Check walls, floors, and ceilings for wires, pipes, and other hazards before drilling. Stop if the location or risk is uncertain.
When You Should Not Drill
Do not drill into an area if you cannot reasonably assess the risk of striking a live wire, gas line, water pipe, or other hidden service. Do not proceed when the material may contain asbestos or hazardous coatings and you lack the required assessment and controls.
Avoid using a handheld drill for work that needs a level of precision, power, or stability beyond its design. If a project involves structural changes, critical load-bearing fixings, or uncertain building materials, seek qualified help before making a hole.
Stop if the tool binds
Release the trigger and wait for the tool to stop. Isolate the power before inspecting the bit or workpiece.
Stop if you see sparks or smoke
Turn the tool off and disconnect it safely if possible. Do not reuse damaged equipment until it has been inspected.
Stop if the surface is unknown
Identify the material and possible hazards before choosing a bit or drilling method.
Maintain Your Drill for Reliable Performance
Basic maintenance helps a drill work as intended and makes problems easier to spot. Clean the tool after use, store bits properly, and follow the manufacturer’s instructions for the battery, charger, chuck, and moving parts.
Do not open the motor, battery pack, or charger unless the manufacturer specifically provides a safe service procedure for the user. Internal electrical parts and rechargeable battery cells can present serious hazards.
Source: storage.googleapis.com
Clean and Store the Tool
After the drill stops, disconnect the power and let hot parts cool. Remove dust from the exterior and ventilation openings using a method approved by the manufacturer. Avoid pushing debris into the motor or wetting electrical parts.
Store the drill in a dry place away from excessive heat and moisture. Keep bits in a case and prevent the chuck from being damaged by loose tools or heavy objects.
Inspect the chuck
Check that the jaws open and close properly and that the bit can be held securely.
Inspect the bits
Replace damaged, bent, or excessively worn bits.
Check the battery
Look for cracks, swelling, leakage, or other damage. Do not charge or use a damaged battery.
Charge and Care for a Cordless Drill Battery
Use a charger approved for the battery system and follow the charging instructions. Keep the battery and charger away from moisture, excessive heat, and combustible materials as directed by the manufacturer.
Do not use a swollen, leaking, punctured, or unusually hot battery. Stop using it and follow the manufacturer’s guidance for safe handling and disposal. Never place a damaged lithium-ion battery in ordinary household trash where prohibited by local rules.
Use the matching charger
Do not assume that chargers with similar plugs or appearances are electrically compatible.
Follow storage guidance
Use the manufacturer’s recommended storage conditions and charge level for the battery type.
A Simple Practice Exercise for New Drill Users
The easiest way to build skill is to practice a few basic actions on scrap wood before working on a visible surface. Use a stable board, a suitable wood bit, clamps, and safety glasses. Keep the board away from your body and make sure the bit cannot strike the bench beneath it.
This exercise lets you learn how the trigger responds, how to keep the drill straight, and how the tool behaves when a bit begins to cut. Do not practice on a wall or an unknown material simply because it is nearby.
Source: www.pinterest.com
Practice Drilling a Straight Hole
Mark a point on the board and secure the board with clamps. Fit a suitable small wood bit, check that the chuck is tight, and set the drill to forward with a suitable speed. Start slowly while keeping the drill aligned with the intended hole.
Stop the drill and inspect the result. Compare the hole with your pencil mark and check whether the bit entered cleanly. If the hole is crooked, practice your stance and alignment before moving to a larger bit.
Goal
Learn to start at the marked point, maintain steady pressure, and stop without allowing the bit to wander.
Practice Driving a Screw
Use a suitable screw and driver bit on a separate piece of scrap wood. Set the clutch low, hold the drill in line with the screw, and begin with gentle trigger pressure. Stop when the screw reaches the intended depth.
If the clutch slips too early, stop and adjust the setting slightly. If the screw enters too far, lower the setting and reduce trigger pressure. These small practice steps help you develop control before assembling furniture or fitting hardware.
Goal
Install a screw without stripping its head, splitting the wood, or driving the head too far into the surface.
Research Notes and Useful Next Questions
This guide uses standard power-tool operating principles and general safety practices to explain common drilling tasks. It does not claim hands-on testing of a particular drill model, and it does not assign universal speed or torque numbers where the correct values depend on the tool, bit, and material.
For model-specific controls, bit capacity, speed ranges, battery care, and maintenance, the manufacturer’s manual is the primary source. For work involving hidden electrical services, structural attachments, or hazardous dust, the relevant building information and safety guidance should determine the next step.
Source: dunnlumber.com
Reader Question Gap Map
The following map identifies useful next questions inferred from the main task. They are editorial judgments about what a beginner may need next, not verified search-volume findings. No live competitor pages, People Also Ask results, or search-demand data are claimed as inspected in this article.
Which drill bit should I use?
Reader stage: preparation. Basis: inferred next need. Coverage: answered in the bit-selection section. Benefit: reduces the risk of poor holes and damaged accessories. Priority: high.
How do I set drill speed and torque?
Reader stage: setup. Basis: inferred next need. Coverage: answered with general guidance, but exact settings depend on the model and accessory. Benefit: improves control and reduces damage. Priority: high.
How do I drill into a wall without hitting wires or pipes?
Reader stage: planning. Basis: inferred next need. Coverage: safety limits and checks are explained, but no detector can guarantee that every hidden service is found. Benefit: helps readers recognize when to stop and seek help. Priority: high.
Why does my drill bit keep slipping?
Reader stage: troubleshooting. Basis: inferred next need. Coverage: answered in the troubleshooting section. Benefit: gives the reader a safe first check. Priority: medium.
How do I maintain a cordless drill battery?
Reader stage: after use. Basis: inferred next need. Coverage: general care is included, with model-specific instructions left to the manufacturer. Benefit: supports safe storage and charging. Priority: medium.
Frequently Asked Questions
Q
How do you use a drill for the first time?
Read the drill manual, wear safety glasses, and choose a bit suitable for the material. Secure a piece of scrap wood, install the bit with the power disconnected, and check that the chuck is tight. Select forward and a suitable speed, then squeeze the trigger gently while keeping the drill straight. Practice stopping and starting before moving to your actual project.
Q
Should I use high or low speed on a drill?
Use the speed range recommended for the bit and material. Low gear often gives better control for screwdriving and many larger-bit tasks, while high gear can suit smaller bits when faster rotation is appropriate. Bit size, material, and tool design all affect the correct setting, so do not treat one speed as right for every job.
Q
What is the difference between drill mode and the clutch setting?
Drill mode is intended for drilling and typically bypasses the clutch’s screwdriving limit. The clutch setting controls how much turning force is applied before the clutch slips. Use the drill mode for ordinary drilling when the tool provides it, and begin with a low clutch setting when driving screws.
Q
Can I use a regular drill on concrete?
A standard drill driver may struggle with concrete, especially as the hole size or material hardness increases. A suitable hammer drill or rotary hammer, together with a masonry-rated bit, may be needed. Check the tool’s rating and use appropriate dust controls and protective equipment. Do not force a regular drill to perform work beyond its design.
Q
How do I stop a drill bit from slipping?
Stop the drill and disconnect the power before checking the bit. Make sure the bit shank is suitable, the chuck jaws are clean and undamaged, and the chuck is tightened according to the manual. Replace a damaged bit or seek repair if the chuck cannot hold it securely.
Q
Can I use a drill to drive screws?
Yes. A drill driver can drive many common screws when fitted with a matching screwdriver bit. Select forward, start with a low clutch setting, and use gentle trigger pressure. Keep the drill aligned with the screw and stop at the intended depth. A dedicated impact driver may be more suitable for some demanding fastening tasks, but it requires compatible accessories and its own operating precautions.
Q
How do I drill into a wall safely?
First, identify the wall material and the intended fixing. Check for hidden electrical wires, pipes, and other services using suitable methods, while recognizing that detectors cannot guarantee a clear drilling path. Choose the correct bit, anchor, and depth. If you cannot establish that the area is safe to drill, stop and consult a qualified professional.
✦ Wrapping Up
Conclusion
Learning how to use a drill starts with a few simple habits: choose the right bit, secure the work, check the settings, and control the trigger. These steps help you make cleaner holes and install screws with less risk of damaging the material or tool.
As you gain skill, learn how different materials respond to drilling and how your drill’s speed, direction, and clutch settings affect the result. Do not guess when the task involves hidden services, hazardous dust, structural fixings, or a tool operating beyond its rated limits.
A short practice session on scrap material is a sensible first step. Once you can start a hole cleanly, hold the drill straight, and stop at the right depth, you will be better prepared for common home projects.
💡 Key Takeaway
Before your next DIY project, read your drill manual, choose the correct bit, put on safety glasses, clamp the workpiece, check for hidden hazards, and practice on scrap material before drilling the final surface.
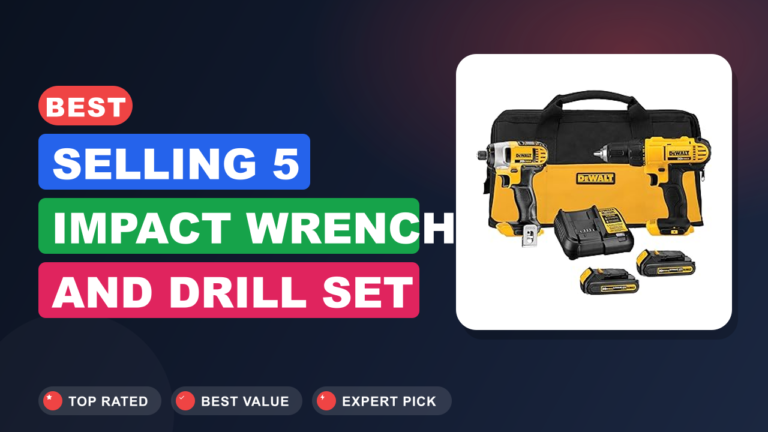
Two cheap, mismatched tools can slow down even the simplest weekend job. Finding the right impact wrench and drill set starts with checking the chuck sizes,…
You’ve got a bit in your hand and you’re not sure what it’s for. That’s the exact question behind how can you tell a masonry drill bit, and the answer comes…