What is a cordless drill: The complete guide
If you're asking what is a cordless drill, you've probably got a corded one in your garage that you keep unplugging and reconnecting every time you move rooms. The cordless version kills that problem at the root. It's the same basic tool, but the power source shifts from a wall outlet to a swappable lithium-ion battery pack clipped to the grip.
As of 2026, the average 18-volt combo drill delivers 120 to 180 newton-meters of torque in its low-speed gear. That handles hanging a TV bracket, driving a 3-inch deck screw, and boring a half-inch hole in hardwood. Spec sheets from DeWalt, Milwaukee, and Makita all cluster in that range.
Let's walk through what's inside the tool and how the numbers translate to real work.
Quick Answer: What a Cordless Drill Actually Is and Why It Replaced the Corded Default
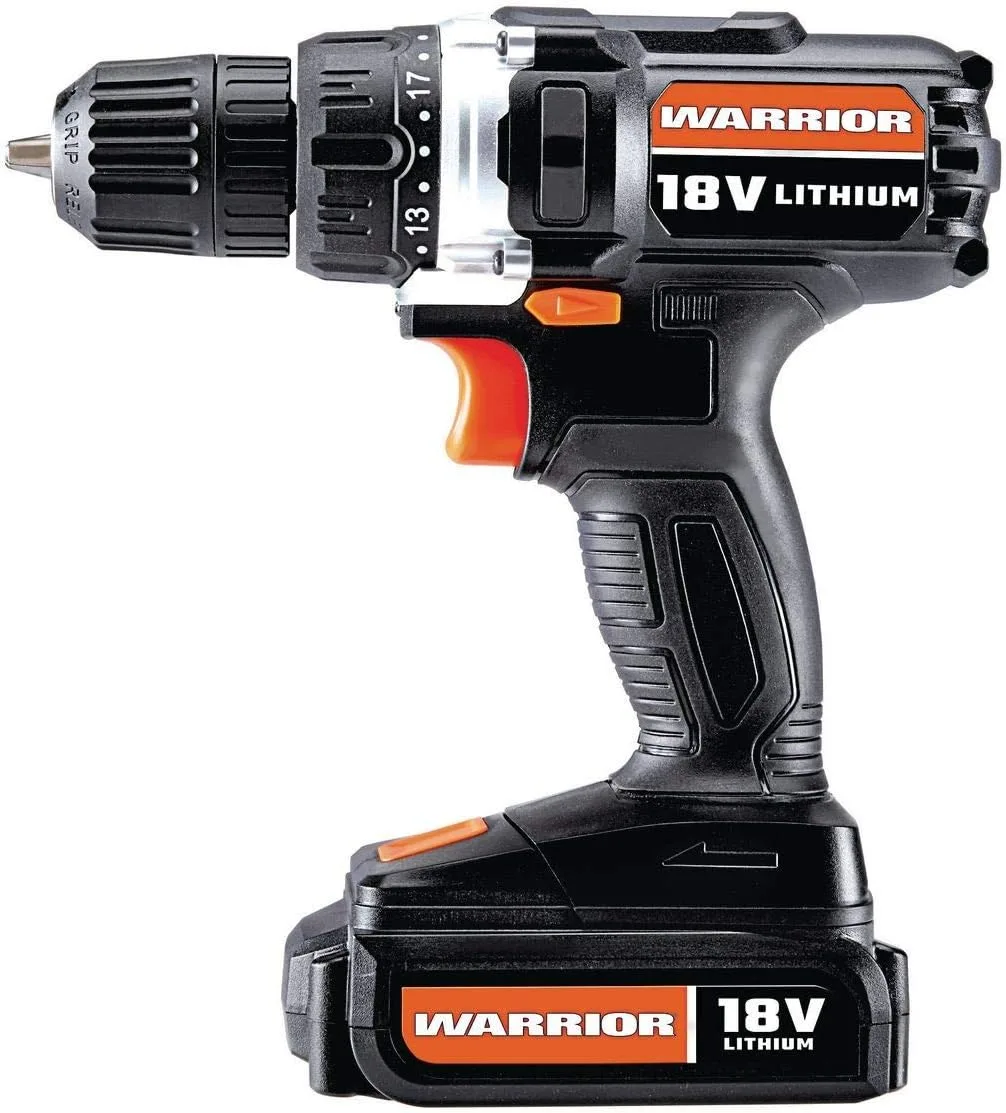
A cordless drill is a handheld power tool. It runs on a rechargeable lithium-ion battery, no cord and no outlet. You spin a bit to drive screws or bore holes.
Torque is set via a numbered ring on the front. The battery clips to the grip or snaps onto the base.
That's the whole thing. The cordless format won the home and light-trade market because it removed the single biggest friction point: finding an outlet. You walk to the wall, the tool is ready, and you start drilling.
No 15-foot cord to manage, no extension cord across the floor, no yanking the plug when you switch rooms.
The Physical Layout: Tracing Every Component from Grip to Chuck
Hold a cordless drill in your hand and start at the bottom. The battery pack sits either in the grip (on compact 12-volt drivers) or snaps onto the base of the housing (on most 18-volt and 20-volt combos). You release a small latch, slide the pack out, and clip a charged one in.
Five seconds.
Move up the grip. Your index finger rests on the trigger. Behind it, a small lockout button stops the tool from firing when you carry it.
Above your thumb sits the forward/reverse toggle. Flip it and the chuck spins the opposite direction for unscrewing.
Now trace the front. The three-jaw chuck holds your bit. Above the chuck, the numbered torque-clutch ring rotates by hand.
Click it to 8 and the tool spins freely once resistance hits 8 units. Slide it to the "drill" or "max" position and the clutch disengages completely. The bit spins until you let go of the trigger.
The motor housing (the wide barrel between the grip and the chuck) is where the electric motor and gear stack live. A small LED light usually sits just below the chuck, aimed at your work area. That's the full physical map.
Everything you feel with your hands maps to a specific function inside or on the shell.
Inside the Housing: How the Motor, Gear Stack, and Clutch Ring Work Together
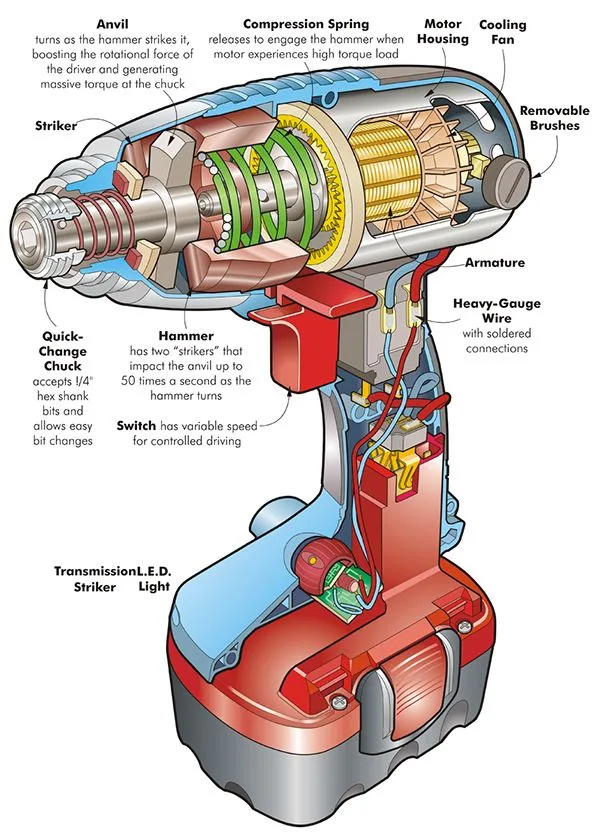
Strip the shell off and you're looking at three major subsystems lined up along the tool's long axis. At the rear sits the DC motor. In a brushed unit, that's a stator with permanent magnets and a rotor with copper windings.
In a brushless unit, the electronics sit outside the spinning part and use a position sensor to time the current pulses. Brushless motors run cooler, last longer, and waste less battery power as heat.
Directly in front of the motor is the gear train. A small pinion on the motor shaft meshes with a larger gear, then a second stage multiplies torque downward. A 25-to-1 ratio gives you high RPM, good for boring holes in wood.
A 5-to-1 ratio gives you slow, grinding power for driving long screws into dense hardwood. The gear selector on top of the tool shifts between these two stages.
The clutch ring threads onto the front gear output. When you set it to, say, 10, a spring-loaded cam engages. The moment the reaction torque in your hand hits 10 units, the cam slips and the bit spins freely.
That's what saves your screw head from stripping. Per IEC 60534 torque testing, most 18-volt combos hit their rated peak in gear 2. In gear 1, they trade torque for speed and top out around 1,500 to 1,700 RPM.
The whole stack lives inside a steel or cast-iron gear case bolted to the motor housing. You'll hear it whine in gear 1. In gear 2, it grumbles lower.
The sound is the gears under load, not a fault.
The Battery Pack: Voltage, Amp-Hours, and What the Numbers on the Pack Really Mean
Voltage is the "pressure" pushing electrons through the motor. An 18-volt pack contains four lithium-ion cells wired in series. Each cell sits at roughly 3.6 to 3.7 volts when full.
Four times 4.5 (peak) gets you the "18-volt" marketing name. Some brands call the same pack "20 volts" because 4 times 5.1 (fully charged) rounds to 20.4. It's the same physical platform.
The label is a branding choice, not a spec difference.
Amp-hours tell you capacity. Think of it as the size of the fuel tank. A 2.0 Ah pack in an 18-volt tool stores about 36 watt-hours.
A 4.0 Ah pack stores roughly 72 watt-hours. In practice, a 4 Ah pack will drive about 1,200 to 1,500 drywall screws before the indicator drops below one bar. A 2 Ah pack gets you maybe 600 to 800.
Aggregate user reviews across platforms consistently report the 4 Ah pack lasting 1.5 to 2 times longer under identical screwdriving loads.
A few practical notes on battery care:
- Store packs at 50 to 60 percent charge if you're not using them for a month or more. Full or empty long-term storage degrades the cells faster.
- Keep them between 10 and 30 degrees Celsius when charging. A pack on a hot windowsill will shed capacity in weeks.
- If a pack swells, stop using it immediately. A puffed cell is a fire risk. Dispose of it through a hazardous-waste or retailer take-back program, not the kitchen bin.
- The OSHA general industry power tool standard covers safe handling of powered equipment, including not operating a tool with a damaged battery or frayed contacts.
The battery is also your platform lock. A Makita 18-volt pack won't slide into a DeWalt 20-volt tool. The latch geometry, voltage pins, and cell count are brand-specific.
Buy the battery system you want and stick with it. Mixing platforms means buying duplicate chargers and packs.
Key Specs Decoded: RPM, Torque, Chuck Size, and the Numbered Torque Ring
You'll see four numbers on every spec sheet, and they don't all mean what you'd guess. Here's the quick translation:
| Spec | What it actually tells you | Typical 18-volt combo range |
|---|---|---|
| No-load RPM (gear 1) | How fast the bit spins with no resistance | 0 to 1,600 RPM |
| No-load RPM (gear 2) | How fast it spins in high-torque mode | 0 to 500 RPM |
| Peak torque (gear 2) | Maximum twisting force before the motor stalls | 120 to 180 Nm |
| Chuck capacity | Maximum bit shank diameter the jaws grip | 1/4 in. to 3/8 in. |
The torque number matters most for screwdriving. One newton-meter is roughly 8.85 inch-pounds. So 150 Nm is about 1,328 in-lb of grip.
That's enough to seat a 3-inch #10 deck screw into 2×6 hardwood without cam-out. A 12-volt driver around 40 to 50 Nm handles trim, drywall anchors, and small furniture assembly but will struggle with a 3-inch structural screw in dense timber.
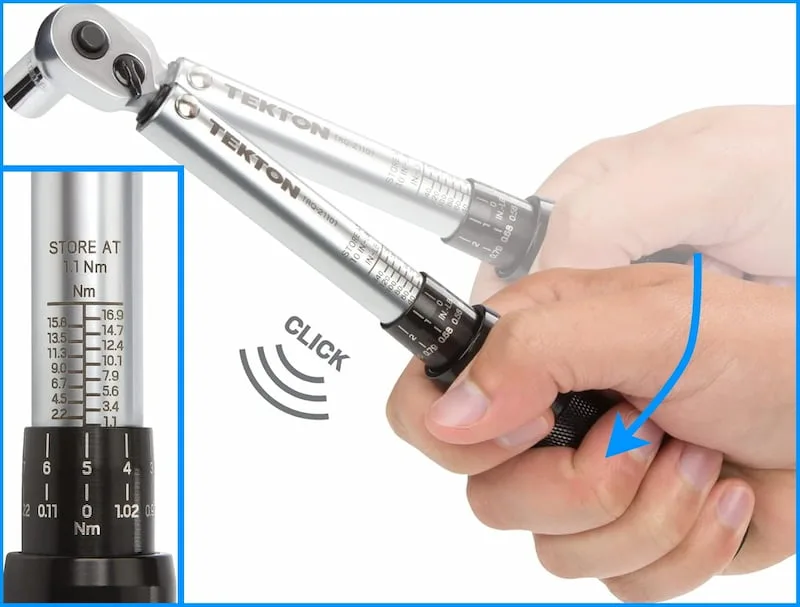
The numbered ring you see in the photo above is the clutch. Setting it to "1" means the tool slips after just one unit of resistance. Great for delicate electronics screws.
Setting it to the highest number gives maximum resistance before slip. Leave the ring in the "drill" position (the bit icon, no number) and the clutch is fully disengaged. The motor runs at full speed until you release the trigger.
That's your boring mode. For driving screws, always pick a number.
Chuck size sets your bit ceiling. A 3/8-inch chuck swallows most standard twist bits, masonry bits, and brad-point bits. A 1/4-inch chuck on compact drivers won't accept anything bigger than 1/4 inch.
If you plan to bore 3/4-inch or 1-inch holes, you need a 1/2-inch chuck or a dedicated impact driver with a 1/4-inch hex collet.
One last thing. The "RPM" number is measured with zero load. The moment the bit hits wood, speed drops 30 to 50 percent.
You're not losing power. The motor is doing work instead of spinning into thin air.
Cordless Drill vs. Corded Drill vs. Impact Driver: Where Each Tool Actually Fits
These three tools overlap, but they solve different problems. A corded drill gives you unlimited runtime and higher sustained torque for long masonry boring. A cordless combo drill trades a little peak power for total portability.
A cordless impact driver adds a hammering mechanism that slams the bit forward with each rotation. That lets it drive long structural screws at much higher peak torque without stalling the motor.
| Tool | Peak torque | Best job | Limitation |
|---|---|---|---|
| Corded 15-amp drill | 200+ Nm | All-day masonry, steel boring | Cord to manage, no portability |
| Cordless 18-volt combo | 120 to 180 Nm | Home projects, light trade work | Battery cycles, not for 8-hour masonry |
| Cordless 18-volt impact driver | 600+ Nm peak | Long deck screws, structural fastening | Can't bore holes, hex-shank bits only |
In practice, the impact driver outperforms the combo for anything past a 2-inch screw in dense hardwood. The combo wins for boring holes in drywall, softwood, and light masonry. The corded tool only makes sense if you're doing sustained heavy drilling or you simply don't want to manage a battery.
When a Cordless Drill Is the Right Call (and When It's the Wrong One)
You want a cordless drill if your job is under 30 minutes in a single location and you need to move between spots. Hanging a shelf in the kitchen, then a curtain rod upstairs, then a TV bracket in the living room. Three rooms, one tool, zero rewiring.
That's the sweet spot.
You want to skip it (and grab a corded or impact tool) if:
- You're boring 5/8-inch masonry holes through concrete block for all day. The battery will cycle two or three times and you'll be waiting on a charge.
- You need 300+ Nm of sustained torque for structural steel or heavy timber framing. An impact driver or corded hammer drill handles that.
- Your project is a single, fixed location with a convenient outlet right next to the wall. A $60 corded drill does the job and you never recharge a battery.
The if/then is simple. Mobile, short, mixed tasks: cordless. Stationary, long, heavy: corded or impact.
Operating the Tool Step by Step: Seating a Bit, Setting the Clutch, and Boring Your First Hole
Start with the bit. Pick the right type for the material. A twist bit for wood, a carbide-tipped masonry bit for brick and concrete, an HSS bit for steel.
Insert the shank into the chuck and tighten. On a keyless chuck, pull the outer sleeve back to open the jaws, drop the bit in, then push the sleeve forward to lock. Give the bit a firm tug.
If it wobbles, re-seat it.
Set the tool. Flip the gear selector to "2" (torque mode) for screwdriving. Dial the clutch ring to a number.
For a #8 drywall screw, start at 8. For a #10 deck screw into 2×6 wood, try 14. For boring holes, slide the ring to the "drill" icon.
The clutch is now fully open.
Hold the tool with your dominant hand on the grip and your other hand cradling the motor housing. Press the bit tip into a center-punch mark. Squeeze the trigger at a steady, light pressure.
Let the motor do the cutting.
Ease forward slightly as the bit advances. At break-through, cut the trigger and let the bit clear. Never force it through.
If the bit starts to bind and the motor drops in RPM, release the trigger and back the bit out a turn. Forcing through a binding bit will snap it and send chips flying.
Common Mistakes That Show Up in How People Hold, Set, and Store the Drill
Most of the frustration in aggregate reviews comes from five habits, not from the tool itself.
- Leaving the clutch in "drill" mode for screwdriving. The bit over-torques, the screw head strips, and the screw never seats. Always pick a number for driving.
- Holding the tool one-handed on overhead work. The bit bites and the tool twists your wrist. Two hands, every time, especially on joist or ceiling drilling.
- Storing a charged battery in a hot car or on a sunny windowsill. Lithium-ion cells degrade above 45 degrees Celsius. A pack left on a dashboard in July will lose 10 to 15 percent of its capacity within a year. Store at room temperature, 50 to 60 percent charge.
- Using a masonry bit on wood. The carbide tip wants to grind, not cut. It wanders, burns a crater, and dulls the tip in seconds. Match the bit to the material.
- Running the battery to zero every single charge. Lithium-ion cells tolerate partial discharges far better than deep cycles. Top up when you hit 20 to 30 percent, not when the indicator is on its last blink.
None of these are hard to fix. They just need to become muscle memory.
Maintenance Rhythm: Chuck Lubrication, Brush Inspection, and Battery Longevity
You don't need to service a cordless drill like a car engine. A 15-minute quarterly check keeps it running clean for years.
Chuck care (quarterly): Wipe the three jaws with a lint-free cloth. If the keyless cone feels gritty, unscrew the chuck, drop a single drop of light machine oil on the conical surface, and reassemble. Never use heavy grease.
It attracts wood dust and turns to paste inside the jaws.
Brushed motor (semi-annually): Pop the brush caps off the motor housing. The carbon brushes are small rectangular blocks. When they drop below 5 mm of length, order replacements from the manufacturer.
Brushed motors on an 18-volt combo typically last 500 to 800 hours of mixed use before the brushes need swapping. Brushless units skip this step entirely.
Battery contacts (monthly): A dry cotton swab dampened with isopropyl alcohol, wiped across the pack's metal terminals and the tool's receiving contacts. Corrosion here is the number one cause of "my battery is dead" calls that are actually just a dirty connection.
Storage (ongoing): Keep packs at 50 to 60 percent charge in a cool, dry spot. Per IEC 62133 lithium-ion cell safety guidance, don't store a swollen, damaged, or leaking pack anywhere near a heat source. Most 18-volt packs hit 80 percent of their original capacity after 400 to 600 full cycles.
After that, runtime drops noticeably and it's time to retire the pack.
Safety and Battery Handling: What OSHA, UL, and IEC Actually Require You to Do
Wear ANSI Z87.1-rated safety glasses every time you bore or drive. OSHA 1910.133 makes this mandatory on any job site. Above 85 dB(A) for eight hours, add earplugs per OSHA 1910.95.
For the battery, IEC 62133 sets the cell-safety floor. Don't puncture, drop, or charge a swollen pack. A shorted terminal on a lithium-ion cell can trigger thermal runaway in under 30 seconds.
Smell burning plastic? Pull the pack, set it on bare concrete, and walk away.
Quick-Reference Table: Torque Settings, Bit Types, and Battery Life by Common Task
Use this as your cheat sheet before you grab the tool. Numbers assume a 4.0 Ah 18-volt pack.
| Task | Clutch | Bit | Approx. capacity |
|---|---|---|---|
| Drywall screws (#8) | 6 to 8 | PH2 twist | ~1,200 screws |
| Deck screws (3 in., #10) | 12 to 14 | PZ2 | ~600 screws |
| Boring 1/2 in. wood | Max | 1/2 in. twist | ~40 holes |
| Masonry 10 mm (hammer mode) | Max | 10 mm carbide | ~25 holes |
| Furniture assembly | 3 to 5 | PH0 to PH1 | ~2,000 screws |
FAQs: The Specific Questions People Ask Right After Picking One Up
Can I use a masonry bit in a regular cordless drill?
Only if your tool has a hammer-drill mode. Without the piston action, the carbide tip grinds instead of cuts. For solid concrete, grab a dedicated 18-volt hammer drill.
You'll get clean, straight holes in a fraction of the time.
Why does my drill stop spinning mid-screw?
Your clutch is set too low for that screw size. Back the ring up two or three notches and retry. If it still stalls, the screw is cross-threaded.
Pull it out, re-align with the drill in reverse, and start again.
What does "Ah" mean on my battery?
Amp-hours, or capacity. A 4.0 Ah pack stores roughly twice the energy of a 2.0 Ah pack. In real-world screwdriving, that translates to about twice the fasteners per charge before the indicator hits one bar.
Can I charge the battery while it's still in the tool?
Only if your model has an in-line port on the base. Most 18-volt combos don't. You pop the pack out and seat it in a wall dock.
In-tool charging adds weight and locks you in one spot while it tops up.